Building a PC typically takes anywhere from 2 to 8 hours, depending on your experience, the complexity of the build, and how well you’ve prepared your components and workspace. For most beginners, setting aside a full day is wise, while seasoned builders can often finish in just a couple of hours. But before you dive in, there are a few important factors to consider that can impact your build time and overall experience.
Introduction
If you’re wondering how long it takes to build a PC, the answer isn’t one-size-fits-all. The process can be quick and satisfying for experienced enthusiasts, but for first-timers, it’s best to approach the task with patience and preparation. In my opinion, taking your time not only ensures a smoother build but also helps you avoid costly mistakes. While testing various builds over the years, I’ve found that planning and organization are just as important as technical know-how.
Preparation Checklist
- Verify all parts are compatible (CPU, motherboard, RAM, GPU, PSU, case, cooling)
- Gather necessary tools (Phillips screwdriver, zip ties, anti-static wrist strap)
- Prepare a clean, static-free workspace
- Download manuals and drivers in advance
- Plan cable management strategy
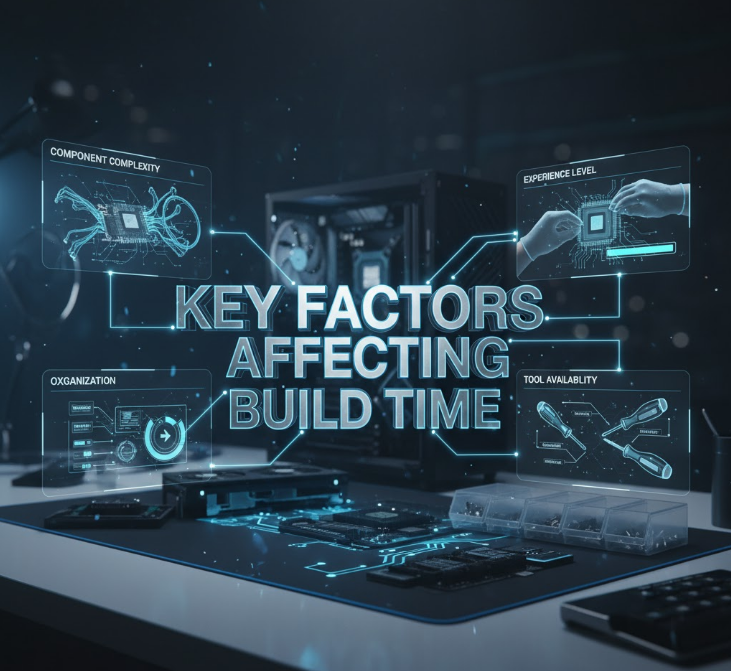
Key Factors Affecting Build Time

1. Experience Level
- Beginners: Expect to spend 6–8 hours, including time for double-checking connections, watching tutorials, and troubleshooting.
- Intermediate Builders: Usually finish in 4–6 hours, thanks to familiarity with the process.
- Experts: Can complete a standard build in 2–3 hours, especially if all parts are ready and compatible.
2. Complexity of the Build
- Basic Office PC: Fewer components, simpler cable management, and less need for advanced cooling.
- Gaming or Workstation PC: May involve multiple GPUs, custom cooling loops, and intricate cable management, which can add several hours.
3. Preparation and Organization
- Parts Procurement: Waiting for components to arrive can delay your build by days or weeks.
- Workspace Setup: A clean, well-lit area with all tools and manuals at hand speeds up the process.
4. Troubleshooting and Testing
- Initial Assembly: Sometimes, unexpected issues like faulty parts or compatibility problems can add hours or even days.
- Software Installation: Installing the operating system, drivers, and essential software typically takes 1–2 hours.
PC Components Explained
- CPU: The “brain” of the PC, installation tips
- GPU: Graphics processing, slot and power requirements
- Motherboard: Central hub, standoffs, I/O shield
- RAM: Memory, slot placement
- Storage: SSD/HDD, mounting and cabling
- PSU: Power supply, modular vs. non-modular
- Case: Form factor, airflow, cable management
- Cooling: Air vs. liquid, installation tips
Step-by-Step Breakdown
Here’s a detailed look at each stage of the PC building process, with average time estimates for both beginners and experts.
1. Unboxing and Prep Work
- Time: 10–15 minutes
- Tip: Check all boxes for screws, manuals, and accessories. Organize everything before starting.
2. Motherboard Setup
- Time: 10 minutes (Expert), 25 minutes (Beginner)
- Tip: Install CPU, RAM, and storage on the motherboard before placing it in the case.
3. CPU Installation
- Time: 1–2 minutes (Expert), 2–5 minutes (Beginner)
- Tip: Handle the CPU carefully and align it properly with the socket.
4. RAM and Storage Installation
- Time: 2–5 minutes each
- Tip: Refer to the motherboard manual for correct slot placement.
5. CPU Cooler Installation
- Time: 5–10 minutes (Expert), 10–15 minutes (Beginner)
- Tip: Apply thermal paste if needed and secure the cooler firmly.
6. Motherboard and PSU Installation
- Time: 10–15 minutes (Expert), 15–25 minutes (Beginner)
- Tip: Use the correct standoffs and screws for the motherboard.
7. GPU Installation
- Time: 2–5 minutes
- Tip: Ensure the GPU is seated properly and connected to the power supply.
8. Cable Management
- Time: 20–30 minutes (Expert), 30–40 minutes (Beginner)
- Tip: Take your time to route cables neatly for better airflow and aesthetics.
9. Operating System and Driver Installation
- Time: 30–40 minutes
- Tip: Use a USB drive for faster OS installation.
10. Benchmarks and Troubleshooting
- Time: 15–60 minutes
- Tip: Run stress tests and monitor temperatures to ensure stability.
Post-Build Setup
- BIOS setup: Initial boot, update BIOS if needed
- OS installation: Use USB, partition drives
- Driver updates: Download latest drivers for GPU, motherboard, etc.
- Initial benchmarks: Run stress tests, monitor temps
Time Estimates by Experience Level
| Experience Level | Assembly Time | Software Setup | Troubleshooting | Total Time |
|---|---|---|---|---|
| Beginner | 4–6 hours | 1–2 hours | 1–2 hours | 6–8 hours |
| Intermediate | 3–4 hours | 1 hour | 1 hour | 4–6 hours |
| Expert | 2–3 hours | 30–45 minutes | 30 minutes | 2.5–4 hours |
Common Mistakes and How to Avoid Them

- Rushing the Build: Take your time, especially with cable management and component installation.
- Skipping Compatibility Checks: Use tools like PC Part Picker to ensure all parts work together.
- Ignoring Manuals: Always read the motherboard and case manuals for specific instructions.
- Poor Workspace Organization: Keep screws, tools, and components organized to avoid losing parts.
- Not Testing Components: Run benchmarks and stress tests before regular use.
Beginner Mistakes to Avoid
- Forgetting standoffs
- Mixing up power cables
- Skipping thermal paste
- Not grounding yourself
- Rushing cable management
FAQs
How long does it take to build a PC for the first time?
Most first-time builders should set aside a full day (6–8 hours) to build, install software, and troubleshoot. In my experience, patience pays off and helps avoid mistakes.
Can I build a PC in under 2 hours?
Experienced builders with all parts ready and a simple build can finish in 2–3 hours. However, custom cooling or complex setups will take longer.
What’s the hardest part of building a PC?
Cable management and troubleshooting compatibility issues are often the most challenging. Watching tutorial videos and reading manuals can help.
Do I need special tools to build a PC?
A basic screwdriver is usually enough, but having zip ties, an anti-static wrist strap, and a clean workspace is recommended.
Should I buy a prebuilt PC instead?
If you’re short on time or nervous about building, a prebuilt PC is a good option. But building your own allows for customization and learning.
Comparison Table: Beginner vs. Expert Build Times
| Task | Beginner Time | Expert Time |
|---|---|---|
| Unboxing & Prep | 15 min | 10 min |
| Motherboard Setup | 25 min | 10 min |
| CPU Installation | 5 min | 2 min |
| RAM & Storage | 10 min | 5 min |
| Cooler Installation | 15 min | 10 min |
| Motherboard & PSU Install | 25 min | 15 min |
| GPU Installation | 5 min | 2 min |
| Cable Management | 40 min | 20 min |
| OS & Driver Installation | 40 min | 30 min |
| Benchmarks & Testing | 60 min | 15 min |
| Total | 240 min | 119 min |
Quick Answer:
- Beginner: 6-8 hours (full day recommended)
- Intermediate: 4-6 hours
- Expert: 2-3 hours
Step-by-Step Explanation: Building a PC

- Plan Your Build: Research compatible parts and order everything you need.
- Prepare Your Workspace: Clean your area and organize tools and components.
- Install CPU, RAM, and Storage on Motherboard: Follow the manual for correct placement.
- Mount Motherboard in Case: Use standoffs and screws as directed.
- Install Power Supply and Connect Cables: Route cables for neatness and airflow.
- Install GPU and Other Expansion Cards: Ensure proper seating and power connections.
- Install Cooling Solutions: Attach CPU cooler and case fans.
- Double-Check Connections: Verify all cables and components are secure.
- Power On and Install OS: Use a USB drive to install Windows or Linux.
- Install Drivers and Essential Software: Download from manufacturer websites.
- Run Benchmarks and Stress Tests: Ensure stability and performance.
Final Thoughts
Building a PC is a rewarding experience that goes far beyond simply assembling hardware. Whether you’re a first-time builder or a seasoned enthusiast, the process teaches valuable skills and offers a sense of accomplishment that’s hard to match. In my experience, powering on a machine you’ve built yourself is always a thrill—there’s nothing quite like seeing your hard work come to life.
Of course, challenges are part of the journey. You might run into compatibility issues, tricky cable management, or the occasional missing screw. But with patience, preparation, and a willingness to learn, these obstacles become opportunities to grow your knowledge and confidence. I always recommend taking your time, reading manuals, and reaching out to the PC building community if you need help.
Once your build is complete, the benefits are clear: you get a system tailored to your needs, free from unnecessary software, and ready for upgrades whenever you want. Plus, you’ll have the satisfaction of knowing every part and connection inside your PC. If you’re considering building your own, don’t hesitate—the experience is well worth the effort, and the skills you gain will serve you for years to come.

