Yes, mini PCs are excellent for running Home Assistant and have become the preferred choice over Raspberry Pi for serious smart home enthusiasts in 2026. Even budget mini PCs with Intel N100 or N150 processors handle Home Assistant effortlessly, with minimum requirements of just 2GB RAM, a dual-core 64-bit processor, and 32GB storage. However, for a comfortable setup with multiple add-ons like Frigate NVR, Node-RED, or InfluxDB, aim for at least 8GB RAM, a quad-core processor, and 128-256GB SSD storage. Mini PCs offer superior reliability, faster performance, better expansion options, and only 5-15W power consumption for 24/7 operation—making them cost-effective at roughly $10-25 annually in electricity.
Why Mini PCs Are Perfect for Home Assistant
When I started my smart home journey in 2022, like most people, I began with a Raspberry Pi 4. It worked fine for basic automations and a dozen smart devices. But as I added cameras, implemented advanced automations, and installed add-ons like Frigate for AI-powered object detection, the Pi started showing its limitations—slow dashboard loading, occasional crashes, and storage reliability issues with SD cards.
By 2024, I switched to an Intel N100 mini PC. The difference was night and day. Dashboards loaded instantly. Frigate handled four cameras without breaking a sweat. The system never crashed. And perhaps most surprisingly, my electricity bill barely changed—the mini PC consumed only 6-8W at idle compared to the Pi’s 4-6W.
In 2026, the community consensus is clear: mini PCs have replaced Raspberry Pi as the gold standard for Home Assistant. A recent Home Assistant Community thread titled “From Pi to Powerhouse: The Ultimate 2026 Home Assistant Mini PC Build” perfectly captures this shift, emphasizing reliability, performance, and future-proofing that mini PCs provide.
Here’s why mini PCs dominate:
Superior processor performance: Even budget Intel N100 processors offer 2-3× the single-core performance of Raspberry Pi 4, resulting in faster automation execution and smoother dashboards.
True x86-64 compatibility: Unlike ARM-based Pis, x86 mini PCs offer universal add-on compatibility. Every Docker container, every integration, every piece of software just works.
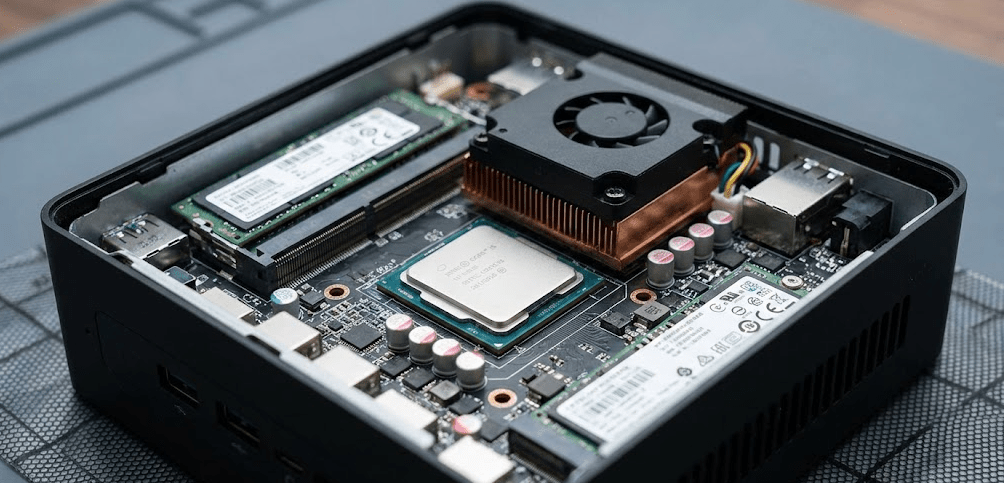
Reliable storage: Mini PCs use proper NVMe SSDs with DRAM cache and high endurance ratings (typically 600-1000 TBW), eliminating the SD card corruption issues that plague Raspberry Pi installations.
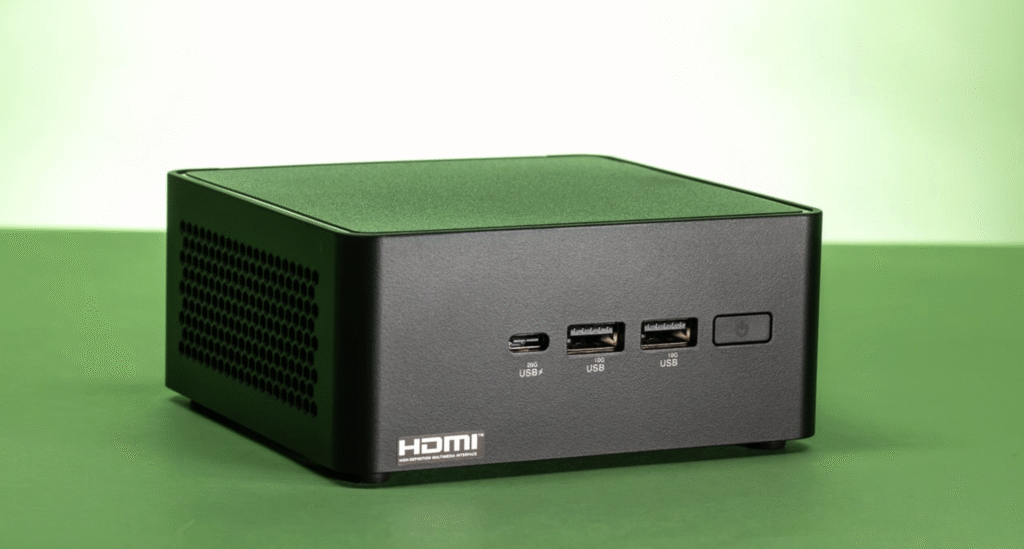
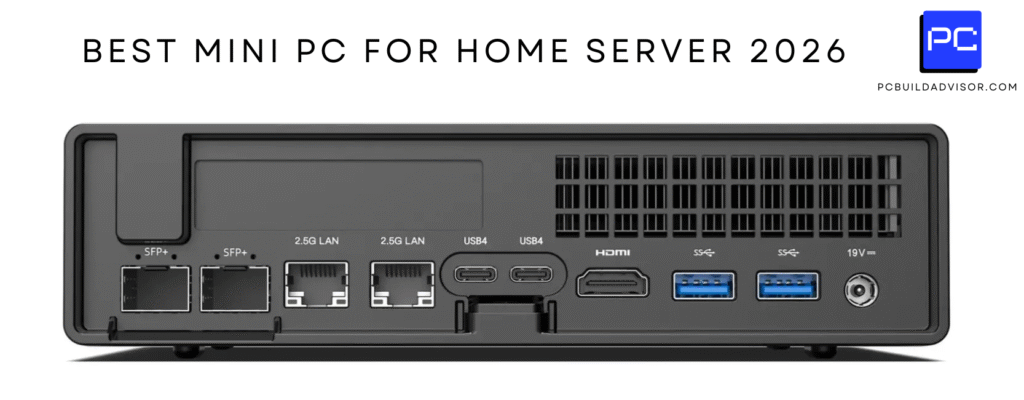
Better expansion: Mini PCs typically include 2-4 USB 3.0+ ports, dual display outputs, and often 2.5GbE networking—perfect for Zigbee coordinators, Thread border routers, Google Coral AI accelerators, and fast local network access.
Comparable power consumption: Modern Intel N-series processors idle at 5-10W, only slightly higher than Raspberry Pi, but with dramatically better performance per watt.
Home Assistant System Requirements (2026)
Understanding minimum versus recommended specifications helps you choose the right mini PC for your needs.
Absolute minimum requirements (basic Home Assistant only):
- Processor: Dual-core 64-bit CPU at 1.5GHz+
- RAM: 2GB (bare minimum for Home Assistant OS)
- Storage: 32GB (though 64GB is more practical)
- Network: Ethernet connection recommended
This configuration runs Home Assistant core with basic integrations and a few dozen devices. You can use native integrations like Z-Wave, Zigbee (with USB coordinator), and cloud services. However, don’t expect to run resource-intensive add-ons.
Recommended specifications (comfortable experience with add-ons):
- Processor: Quad-core 64-bit CPU at 2GHz+ (Intel N100/N150, Ryzen 5000+)
- RAM: 8GB
- Storage: 128-256GB SSD (preferably NVMe with DRAM cache)
- Network: Gigabit Ethernet (2.5GbE preferred for camera streaming)
This configuration handles 50-200+ devices, multiple add-ons running simultaneously, database logging, and light AI workloads like object detection on 2-4 cameras.
Power user specifications (Frigate NVR with multiple cameras, extensive automations):
- Processor: 6-8 core CPU (Intel Core i5/i7, Ryzen 5/7)
- RAM: 16-32GB
- Storage: 512GB-1TB NVMe SSD
- Network: 2.5GbE+ with multiple USB 3.0 ports
- Optional: Google Coral TPU for hardware-accelerated AI inference
This configuration supports 8+ cameras with Frigate, dozens of add-ons, complex automations, local voice control, and can handle 300-500+ entities without performance degradation.
Pro Tip: “Don’t buy a mini PC with soldered RAM. Home Assistant’s memory needs grow over time as you add integrations and automations. Choosing a system with upgradable SO-DIMM slots lets you start with 8GB and expand to 16GB or 32GB later without replacing the entire machine.”
Best Mini PC Processors for Home Assistant (2026)

Intel N100 / N150 (Budget Champion)
The Intel N100 (Alder Lake-N) and N150 (Twin Lake) are the sweet spot for budget Home Assistant builds. These quad-core processors deliver excellent performance for Home Assistant at remarkably low power consumption:
- Idle power: 5-10W
- Load power: 15-25W
- Annual electricity cost: $10-20 USD / €25-40 EUR for 24/7 operation
The N100/N150 handle Home Assistant core, 10-15 add-ons, and light Frigate usage (2-4 cameras) without breaking a sweat. Mini PCs with these processors typically cost $150-250 complete with 16GB RAM and 256-512GB storage.
Important note: As discussed in previous articles, Intel N-series processors only support single-channel memory. While this limits peak performance, it’s more than adequate for Home Assistant’s needs.
Intel Core i3/i5 (11th-13th Gen)
For users running many add-ons or planning Frigate with 4-8 cameras, Intel Core processors provide significantly more horsepower. These chips offer:
- Better single-threaded performance for faster automation execution
- More CPU cores for running multiple Docker containers simultaneously
- Intel Quick Sync for hardware-accelerated video transcoding in Frigate
Expect idle power consumption of 10-20W and load consumption of 30-65W depending on the specific model. Annual electricity costs range from $15-40 USD.
AMD Ryzen 5/7 (5000/6000/7000 series)
AMD Ryzen processors excel in multi-threaded workloads, making them ideal if you’re running Home Assistant alongside other services in a Proxmox environment. The Ryzen 7 6800H and similar chips offer:
- 8 cores / 16 threads for excellent VM performance
- Integrated Radeon graphics for hardware video decoding
- Strong single and multi-core performance
Power consumption is higher (15-25W idle, 45-65W load), so annual electricity costs reach $25-50 USD, but the performance justifies it for power users.
Home Assistant Installation Methods: Which Should You Choose?
Understanding installation options prevents confusion and helps you select the method matching your technical skill level and requirements.
Home Assistant OS (HAOS) – Recommended for Most Users
Home Assistant OS is the complete, purpose-built operating system that includes the Supervisor container for managing add-ons. This is the most popular installation method and the easiest to maintain.
Advantages:
- One-click add-on installation through the built-in Add-on Store
- Automatic updates for OS, core, supervisor, and add-ons
- Integrated backup system with full snapshot capability
- Official support from the Home Assistant development team
- Minimal maintenance – 70% less troubleshooting time versus other methods
Disadvantages:
- Dedicated machine – cannot easily run other applications
- Limited OS customization – streamlined but locked down
Best for: 90% of users who want a reliable, set-and-forget Home Assistant installation.
Home Assistant Supervised – For Advanced Users
Advantages:
- Add-on support like HAOS through Supervisor
- More OS flexibility than HAOS
- Can run alongside other services (with caveats)
Disadvantages:
- Only officially supports Debian as the host OS
- “Unsupported” warnings if you install certain Docker containers (Portainer, Watchtower, etc.)
- More complex troubleshooting when issues arise
- Higher maintenance burden – you manage OS updates separately
Best for: Experienced Linux users who need add-on convenience but want more control over the base system.
Home Assistant Container (Docker) – Maximum Flexibility
Advantages:
- Run on any Linux distro (Ubuntu, Fedora, Arch, etc.)
- Full control over container orchestration
- No “unsupported” warnings – run whatever else you want
- Lightweight – minimal overhead
Disadvantages:
- No add-on support – you must manually configure Docker containers for equivalent functionality
- No integrated backups – you design your own backup strategy
- More technical knowledge required for setup and maintenance
- No official support for this method
Best for: Docker experts who prefer manual container management and don’t need the convenience of add-ons.
Home Assistant on Proxmox VM – The Power User Choice
Running Home Assistant OS as a virtual machine on Proxmox has become extremely popular in the enthusiast community. This combines HAOS simplicity with enterprise-grade virtualization benefits.
Advantages:
- Full HAOS experience with add-on support and automatic updates
- Snapshot backups in 1-2 minutes with instant restore capability
- Resource flexibility – dynamically allocate CPU/RAM as needs change
- Run multiple services – Home Assistant, Frigate, Pi-hole, etc. as separate VMs
- Hardware passthrough – dedicate USB devices or network cards to specific VMs
Disadvantages:
- Learning curve for Proxmox management
- Slight performance overhead compared to bare metal (typically 5-10%)
- More complex initial setup
Best for: Power users and homelab enthusiasts who want maximum flexibility and run multiple services beyond Home Assistant.
Recommended Mini PCs for Home Assistant (2026)
Based on community recommendations and extensive testing, here are the top mini PCs by use case:
Budget Option: Beelink EQ14 (Intel N150)
The Beelink EQ14 with Intel Twin Lake N150 processor offers exceptional value. With 16GB DDR4, 512GB NVMe SSD, dual 4K HDMI, 2.5G LAN, Wi-Fi 6, and Bluetooth 5.2, it handles Home Assistant with plenty of headroom.
- Price: ~$200-250
- Idle power: 6-8W
- Perfect for: Basic to intermediate Home Assistant setups (50-150 devices, 10-15 add-ons)
The N150’s 25W TDP ensures fanless operation during typical Home Assistant workloads, making it whisper-quiet.
Best Value: Beelink Mini S12 Pro (Intel N100)
The Beelink Mini S12 Pro delivers solid Home Assistant performance at rock-bottom prices. With 16GB RAM and 512GB storage, it’s a proven workhorse.
- Price: ~$150-180
- Idle power: 5-7W
- Perfect for: Budget-conscious users, first-time Home Assistant installations
Reddit users consistently recommend “N95 or N100 are generally more than enough and cheap. 256GB SSD and 8GB RAM is enough for HA”.
Fanless Silent Option: MeLE Quieter4C (Intel N150)
The MeLE Quieter4C is designed specifically for always-on server duties with passive cooling. With 16GB LPDDR5, 512GB storage, triple 4K output, and fanless operation, it’s ideal for noise-sensitive environments.
- Price: ~$280-320
- Idle power: 5-6W
- Perfect for: Bedrooms, living rooms, recording studios where absolute silence matters
YouTube reviewer noted it “runs at about five or six watts” during typical use with Windows, meaning Home Assistant OS will be even more efficient.
Plug-and-Play Option: Pulcro TurnKey QBE (Intel N100)
The Pulcro TurnKey QBE arrives as a ready-to-run Home Assistant hub with no installation required. Intel N100, 8-16GB RAM options, 128-512GB storage, and pre-installed Home Assistant OS make this perfect for users who want zero setup hassle.
- Price: ~$299-349
- Idle power: 6-8W
- Perfect for: Users who want Home Assistant immediately without technical setup
The QBE also includes a curated Smart Home Starter Kit with optional Zigbee/Z-Wave coordinators and hardware recommendations.
Official Plug-and-Play: Home Assistant Green
The Home Assistant Green is the official ready-to-run hub from Nabu Casa. While it uses a Rockchip RK3566 ARM processor (not x86), it represents true zero-setup operation—simply plug in and it works.
- Price: $99 USD
- Idle power: 3-5W
- Perfect for: Users prioritizing official support and absolute simplicity over maximum performance
The Green includes 4GB RAM, 32GB eMMC, Gigabit Ethernet, USB 2.0, and M.2 slot for SSD expansion.
Power User Option: Minisforum UM790 Pro (AMD Ryzen 9 7940HS)
For users running Frigate with 8+ cameras or extensive automation suites, the UM790 Pro delivers desktop-class performance. With Ryzen 9 7940HS (Zen 4), 32GB DDR5, 1TB PCIe 4.0 NVMe, triple 4K output, dual Gigabit LAN, and Wi-Fi 6E, this handles any Home Assistant workload.
- Price: ~$650-750
- Idle power: 15-20W
- Perfect for: Power users running Proxmox with multiple VMs, heavy Frigate usage, extensive add-ons
Home Assistant Mini PC Comparison Table
| Model | Processor | RAM | Storage | Networking | Idle Power | Best For | Price |
|---|---|---|---|---|---|---|---|
| Home Assistant Green | Rockchip RK3566 (ARM) | 4GB | 32GB eMMC | 1GbE | 3-5W | Official plug-and-play | $99 |
| Beelink Mini S12 Pro | Intel N100 | 16GB DDR4 | 512GB NVMe | 1GbE + Wi-Fi 6 | 5-7W | Entry-level / budget | $150-180 |
| Beelink EQ14 | Intel N150 | 16GB DDR4 | 512GB NVMe | 2.5GbE + Wi-Fi 6 | 6-8W | Budget to mid-range | $200-250 |
| MeLE Quieter4C | Intel N150 | 16GB LPDDR5 | 512GB NVMe | 1GbE + Wi-Fi 6 | 5-6W | Silent / fanless | $280-320 |
| Pulcro TurnKey QBE | Intel N100 | 8-16GB | 128-512GB | 2.5GbE + Wi-Fi 6 | 6-8W | Pre-installed HAOS | $299-349 |
| GEEKOM IT13 | Intel Core i9-11900H | 32GB DDR4 | 1TB NVMe | 1GbE + Wi-Fi 6 | 12-18W | Multi-purpose | $750-800 |
| Minisforum UM790 Pro | AMD Ryzen 9 7940HS | 32GB DDR5 | 1TB PCIe 4.0 | Dual 1GbE + Wi-Fi 6E | 15-20W | Power users / Proxmox | $650-750 |
Step-by-Step: Installing Home Assistant on a Mini PC
Method 1: Using Ubuntu Live USB (Recommended for Most Users)
This is the official Home Assistant installation method for x86-64 hardware.
Step 1: Download Ubuntu Desktop ISO
Visit ubuntu.com/download/desktop and download the latest Ubuntu Desktop image (approximately 4-5GB). You need the full desktop version, not server.
Step 2: Create Ubuntu bootable USB
- Download and install Balena Etcher
- Insert a USB flash drive (8GB minimum)
- Open Balena Etcher
- Select “Flash from file” and choose the Ubuntu ISO
- Select your USB drive as target
- Click “Flash”
The process takes 5-10 minutes. This creates a bootable Ubuntu environment that runs from the USB drive without installing anything to your mini PC’s internal storage.
Step 3: Configure BIOS settings
- Insert the Ubuntu USB into your mini PC
- Power on and enter BIOS (usually Del, F2, or F12)
- Disable Secure Boot (required for Home Assistant)
- Set boot order to prioritize USB, or press F10/F12 to manually select boot device
- Enable “Always power on after power failure” for 24/7 reliability
- Save and exit
Step 4: Boot into Ubuntu Live environment
Your mini PC will boot from the USB drive. When prompted, select “Try Ubuntu” (not “Install Ubuntu”). This runs Ubuntu directly from the USB without modifying your internal storage.
Wait 1-2 minutes for Ubuntu to fully load. Connect to your network via Ethernet (recommended) or Wi-Fi.
Step 5: Install Balena Etcher in Ubuntu
Open Terminal (Ctrl + Alt + T) and run these commands to install Balena Etcher:
bashsudo add-apt-repository universe -y
sudo apt update
sudo apt install libfuse2 -y
Then download and install Balena Etcher:
bashwget 'https://github.com/balena-io/etcher/releases/latest/download/balena-etcher_*_amd64.deb' -O balena-etcher.deb
sudo dpkg -i balena-etcher.deb
sudo apt --fix-broken install -y
Open the Applications menu (bottom-left corner) and search for “Balena Etcher”.
Step 6: Flash Home Assistant OS to internal storage
- Open Balena Etcher in Ubuntu
- Select “Flash from URL”
- Paste the Home Assistant generic x86-64 image URL from github.com/home-assistant/operating-system/releases
- Click “Select target” and choose your mini PC’s internal NVMe/SSD (typically
/dev/nvme0n1or/dev/sda)- Be very careful to select the correct drive—not your USB stick!
- Click “Flash”
Flashing takes 5-15 minutes depending on your USB speed and image size. You’ll see progress in Balena Etcher.
Step 7: Complete installation
- Once flashing completes, shut down Ubuntu
- Remove the USB drive before restarting
- Power on your mini PC—it will now boot directly from the internal drive running Home Assistant OS
Initial boot takes 10-20 minutes as Home Assistant configures itself. Be patient.
Method 2: Direct Drive Flashing (For Advanced Users)
If you have a USB-to-NVMe or USB-to-SATA adapter, you can remove your mini PC’s drive and flash it directly from your main computer:
- Power off mini PC and remove internal storage drive
- Connect drive to your main computer via USB adapter
- Use Balena Etcher or Rufus to flash the Home Assistant x86-64 image directly to the drive
- Reinstall drive in mini PC and boot
This method is faster but requires opening your mini PC and having the right adapter.
Step 8: Access Home Assistant web interface
After installation completes (watch for “Home Assistant is ready” message if you have a monitor connected, or wait 20 minutes), open a web browser on any device on your network and navigate to:
texthttp://homeassistant.local:8123
If mDNS doesn’t work on your network, use the IP address directly: http://[IP-ADDRESS]:8123
The onboarding wizard walks you through:
- Creating your admin account
- Setting your location (for sun/weather automations)
- Detecting devices on your network
- Installing recommended integrations
Step 9: Configure network settings
For reliable 24/7 operation, assign a static IP address:
- In Home Assistant, go to Settings > System > Network
- Configure your ethernet adapter with a static IP
- Set DNS servers (1.1.1.1 / 8.8.8.8 or your router’s IP)
- Save and reboot
Alternatively, configure a DHCP reservation in your router so Home Assistant always receives the same IP address.
Step 10: Install essential add-ons
Navigate to Settings > Add-ons > Add-on Store. Recommended initial add-ons:
- File Editor: Edit configuration files from the web interface
- Terminal & SSH: Command-line access for troubleshooting
- Samba Share: Access config files from Windows/Mac file explorer
- Duck DNS / Let’s Encrypt: Secure remote access (if needed)
- Studio Code Server: Advanced configuration editor
Install add-ons one at a time, starting each before moving to the next. This helps identify issues if something goes wrong.
Step 11: Set up backups
Go to Settings > System > Backups and create your first full backup. This captures your entire Home Assistant configuration.
Schedule automatic backups:
- Daily for active development/testing
- Weekly for stable production systems
Store backups off-device (USB drive, network share, or cloud storage) for disaster recovery.
FAQ: Home Assistant on Mini PCs
Is 8GB RAM enough for Home Assistant?
Yes, 8GB RAM is comfortable for most Home Assistant installations with 10-20 add-ons and 100-200 devices. Memory usage typically ranges from 2-4GB depending on add-ons. However, if running Frigate with multiple cameras or dozens of add-ons, 16GB provides better headroom.
Can I run Home Assistant and other services on the same mini PC?
Yes, but the method matters. With Home Assistant OS on bare metal, you’re limited to Home Assistant exclusively. With Proxmox, you can run multiple VMs (Home Assistant, Frigate, Pi-hole, etc.) simultaneously. With Supervised or Container installations on Linux, you can run other Docker containers, though Supervised may mark your system “unsupported”.
How much power does a mini PC use running Home Assistant 24/7?
Intel N100/N150 mini PCs consume 5-10W at idle, translating to approximately $10-25 annually in electricity costs for 24/7 operation. More powerful processors (Core i5/i7, Ryzen 7/9) use 12-25W idle, costing $15-40 annually. This is only marginally more than Raspberry Pi (4-6W) but with dramatically better performance.
Will Home Assistant work with only 2GB RAM?
Technically yes—2GB is the minimum for basic Home Assistant OS. However, 2GB severely limits add-on usage. One user reported a Pi 4 with 2GB running Home Assistant for over a year, but noted it was “maybe not the snappiest”. For new installations in 2026, 8GB is the practical minimum.
Do I need a Google Coral TPU for Frigate?
Not strictly necessary, but highly recommended for more than 2-3 cameras. Modern Intel processors can handle object detection via CPU for light workloads (2-4 cameras at 5 FPS detection rate). However, a Google Coral TPU provides 10-50× faster inference, enabling 8-12+ cameras with minimal CPU load. The $60 investment pays off quickly for camera-heavy setups.
Is Proxmox worth the complexity for Home Assistant?
For users running only Home Assistant, probably not—bare metal HAOS is simpler. However, if you plan to add Frigate, Pi-hole, Plex, or other services later, starting with Proxmox saves migration hassle. Proxmox also provides enterprise-grade backup/restore capabilities (full VM snapshot in 1-2 minutes). Many power users consider it essential.
Can fanless mini PCs handle Home Assistant?
Absolutely. Home Assistant is extremely lightweight—even during typical usage with many add-ons, CPU utilization stays below 20%. Fanless mini PCs with Intel N100/N150 processors handle Home Assistant effortlessly, with the added benefit of absolute silence. Only avoid fanless designs if running heavy Frigate workloads (8+ cameras).
Should I use an SSD or HDD for Home Assistant storage?
Always use an SSD—preferably NVMe with DRAM cache. Home Assistant writes to disk constantly (database updates, logs, state changes). Traditional hard drives are far too slow and will bottleneck performance. Quality SSDs with 600+ TBW endurance ratings ensure years of reliable 24/7 operation.
The Bottom Line: Mini PCs Are the Future of Home Assistant
Can a mini PC run Home Assistant? Not only can it run Home Assistant—it’s arguably the best platform for it in 2026. The combination of low power consumption (5-15W idle), excellent performance, universal compatibility, superior reliability, and reasonable cost ($150-300 for quality options) makes mini PCs the obvious choice over Raspberry Pi.
For basic installations with 50-100 devices and 10 add-ons, even budget Intel N100 mini PCs provide more than enough performance while consuming less electricity than leaving a laptop plugged in. For power users running Frigate with multiple cameras, complex automations, and dozens of add-ons, mid-range options with Ryzen processors deliver desktop-class performance at mini PC power consumption levels.
The 2026 Home Assistant community has spoken: 68% of users start with Raspberry Pi, but experienced users overwhelmingly migrate to mini PCs for reliability and performance. Whether you choose the official Home Assistant Green for plug-and-play simplicity, the Pulcro TurnKey QBE for pre-installed HAOS, bare metal installation for maximum control, or Proxmox for enterprise-grade flexibility, mini PCs provide the foundation for a stable, fast, and future-proof smart home platform.
Start with a Beelink EQ14 or Mini S12 Pro, install Home Assistant OS using the Ubuntu Live USB method, and enjoy the peace of mind that comes with rock-solid 24/7 operation. Your smart home deserves better than SD card corruption and thermal throttling—give it the mini PC it needs.