Skip to content
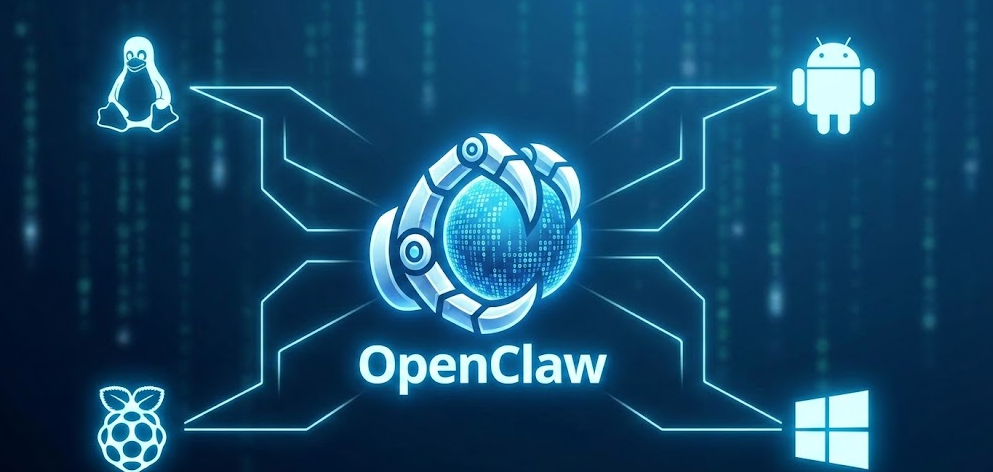
Yes, OpenClaw runs on all four platforms, but with different levels of official support and practical performance. Linux is the native home of OpenClaw and the smoothest experience. Windows is fully supported via WSL2 and also works natively through PowerShell. Raspberry Pi is one of the most popular self-hosting setups, with the Pi 5 (8GB) being the recommended hardware. Android is technically possible via Termux but sits firmly in the enthusiast tier, with more setup friction than any other platform. This guide covers all four in full detail, including exact commands, hardware requirements, real limitations, and what each platform is actually like to use day to day.
What Is OpenClaw and Why Platform Matters
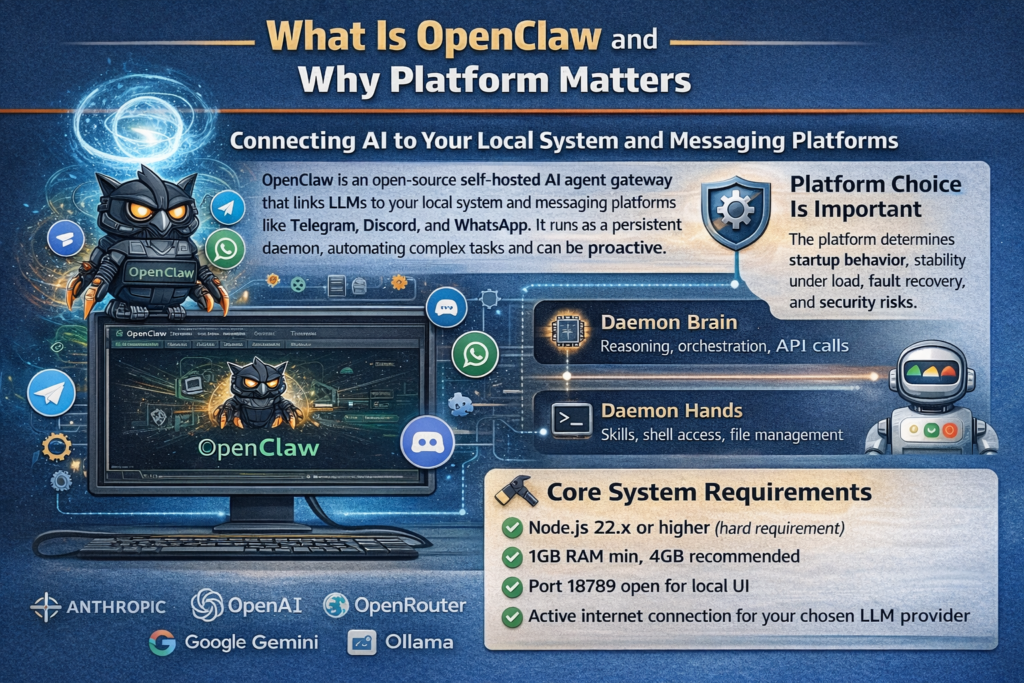
OpenClaw is an open-source self-hosted AI agent gateway that connects large language models to your local system and messaging platforms like Telegram, Discord, and WhatsApp. Unlike a standard chatbot, OpenClaw runs as a persistent background daemon. It can message you proactively, execute shell commands, manage files, browse the web, run skills from ClawHub, and automate complex multi-step tasks while you are doing something else entirely.
Because it runs as a daemon rather than a web app, the platform it runs on matters significantly. The operating system determines how it starts on boot, how stable it remains under load, how you manage it when things go wrong, and what security surface you are exposing. As PromptLayer’s detailed OpenClaw installation guide explains, OpenClaw’s architecture splits into two parts: the Brain (the reasoning engine handling API calls and orchestration) and the Hands (the execution environment running skills, shell access, and file management). Both parts have different resource demands depending on the platform.
The core system requirements that apply across all platforms are:
- Node.js 22.x or higher (this is a hard requirement, not a suggestion)
- A minimum of 1GB RAM for the gateway alone, with 4GB recommended for stable npm builds
- Port 18789 available for the local Control UI
- An active internet connection to reach your chosen LLM provider’s API (Anthropic, OpenAI, OpenRouter, Google Gemini, or a local Ollama instance)
Platform 1: Linux
Support Level: Full Native Support
Linux is the platform OpenClaw was built for first. Every installation method works, all documentation assumes a Linux terminal, and the community defaults to Linux when giving troubleshooting advice. If you are choosing a platform specifically to run OpenClaw and you are comfortable on the command line, Linux is the right answer.
Supported distributions: Ubuntu 22.04 and 24.04, Debian 11 and 12, Fedora 39 and 40, Arch Linux, and any other distribution capable of running Node.js 22.x. Ubuntu 22.04 LTS and 24.04 LTS are the most tested and have the most community troubleshooting resources.
System Requirements (Linux)
| Requirement | Minimum | Recommended |
|---|---|---|
| RAM | 1GB | 4GB+ |
| Storage | 10GB free | 20GB+ SSD |
| CPU | Any 64-bit x86 or ARM | Modern multicore |
| Node.js | 22.x | Latest LTS |
| OS | Any 64-bit Linux | Ubuntu 22.04 or 24.04 LTS |
Installation: Method 1 — One-Line Scripted Installer (Recommended)
This is the fastest method for most users. The install script detects your OS, checks Node.js versions, installs missing dependencies, and launches the onboarding wizard automatically:
bashcurl -fsSL https://openclaw.ai/install.sh | bash
Security note: Running a piped curl-to-bash command is convenient but means you are executing remote code without reviewing it first. The security-conscious approach is to download the script, read it, then execute it:
bashcurl -O https://openclaw.ai/install.sh
cat install.sh        # review the contents
bash install.sh
Installation: Method 2 — npm Global Install
Better for systems already running multiple Node.js applications where you want more control:
bash# Install OpenClaw globally
npm install -g openclaw@latest

# Run the onboarding wizard and register as a background daemon
openclaw onboard --install-daemon
The --install-daemon flag registers OpenClaw as a systemd service automatically, so it starts on boot and restarts on crash without any manual configuration.
Installation: Method 3 — Docker
Ideal for isolation, reproducibility, and keeping OpenClaw contained to its own environment:
bashgit clone https://github.com/openclaw/openclaw
cd openclaw
./docker-setup.sh
Docker mounts two volumes: ~/.openclaw for configuration and credentials, and ~/openclaw/workspace as the agent’s execution sandbox. If you hit permission errors, fix ownership on the host:
bashsudo chown -R 1000:1000 ~/.openclaw
Step: Prepare Your System
Before any installation method, make sure your system is ready:
bash# Update package lists
sudo apt update && sudo apt upgrade -y

# Install essential build tools (required for some OpenClaw skills with native dependencies)
sudo apt install -y build-essential git python3 curl wget

# Check Node.js version
node --version    # Must show v22.x.x or higher
If your Node.js version is below 22, install the correct version via NodeSource:
bashcurl -fsSL https://deb.nodesource.com/setup_22.x | sudo -E bash -
sudo apt-get install -y nodejs
Step: Run the Onboarding Wizard
After installation, run the setup wizard if it did not launch automatically:
bashopenclaw onboard
During onboarding you will:
- Choose your LLM provider: Anthropic Claude, OpenAI, OpenRouter, Google Gemini, or local Ollama
- Enter your API key for the chosen provider
- Name your agent
- Choose your default messaging channel (Telegram is the most popular for Linux self-hosters)
Configuration is saved to ~/.openclaw/openclaw.json.
Step: Start and Verify the Gateway
bash# Start the gateway daemon
openclaw gateway start

# Run the health check
openclaw doctor

# Check live status
openclaw status

# Open the local Control UI in your browser
openclaw dashboard
The Control UI runs at http://localhost:18789. Never expose this port to the public internet. Use Tailscale or a VPN if you need remote access.
Step: Manual systemd Service (If Not Using –install-daemon)
If you installed via npm without the daemon flag, here is how to set up systemd manually:
bashsudo tee /etc/systemd/system/openclaw.service > /dev/null << 'EOF'
[Unit]
Description=OpenClaw AI Assistant Gateway
After=network-online.target
Wants=network-online.target

[Service]
Type=simple
User=youruser
WorkingDirectory=/home/youruser
ExecStart=/usr/bin/openclaw gateway start --foreground
Restart=always
RestartSec=10
Environment=NODE_ENV=production

[Install]
WantedBy=multi-user.target
EOF

sudo systemctl daemon-reload
sudo systemctl enable openclaw
sudo systemctl start openclaw
VPS-Specific Consideration: Swap File
On a VPS with less than 2GB RAM, allocate a swap file before running npm install. The build phase can trigger out-of-memory kills on low-memory instances:
bashsudo fallocate -l 4G /swapfile
sudo chmod 600 /swapfile
sudo mkswap /swapfile
sudo swapon /swapfile
Platform 2: Windows
Support Level: Full Support (via WSL2 or Native PowerShell)
Windows is a first-class supported platform. There are two installation paths: the WSL2 route, which runs OpenClaw inside a Linux subsystem and is the recommended approach for most Windows users, and the native PowerShell route, which installs directly on Windows without any Linux layer. Both work. WSL2 is recommended because it gives you a full Linux environment, making skill installation, troubleshooting, and community help resources directly applicable.
System Requirements (Windows)
| Requirement | Minimum | Recommended |
|---|---|---|
| Windows version | Windows 10 (21H2+) | Windows 11 |
| RAM | 4GB | 8GB+ |
| Storage | 20GB free | SSD with 40GB+ |
| Node.js | 22.x | Latest LTS |
| WSL2 | Required for WSL path | Ubuntu 22.04 on WSL2 |
Method A (Recommended): Install via WSL2
Step 1: Enable WSL2
Open PowerShell as Administrator and run:
powershellwsl --install
Reboot when prompted. This installs WSL2 and Ubuntu by default.
Step 2: Launch Ubuntu and set up your user
Open Ubuntu from the Start menu. Create your Linux username and password when prompted.
Step 3: Update packages inside Ubuntu
bashsudo apt update && sudo apt upgrade -y
Step 4: Install OpenClaw inside WSL2
The OpenClaw installer requires sudo privileges to install the background daemon and global npm packages. Running it without sudo will result in a cascade of EACCES permission denied errors:
bashcurl -fsSL https://openclaw.ai/install.sh | sudo bash
From this point forward, every Linux command from the Linux section above applies directly inside your WSL2 Ubuntu environment. The experience is identical to native Linux.
Step 5: Access the Control UI from your Windows browser
WSL2 bridges its localhost to Windows automatically. Open your Windows browser and navigate to:
texthttp://localhost:18789
The OpenClaw dashboard will load just as it does on Linux.
Method B: Install Directly on Windows via PowerShell
For users who prefer not to use WSL2, OpenClaw provides a native Windows installer:
Step 1: Install Node.js 22.x on Windows
Download the LTS installer from nodejs.org and run it. Verify after installation:
powershellnode --version # Must show v22.x.x or higher Step 2: Run the Windows installer script
Open PowerShell and run:
powershelliwr -useb https://openclaw.ai/install.ps1 | iex
Note: Before running any downloaded PowerShell script, check your execution policy:
powershellGet-ExecutionPolicy
If it returns Restricted, change it to allow the script:
powershellSet-ExecutionPolicy -ExecutionPolicy RemoteSigned -Scope CurrentUser
Step 3: Or install via npm directly
powershellnpm install -g openclaw@latest
openclaw onboard --install-daemon
On Windows, --install-daemon registers OpenClaw as a Windows Service rather than a systemd service. It behaves equivalently: starts on boot, restarts on crash.
Step: Verify Your Windows Installation
powershellopenclaw doctor
openclaw status
openclaw dashboard
These three commands are your standard health check sequence on every platform. If openclaw doctor returns all green, your installation is working correctly.
Windows-Specific Troubleshooting
“openclaw is not recognized as a command”: Your npm global bin directory is not in your system PATH. Add %APPDATA%\npm to your PATH in System Environment Variables, then restart your terminal.
PowerShell execution policy blocking scripts: Run Set-ExecutionPolicy -ExecutionPolicy RemoteSigned -Scope CurrentUser to allow locally-created and signed scripts.
Port 18789 already in use: Another application is using that port. Find it with netstat -ano | findstr :18789 and terminate the process from Task Manager.
WSL2 network not bridging to Windows: In rare cases, WSL2’s localhost forwarding breaks after a Windows update. Run wsl --shutdown, reopen Ubuntu, and restart the gateway.
Platform 3: Raspberry Pi
Support Level: Community-Supported, Highly Popular
Raspberry Pi is one of the most popular OpenClaw self-hosting setups in the community. For roughly $1/month in electricity, a Pi becomes an always-on AI assistant that runs 24/7, keeps all your data on your own hardware, and never needs you to leave a laptop open. The tradeoff is that setup requires real Linux command-line comfort, and not all skills perform equally well on ARM hardware.
Which Pi Do You Need?
| Model | RAM | Storage | Verdict |
|---|---|---|---|
| Pi 5 (8GB) | 8GB LPDDR4X | NVMe via HAT | Recommended — comfortable headroom for 3 to 5 active skills |
| Pi 5 (4GB) | 4GB LPDDR4X | NVMe via HAT | Good — fine for single-agent, single-channel setups |
| Pi 4 (8GB) | 8GB LPDDR4 | USB 3.0 SSD | Acceptable — noticeably slower but functional |
| Pi 4 (4GB) | 4GB LPDDR4 | SD card | Minimum viable — expect swap usage under load |
| Pi 3 and below | 1GB | SD card | Not recommended — insufficient RAM |
The 8GB RAM advantage is real. OpenClaw’s Node.js runtime, message processing, skill execution, and persistent memory all add up. On a 4GB Pi running multiple skills, you will hit swap regularly, which degrades response speed and wears out your SD card faster. The Pi 5 (8GB) at around $80 is the correct choice for anyone planning a serious 24/7 deployment.
Full Hardware Shopping List
| Component | Recommended | Budget Option |
|---|---|---|
| Raspberry Pi | Pi 5 8GB (~$80) | Pi 4 8GB (~$60) |
| Power supply | Official 5V 5A USB-C ($12) | Official 5V 3A for Pi 4 ($8) |
| Storage | NVMe SSD 128GB+ ($20 to $30) | microSD 64GB Class A2 ($10) |
| NVMe HAT | Pi 5 M.2 HAT+ ($12) | Not applicable |
| Case | Active cooling case ($10 to $15) | Basic case with fan ($8) |
| Network | Cat6 Ethernet cable ($5) | Built-in WiFi |
| Total | ~$140 to $150 | ~$85 to $95 |
Do not cheap out on the power supply. Under-voltage is the most common cause of random crashes during AI workloads on a Pi. The official Raspberry Pi power supply is specifically rated for sustained high loads. Generic USB-C chargers from Amazon frequently cannot deliver stable 5A output under sustained CPU load.
Step 1: Install Raspberry Pi OS
Use Raspberry Pi OS Lite 64-bit. The desktop version wastes RAM and CPU that OpenClaw needs. Download Raspberry Pi Imager, select Raspberry Pi OS Lite (64-bit), and use the gear icon to pre-configure:
- Hostname:
openclaw-pi - Enable SSH with password authentication
- Set your username, password, and WiFi network
- Set your locale and timezone
After flashing, insert the card into the Pi, power it on, and SSH in:
bashssh [email protected]
Update everything immediately:
bashsudo apt-get update && sudo apt-get upgrade -y
Optional but strongly recommended: Boot from NVMe SSD
If you have an NVMe SSD and M.2 HAT+, clone your SD card to the SSD using SD Card Copier (under Accessories in the full OS, or use dd commands in Lite), then update boot order in raspi-config under Advanced Options > Boot Order > NVMe. This gives 3 to 5x faster read/write speeds and eliminates SD card corruption risk, which is a real issue for 24/7 write-heavy workloads.
Step 2: Install Node.js 22.x
The Node.js version in the default Raspberry Pi OS repos is outdated. Install via NodeSource:
bashcurl -fsSL https://deb.nodesource.com/setup_22.x | sudo -E bash -
sudo apt-get install -y nodejs

# Verify
node --version    # Must show v22.x.x
npm --version

# Install essential build tools
sudo apt-get install -y build-essential git python3
Step 3: Install OpenClaw
bash# Install OpenClaw globally
npm install -g openclaw

# Verify
openclaw --version

# Run the onboarding wizard
openclaw onboard
Onboarding will ask for your LLM provider, API key, agent name, and default model. Use a cloud provider (Anthropic or OpenAI) rather than a local Ollama model. Local inference on a Pi, even a Pi 5, is impractically slow: a 3B parameter model takes 10 to 30 seconds per response. The Pi should run the OpenClaw agent runtime while the actual AI thinking is done by a cloud API.
Step 4: Set Up the systemd Service
This is what makes your Pi a true 24/7 server. The systemd service ensures OpenClaw starts on every boot and restarts automatically if it crashes:
bashsudo tee /etc/systemd/system/openclaw.service > /dev/null << 'EOF'
[Unit]
Description=OpenClaw AI Assistant Gateway
After=network-online.target
Wants=network-online.target

[Service]
Type=simple
User=youruser
WorkingDirectory=/home/youruser
ExecStart=/usr/bin/openclaw gateway start --foreground
Restart=always
RestartSec=10
Environment=NODE_ENV=production

[Install]
WantedBy=multi-user.target
EOF

sudo systemctl daemon-reload
sudo systemctl enable openclaw
sudo systemctl start openclaw
Step 5: Connect Telegram
Telegram is the most popular messaging channel for Pi-based OpenClaw setups due to its reliable API and the fact that it does not require a dedicated phone number.
- Open Telegram and search for @BotFather
- Send
/newbot, choose a name and username (must end inbot) - Copy the API token BotFather provides
- In your Pi terminal:
openclaw channel add telegram - Paste your bot token when prompted
- Send a message to your new bot to confirm the connection
Step 6: Performance Optimization
Use an SSD. This is the single biggest performance improvement available. OpenClaw constantly writes to memory files, logs, and conversation history. SD cards have limited write endurance and slow random I/O. An NVMe SSD makes everything faster and prevents premature card failure.
Limit Node.js heap size to prevent out-of-memory kills on 4GB models:
bashexport NODE_OPTIONS="--max-old-space-size=2048"
# For 4GB Pi: use --max-old-space-size=1024
Disable unnecessary services to free resources:
bashsudo systemctl disable bluetooth
sudo systemctl stop bluetooth
Overclock for Pi 5 (optional — proceed with caution):
⚠️ Warning: Overclocking voids your Raspberry Pi warranty and carries real risk of instability or hardware damage if done incorrectly. Only attempt this if your Pi 5 has adequate active cooling installed and you are comfortable monitoring temperatures closely. Never overclock without a heatsink and fan.
bashsudo nano /boot/firmware/config.txt
# Add:
arm_freq=2800
gpu_freq=1000
over_voltage_delta=5000
over_voltage_delta=5000 applies a conservative +50mV overvolt, which is a mild and widely used starting point for Pi 5 overclocking. Do not increase this value without thorough research, as higher values can damage your board. Monitor your temperature with vcgencmd measure_temp and keep it below 80°C under sustained load. If you experience instability or throttling, remove the overclock settings entirely and restore defaults first.
Increase swap for 4GB models:
bashsudo dphys-swapfile swapoff
sudo sed -i 's/CONF_SWAPSIZE=.*/CONF_SWAPSIZE=2048/' /etc/dphys-swapfile
sudo dphys-swapfile setup
sudo dphys-swapfile swapon
Step 7: Health Monitoring
Create a simple health-check script and run it on a cron schedule:
bash#!/bin/bash
# /home/youruser/check-openclaw.sh
if ! openclaw gateway status | grep -q "running"; then
  echo "$(date): OpenClaw is down, restarting..." >> /var/log/openclaw-health.log
  openclaw gateway restart
fi
Add to cron to run every 5 minutes:
bashcrontab -e
# Add this line:
*/5 * * * * /home/youruser/check-openclaw.sh
Real Raspberry Pi Limitations
| What Works Well | What Struggles |
|---|---|
| Single-user Telegram or Discord bot | Local LLM inference via Ollama |
| Scheduled tasks and automations | Multiple simultaneous users (2+ concurrent) |
| Text-based skills (email, calendar, search) | Heavy browser automation via Playwright |
| Always-on 24/7 uptime | Large document or image processing |
| Heartbeats, reminders, monitoring | Video or media generation tasks |
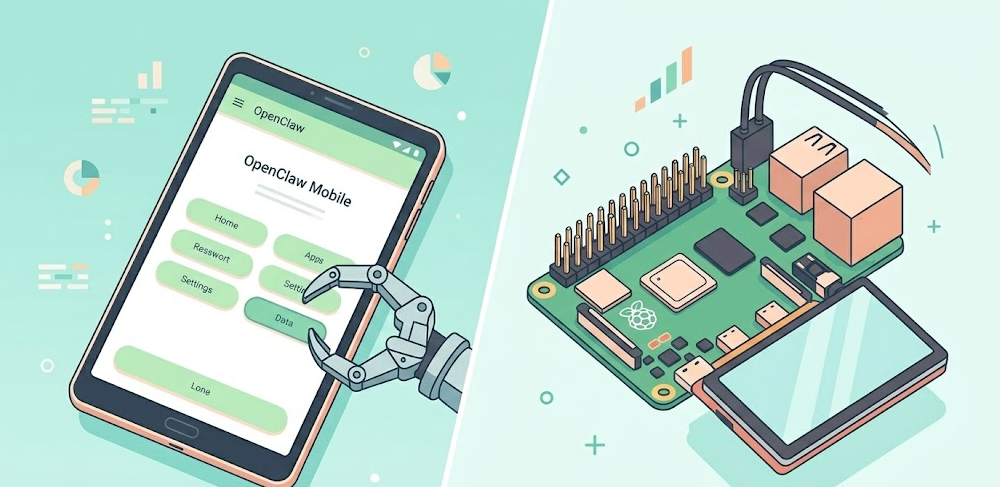
Platform 4: Android
Support Level: Community-Supported (Enthusiast Tier)
Android is not an officially supported platform. There is no official OpenClaw installer for Android. However, a growing number of users in the r/LocalLLM community have successfully run OpenClaw on Android tablets and phones with decent hardware specs using Termux, a terminal emulator that provides a Linux-like environment on Android without requiring root access.
One r/LocalLLM community member noted that setting up OpenClaw on an Android tablet with 4GB RAM and a solid CPU was surprisingly easier than getting it running on a Raspberry Pi 4 with 2GB RAM, with better performance on comparable tasks. This is partly because modern Android device chipsets, particularly Snapdragon 8-series processors, are faster in raw terms than even the Pi 5 for sequential Node.js workloads.
Requirements for Android
- Android 11 or higher
- Minimum 4GB RAM (6GB+ strongly recommended for comfortable use)
- A modern SoC (Snapdragon 8-series, Dimensity 9000-series, or equivalent)
- Termux installed from F-Droid (not the Play Store version, which is outdated and no longer maintained)
- At least 8GB of free storage
Why F-Droid Termux and Not Play Store Termux
This is important: the Termux version on the Google Play Store stopped receiving updates in 2020 and will not work for modern Node.js installations. You must install Termux from F-Droid. Download F-Droid from f-droid.org and then install Termux through it.
Step 1: Install and Set Up Termux
Install Termux from F-Droid, then open it and run the initial setup:
bash# Update Termux packages
pkg update && pkg upgrade -y

# Install required dependencies
pkg install nodejs-lts git python build-essential curl
Verify Node.js version:
bashnode --version # Must show v22.x.x or higher If the nodejs-lts package in Termux does not provide version 22 yet, install via nvm:
bash# Install nvm
curl -o- https://raw.githubusercontent.com/nvm-sh/nvm/v0.39.7/install.sh | bash
source ~/.bashrc

# Install Node.js 22
nvm install 22
nvm use 22
node --version
Step 2: Install OpenClaw
bashnpm install -g openclaw@latest
openclaw --version
openclaw onboard
Onboarding on Android is identical to any other platform. Choose your LLM provider, enter your API key, name your agent, and pick a messaging channel.
Step 3: Start the Gateway
bashopenclaw gateway start
Unlike Linux and Windows where you can register OpenClaw as a system service, Android with Termux has limitations around background execution. Android’s battery optimization aggressively kills background processes, including Termux sessions.
To keep OpenClaw running in the background on Android:
- Open Android Settings > Battery > Battery Optimization
- Find Termux and set it to “Not Optimized” or “Unrestricted”
- In the Termux notification, keep it as a foreground notification so Android does not kill it
- Alternatively, use Termux:Widget or a Termux:Boot script to restart the gateway automatically
Using Termux:Boot for auto-start:
Install Termux:Boot from F-Droid (same source as Termux), then create a startup script:
bashmkdir -p ~/.termux/boot/
cat > ~/.termux/boot/start-openclaw.sh << 'EOF'
#!/data/data/com.termux/files/usr/bin/bash
openclaw gateway start
EOF
chmod +x ~/.termux/boot/start-openclaw.sh
This will start the OpenClaw gateway automatically every time Android reboots, as long as Termux:Boot is installed.
Step 4: Access the Control UI on Android
The Control UI runs on localhost:18789. On Android, open any mobile browser and navigate to http://localhost:18789 while Termux is running the gateway. It works in Chrome for Android.
Android-Specific Limitations
- No systemd. Android does not have systemd, so managing background services requires the Termux:Boot workaround described above rather than a proper init system
- Battery optimization is aggressive. Even with unrestricted battery settings, some Android OEMs (Xiaomi, Samsung on certain firmware versions) may still kill background Termux sessions. Tablets left plugged in are significantly more reliable than phones
- Bluetooth-dependent skills may behave differently. Android’s Bluetooth stack is not always accessible from Termux in the same way it would be on Linux
- Storage access requires permissions. If any of your skills need to read or write files on Android shared storage, you need to grant Termux explicit storage permissions:
termux-setup-storage - Not suitable for production. Android is best treated as a testing environment or a personal-use setup, not a reliable always-on server for business-critical automations
Cross-Platform Comparison
| Feature | Linux | Windows (WSL2) | Windows (Native) | Raspberry Pi | Android (Termux) |
|---|---|---|---|---|---|
| Official support | ✅ Full | ✅ Full | ✅ Full | Community | Community |
| One-line installer | ✅ | ✅ (inside WSL2) | ✅ (PS script) | ✅ | ❌ Manual only |
| systemd service | ✅ | ✅ (inside WSL2) | Windows Service | ✅ | ❌ Termux:Boot |
| Playwright browser automation | ✅ | ✅ | ✅ | ⚠️ Slow | ❌ Not reliable |
| 24/7 always-on | ✅ | ⚠️ Sleep risk | ⚠️ Sleep risk | ✅ | ⚠️ Battery kills |
| Local Ollama inference | ✅ | ✅ | ✅ | ⚠️ Very slow | ⚠️ Very slow |
| Ease of setup | Easy | Moderate | Easy | Moderate | Hard |
| Recommended for beginners | ✅ | ✅ | ✅ | ⚠️ Some Linux needed | ❌ |
Choosing the Right Platform for Your Needs
Choose Linux if you are a developer, run a VPS or home server, or want the cleanest possible setup with the most community support. Any mainstream Linux distro works, and every tutorial you find will apply directly.
Choose Windows via WSL2 if your daily driver is a Windows machine and you do not want a separate device dedicated to OpenClaw. WSL2 gives you a real Linux environment without leaving Windows. This is the right setup for developers on Windows who want to integrate OpenClaw into their existing workflow.
Choose Raspberry Pi if you want a dedicated, always-on, private AI assistant running in your home or office 24/7 at near-zero electricity cost. Get the Pi 5 with 8GB RAM, use an NVMe SSD, and follow the systemd setup in this guide. The ClawRapid comprehensive Raspberry Pi setup guide is one of the most detailed community resources for this setup, covering hardware selection through monitoring and maintenance in a single guide.
Choose Android only if it is the only device you have available and you understand the limitations around background execution and battery management. It works, but it requires more patience than any other platform.
For a hands-on demonstration of the full Ubuntu Linux + Ollama integration running OpenClaw locally with zero API cost, This complete walkthrough on YouTube covers the entire installation from scratch including dependency setup, Ollama model download, and connecting everything together.
Universal Troubleshooting Commands
These commands work identically across Linux, Windows (WSL2 or native), Raspberry Pi, and Android (Termux):
bash# Full health check
openclaw doctor

# Check current status
openclaw status

# Restart the gateway
openclaw gateway restart

# View live logs
openclaw logs --follow

# Open the Control UI
openclaw dashboard

# List all installed skills
openclaw skills list

# Update OpenClaw to the latest version
npm update -g openclaw
The most common error messages across all platforms:
| Error | Cause | Fix |
|---|---|---|
Gateway not responding or 0 tokens used | Daemon stopped or API auth failed | openclaw gateway restart, verify API key |
RPC probe: failed | Port 18789 blocked or in use | sudo lsof -i :18789, kill conflicting process |
Access not configured | User ID not allowlisted | Run openclaw pairing approve with your pairing code |
EACCES errors in Docker | Node user lacks volume permissions | sudo chown -R 1000:1000 ~/.openclaw |
node: command not found | Node.js not installed or PATH issue | Install Node.js 22.x, verify PATH |
Cannot find module 'openclaw' | npm global install failed | Re-run npm install -g openclaw@latest |
Security Reminders That Apply on Every Platform
OpenClaw runs with shell access and file permissions, which means a misconfigured or compromised installation is a real risk on any platform. A few non-negotiable practices regardless of what you are running on:
- Enable
exec.ask: "on"in your config to require explicit approval before write or exec commands, especially when first setting up - Never expose port 18789 to the public internet. Use Tailscale, WireGuard, or an SSH tunnel for remote access
- Treat
~/.openclaw/like a password vault. It contains your API keys and agent credentials - Review skills before installing them. As the Cherry Servers OpenClaw Linux VPS setup guide emphasizes, running OpenClaw on a network-connected server means thinking carefully about what access each installed skill has and limiting permissions to what is actually needed
- Run OpenClaw in Docker or a dedicated VM on shared or production systems to limit blast radius if something goes wrong
Frequently Asked Questions
Does OpenClaw run on Linux?
Yes, fully and natively. Linux is the primary supported platform. Use the one-line installer (curl -fsSL https://openclaw.ai/install.sh | bash), npm global install, or Docker. Ubuntu 22.04 and 24.04 LTS are the most tested distributions.
Does OpenClaw run on Windows?
Yes. The recommended method is installing inside WSL2 (Windows Subsystem for Linux), which gives you a full Linux environment within Windows. Use curl -fsSL https://openclaw.ai/install.sh | sudo bash inside WSL2 to avoid EACCES permission errors. A native Windows PowerShell installer is also available. Both methods are fully supported.
Does OpenClaw run on Raspberry Pi?
Yes. It is one of the most popular self-hosting setups in the community. The minimum hardware is a Pi 4 with 4GB RAM, but the Pi 5 with 8GB RAM is strongly recommended for comfortable 24/7 operation. Use Raspberry Pi OS Lite 64-bit and an NVMe SSD rather than an SD card.
Does OpenClaw run on Android?
Yes, but it is unsupported officially and requires Termux from F-Droid. It works best on devices with 6GB or more RAM and a recent SoC. Battery optimization settings must be adjusted to prevent Android from killing the Termux background process.
What is the minimum RAM for OpenClaw on any platform?
1GB RAM is the absolute minimum for the gateway alone. 4GB is recommended for stable npm builds and running skills. On Raspberry Pi and Android specifically, 8GB RAM provides significantly better reliability for multi-skill workflows.
Can I run OpenClaw without a cloud AI API by using Ollama locally?
Yes, Ollama integration is supported on all platforms. However, local inference is only practical on a full desktop or laptop with a modern GPU or sufficient CPU power. On a Raspberry Pi or Android device, even a 3B parameter model takes 10 to 30 seconds per response, making local inference impractical for real use. Use cloud APIs on resource-constrained hardware and use Ollama locally only on full machines with 8GB+ RAM.
Which platform is easiest to set up for a beginner?
Linux (Ubuntu) or Windows via WSL2 are the easiest for most users. The one-line installer handles most of the setup automatically. Raspberry Pi requires some Linux command-line comfort. Android requires the most manual steps and ongoing maintenance.
Do OpenClaw skills work the same on all platforms?
Most skills work identically across Linux, Windows, and Raspberry Pi. A few skills with browser automation dependencies (Playwright MCP) may run slowly or unreliably on Raspberry Pi due to ARM memory constraints. On Android, browser automation skills are generally not reliable due to Android’s process management and limited Termux compatibility with headless browser runtimes.
Does OpenClaw work on macOS?
Yes, macOS is also a fully supported platform using the same one-line installer or npm global install. macOS uses launchd instead of systemd for the background daemon. This guide focuses on Linux, Windows, Raspberry Pi, and Android, but the macOS installation is equally straightforward.
How do I keep OpenClaw updated across all platforms?
The command is the same everywhere: npm update -g openclaw, followed by openclaw gateway restart. Always check the OpenClaw changelog before updating, as breaking changes can affect installed skills and existing configuration.
Bottom Line
OpenClaw runs well on all four platforms covered in this guide, but each has a different setup complexity and practical ceiling. Linux is the cleanest experience and the right choice if you have a server or VPS available. Windows via WSL2 is the right choice if your primary machine runs Windows and you want OpenClaw integrated into your existing workflow. Raspberry Pi is the right choice if you want a dedicated, private, always-on assistant at near-zero running cost and you are comfortable with Linux administration. Android works but belongs in the enthusiast category: it takes more effort, has more limitations, and needs more ongoing babysitting than any other platform. Start with the platform you already know, get OpenClaw running end-to-end with one skill and one messaging channel before expanding, and treat the first week as a configuration and learning period rather than a production deployment.