You can cool down your GPU using multiple methods ranging from simple software tweaks to advanced hardware modifications. The most effective approach combines improved case airflow (adding 2-3 intake/exhaust fans), custom fan curves via MSI Afterburner (ramping to 70-80% at 70°C), and undervolting (reducing voltage by 50-100mV while maintaining performance). For GPUs consistently hitting 80-85°C+, Physical interventions like repasting with Honeywell PTM7950 (Phase Change Material) or premium compounds (Arctic MX-6) every 2-3 years and replacing degraded thermal pads reduce temperatures by 5-15°C. Modern GPUs (RTX 40/50 series, RX 7000/8000 series) safely operate at 80-83°C under load, with thermal throttling starting at 87-92°C depending on model. Focus cooling efforts on maintaining temperatures below 80°C for optimal boost clocks and component longevity.
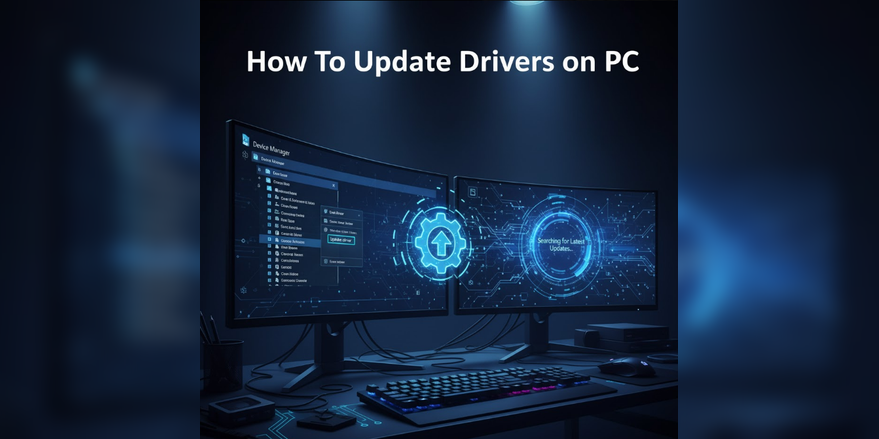
Understanding GPU Temperatures in 2026
What temperatures are normal?
Modern GPUs operate within specific temperature ranges based on workload and cooling solution:
- Idle: 30-45°C (air cooling), 25-35°C (liquid cooling)
- Light gaming (esports titles, older games): 55-65°C
- Heavy gaming (AAA titles, 1440p/4K): 70-80°C
- Stress testing (Furmark, mining): 75-85°C
- Thermal throttling threshold: 83-92°C (varies by manufacturer)
- Critical shutdown: 95-110°C (emergency protection)
Air cooling maintains most GPUs at 70-78°C under gaming loads. Liquid cooling (custom loops) keeps temperatures at 60-70°C even when overclocked. Immersion cooling (enterprise/data center) holds GPUs under 65°C but requires specialized infrastructure.
Why GPUs run hot
Graphics cards generate enormous heat due to:
High power consumption: RTX 5090 consumes up to 500W+, RTX 4090 up to 450W, RTX 4080 up to 320W, RX 8900 XTX up to 400W, RX 7900 XTX up to 355W. This energy converts directly to heat requiring efficient dissipation.
Dense transistor packing: Modern GPUs pack 92+ billion transistors (RTX 5090) into compact dies, creating extreme power density—hundreds of watts per square centimeter. This concentrated heat challenges cooling solutions more than larger, lower-density chips.
Boost clock behavior: GPUs dynamically boost clock speeds until hitting temperature, power, or voltage limits. A GPU at 75°C boosts higher than the same GPU at 85°C, incentivizing better cooling for performance gains beyond just longevity.
Inadequate case airflow: Many gaming PCs prioritize aesthetics (tempered glass panels, RGB lighting) over airflow, trapping hot air around GPUs. Restricted airflow forces GPUs to work harder, increasing fan speeds and temperatures.
Pro Tip: “Before attempting hardware modifications like repasting or buying aftermarket coolers, exhaust case air quality first. Open your case’s side panel and run the same workload that causes high temps. If GPU temperature drops 8-10°C+ with the panel off, your case airflow is the bottleneck—not your GPU cooler. Invest in case fans or a better-ventilated case before spending money on thermal paste or coolers.”
Method 1: Improve Case Airflow (Easiest, Most Effective)
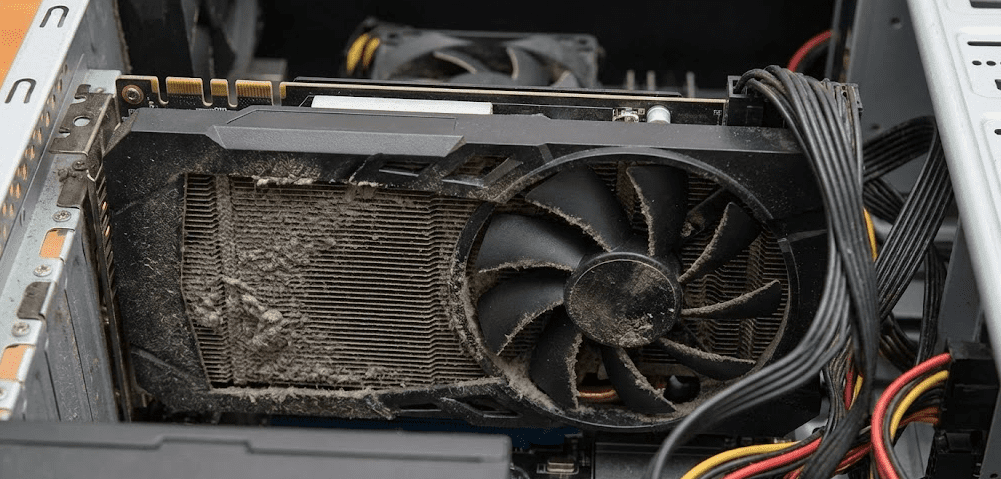
Poor case airflow is the #1 cause of high GPU temperatures. Hot air trapped around your GPU prevents the cooler from functioning properly regardless of how good it is.
Step 1: Assess current airflow
Open your case and identify fan positions:
- Front/bottom fans: Should intake fresh air (pull air into case)
- Top/rear fans: Should exhaust hot air (push air out of case)
- Positive pressure: Slightly more intake than exhaust prevents dust buildup
- Negative pressure: More exhaust than intake pulls air through gaps (dustier but cools better)
Step 2: Add intake fans
Most cases support 2-3 front intake fans (120mm or 140mm). If you only have 1 front fan or none, add more:
- Budget option: Arctic P12/P14 PWM ($8-12 each, excellent airflow-to-noise ratio)
- Premium option: Noctua NF-A12x25 ($35-40 each, whisper-quiet with maximum airflow)
- RGB option: Corsair iCUE QL120/140 ($25-35 each, aesthetics with decent performance)
Mount fans with arrows pointing inward (pulling fresh air into the case). Connect to motherboard fan headers or a fan hub.
Step 3: Add exhaust fans
Install 1-2 exhaust fans at the rear or top of your case:
- Rear exhaust: Essential—every case needs at least one 120mm rear exhaust
- Top exhaust: Optional but helpful for expelling GPU heat rising naturally
Configure exhaust fans to ramp speed based on GPU temperature (available in BIOS or fan control software like Fan Control).
Step 4: Remove airflow obstructions
- Remove drive cages: If unused, remove HDD cages blocking front intake airflow
- Cable management: Route cables behind the motherboard tray, not in front of GPU/fans
- Dust filters: Clean dust filters monthly—clogged filters block 30-50% of airflow
Expected temperature drop: 5-12°C depending on how restricted your case was initially. This is the highest ROI cooling improvement—$20-40 in fans often outperforms $100+ GPU cooler upgrades.
Method 2: Create Custom Fan Curve (Free, Immediate Impact)
GPU manufacturers set conservative fan curves prioritizing silence over cooling. Creating an aggressive custom curve improves temperatures without hardware modifications.
Step 1: Download MSI Afterburner
MSI Afterburner works with all GPU brands (NVIDIA, AMD), not just MSI cards. Download from msi.com/Landing/afterburner and install. It includes RivaTuner Statistics Server for on-screen monitoring.
Step 2: Enable manual fan control
- Launch MSI Afterburner
- Click the gear icon (Settings)
- Navigate to the “Fan” tab
- Check “Enable user-defined software automatic fan control”
- You’ll see a graph with temperature (horizontal axis) and fan speed percentage (vertical axis)
Step 3: Adjust the fan curve
The default curve keeps fans at 30-40% until 60°C, ramping to 70-80% only at 80°C+. Create a more aggressive curve:
Recommended custom curve:
- 30°C: 40% fan speed (quiet when idle)
- 50°C: 50% fan speed
- 60°C: 60% fan speed
- 70°C: 75% fan speed (aggressive ramp for gaming)
- 80°C: 90% fan speed
- 85°C: 100% fan speed (emergency cooling)
Click and drag the curve points to match these values. The curve should be steeper than stock, ramping fan speed earlier to prevent temperature buildup.
Step 4: Apply and test
Click “Apply” and the checkmark button. Enable “Apply overclocking at system startup” in settings so your curve loads automatically. Test with a demanding game or benchmark (3DMark, Heaven Benchmark) and monitor temperatures with HWiNFO or GPU-Z.
Expected temperature drop: 5-10°C compared to stock fan curves. Trade-off: increased fan noise, but modern GPUs remain quiet at 60-70% fan speeds.
Method 3: Undervolt Your GPU (Advanced, No Performance Loss)
Undervolting reduces GPU voltage while maintaining clock speeds, lowering power consumption and heat without sacrificing performance. Modern GPUs ship with excess voltage for manufacturing variance—most can run 50-100mV lower.
Step 1: Prepare tools and baseline
- Install MSI Afterburner (same tool as fan curves)
- Run a benchmark (3DMark Time Spy, Unigine Superposition) and note your stock performance score and temperatures
- Ensure your system is stable at stock settings before undervolting
Step 2: Open the voltage/frequency curve editor
In MSI Afterburner, press Ctrl + F to open the curve editor. You’ll see a graph showing voltage (horizontal axis) and core clock frequency (vertical axis).
Step 3: Identify your target voltage and frequency
Run a demanding game or benchmark while monitoring with HWiNFO. Note:
- Maximum frequency achieved (e.g., 2700MHz)
- Voltage at that frequency (e.g., 1.050V)
Your goal is to run the same frequency at lower voltage (e.g., 2700MHz at 0.975V instead of 1.050V).
Step 4: Apply the undervolt
In the curve editor:
- Find the voltage point corresponding to your target (e.g., 975mV on horizontal axis)
- Drag that point upward to your desired frequency (e.g., 2700MHz on vertical axis)
- Select all points to the right of your chosen voltage
- Press Delete to flatten the curve (ensures GPU won’t boost higher with more voltage)
- Click the checkmark to apply
Step 5: Stress test for stability
Run stress tests to verify stability:
- 3DMark Time Spy (15-minute stress test loop)
- Heaven Benchmark (30 minutes looped)
- Play demanding games for 2-3 hours
Watch for:
- Artifacts (visual glitches, flickering): Undervolt is too aggressive, increase voltage by 12-25mV
- Crashes or black screens: Increase voltage by 25-50mV
- Driver resets: Increase voltage or reduce target frequency
Step 6: Fine-tune and save
Once stable, save your profile (floppy disk icon) as “Undervolt Gaming” or similar. Enable “Apply overclocking at system startup” so it loads automatically.
Expected results:
- Temperature drop: 8-15°C under load
- Power consumption reduction: 50-100W (RTX 5090/4090), 40-70W (RTX 4080/RX 8900 XTX)
- Performance impact: 0-2% (usually within margin of error)
- Noise reduction: Significant due to lower fan speeds from reduced heat
Method 4: Repaste GPU and Replace Thermal Pads (Moderate Difficulty)
Thermal paste degrades over 2-3 years, especially under sustained high temperatures. Replacing it can restore factory-fresh cooling performance or improve beyond it with premium compounds.
When to repaste
- GPU is 2+ years old with increasing temperatures over time
- Hotspot temperature (Tj Max) is 15-20°C higher than average GPU temp
- You’ve exhausted software/airflow improvements but temps remain high
- You bought a used GPU and don’t know thermal paste age
Tools and materials needed
- Small Phillips screwdrivers (typically PH0 or PH1)
- Isopropyl alcohol (90%+ concentration) and lint-free wipes/coffee filters
- Phase Change Material (Best Option): Honeywell PTM7950 ($15-20). This industrial material comes as a solid pad, is easier to apply than paste, and resists “pump-out” effect better than liquid pastes, lasting 3-5+ years. Especially critical for direct-die GPUs (RTX 4090/5090) where traditional paste degrades in 6-12 months.
- Budget thermal paste alternative: Arctic MX-6 ($8-12), Noctua NT-H2 ($8-10). Avoid Thermal Grizzly Kryonaut for GPUs that exceed 80°C—it degrades rapidly at sustained high temperatures.
- Thermal pads (if replacing): Measure original thickness (typically 1mm, 1.5mm, 2mm) with calipers; buy Gelid GP-Extreme or Thermalright Odyssey pads
- Anti-static wrist strap (optional but recommended)
- 1-2 hours of time
Step-by-step repaste procedure
Step 1: Remove GPU from system
Power down PC, unplug power cable, press power button 5-10 times to discharge capacitors. Remove PCIe power cables from GPU, unscrew bracket screws, release PCIe slot latch, and gently remove GPU.
Step 2: Remove GPU shroud and cooler
Place GPU on a clean, soft surface (anti-static mat or towel). Remove screws around the perimeter of the PCB (typically 8-12 screws). Some screws may be hidden under warranty stickers—removing these voids warranty.
Gently lift the cooler away from the PCB. Important: If it resists, don’t force it. Old thermal paste can act like glue. Gently twist while pulling upward, or run a stress test to warm the GPU first (makes paste easier to separate).
Step 3: Clean old thermal paste
Apply isopropyl alcohol to a lint-free wipe or coffee filter. Gently wipe the GPU die and cooler contact surface until all old paste is removed. The GPU die should be shiny bare silicon, the cooler should be shiny copper/nickel.
For PTM7950: The old PTM7950 pad will peel off cleanly once warmed. Remove any residue with isopropyl alcohol.
Caution: Don’t touch the GPU die itself with fingers or apply excessive pressure. Don’t let isopropyl alcohol drip onto electrical components.
Step 4: Inspect and replace thermal pads (if needed)
Check thermal pads on VRAM chips and VRM components. If they’re:
- Crushed or torn: Replace with new pads of identical thickness
- Hardened or dried out: Replace with new pads
- Soft and intact: Can reuse, but replacement improves cooling
Measure original pad thickness with calipers before removal. Apply new pads to VRAM and VRM, ensuring complete coverage without overlapping onto adjacent components.
Step 5: Apply new thermal interface material
For PTM7950 (recommended):
- Cut the PTM7950 pad to match GPU die size (it comes in sheets)
- Remove protective film from one side
- Center the pad on the GPU die
- Remove protective film from the other side
- The pad will feel solid/rubbery—this is normal. It melts at 45°C during first use.
For traditional paste (Arctic MX-6):
Apply a small amount (rice grain to small pea size) to the center of the GPU die. Less is more—the mounting pressure spreads paste evenly. Too much paste can spill over onto the PCB (messy but not dangerous).
Step 6: Reassemble GPU cooler
Carefully align the cooler with the PCB mounting holes. Start all screws finger-tight before fully tightening any. Tighten in a cross pattern (like car lug nuts) to ensure even pressure. Don’t overtighten—firm resistance is sufficient.
Reattach the shroud/backplate with remaining screws. Reconnect any fan cables to the PCB.
Step 7: Reinstall and test
Reinstall GPU in PCIe slot, connect power cables, boot system. Run benchmarks and monitor temperatures.
For PTM7950: Initial temperatures may be similar or slightly higher than stock. After 2-3 thermal cycles (heating to 70°C+ and cooling), PTM7950 fully phases and performance improves, typically showing 3-8°C improvement over stock paste.
Expected temperature drop: 5-15°C depending on age and condition of original paste. PTM7950 on a RTX 4090/5090 prevents the “pump-out” degradation that causes traditional paste to fail within months on these high-pressure direct-die designs.
Method 5: The Deshroud Mod (Advanced DIY Cooling)
Instead of buying rare and expensive aftermarket coolers incompatible with modern GPUs, the deshroud mod repurposes your GPU’s existing heatsink with better fans.
What is deshrouding?
Deshrouding involves removing your GPU’s plastic shroud and stock fans while keeping the metal heatsink, then attaching high-performance 120mm case fans directly to the heatsink using zip ties or custom mounts. This provides better airflow, lower noise, and improved cooling.
When to consider deshrouding
- Your GPU runs hot (80°C+) despite good case airflow
- Stock GPU fans are loud or worn out
- You want quieter operation with better cooling
- You’ve exhausted software solutions (fan curves, undervolting)
- Your case has good airflow to feed the deshrouded GPU
Required materials
- 2× high-performance 120mm fans: Noctua NF-A12x25 ($35-40 each), Arctic P12 PWM ($8-12 each), or Phanteks T30 ($30-35 each)
- Zip ties or 3D-printed fan mounts
- Small Phillips screwdrivers
- Fan splitter cable (if needed to power both fans from one GPU header)
Step-by-step deshroud procedure
Step 1: Remove GPU and disassemble shroud
Follow the same GPU removal and disassembly steps as repasting (Method 4). Remove the plastic shroud and disconnect stock fans from the PCB. Keep the metal heatsink and backplate attached to the GPU.
Step 2: Test fit 120mm fans
Place two 120mm fans on top of the heatsink to verify they cover most of the fin area. The fans should overlap the heatsink significantly—gaps reduce cooling efficiency.
Step 3: Attach fans with zip ties
Thread zip ties through the fan mounting holes and around the heatsink fins. Tighten until fans are secure but not deforming. Use 4-6 zip ties per fan for stability.
Alternative: 3D print custom fan mounts specific to your GPU model (search Thingiverse or Printables for “[GPU model] deshroud mount”).
Step 4: Connect fans to power
Option A: Connect both fans to the GPU’s fan header using a splitter cable. The fans will ramp with GPU temperature automatically.
Option B: Connect fans to motherboard fan headers and configure fan curves in BIOS based on GPU temperature (requires motherboard support for GPU temperature monitoring).
Option A is simpler and ensures fans respond to GPU temperature directly.
Step 5: Reinstall and test
Reinstall the GPU with deshrouded setup. The heatsink will be exposed without the shroud—this is normal. Boot system and monitor temperatures.
Expected results:
- Temperature drop: 10-15°C due to better fans and improved airflow
- Noise reduction: 5-15 dBA quieter depending on fan choice (Noctua fans are whisper-quiet)
- Trade-offs: Exposed heatsink looks less polished, deshroud voids warranty, requires case with adequate airflow
Who should deshroud: Enthusiasts comfortable with DIY modifications, users with hot-running GPUs in well-ventilated cases, users prioritizing silence and cooling over aesthetics.
Who should avoid: Users unwilling to void warranty, cases with poor airflow (deshrouding requires fresh air supply), users uncomfortable with custom modifications.
GPU Cooling Methods Comparison
| Method | Difficulty | Cost | Temp Reduction | Noise Impact | Warranty Risk |
|---|---|---|---|---|---|
| Improve case airflow | Easy | $20-60 | 5-12°C | Minimal increase | None |
| Custom fan curve | Easy | Free | 5-10°C | Moderate increase | None |
| Undervolting | Moderate | Free | 8-15°C | Decrease (lower heat = slower fans) | None |
| Repaste (PTM7950) | Moderate | $15-40 | 5-15°C | Decrease (better cooling = slower fans) | Voids warranty |
| Deshroud mod | Hard | $20-80 | 10-15°C | Significant decrease | Voids warranty |
| Liquid cooling (custom) | Very Hard | $300-600+ | 15-25°C | Significant decrease | Voids warranty |
Temperature reductions are cumulative—combining methods yields best results. Example: Case airflow (8°C) + custom curve (7°C) + undervolt (12°C) = 27°C total reduction.
Common GPU Cooling Mistakes to Avoid
Mistake 1: Maxing out fan speed constantly
Running fans at 100% 24/7 wears bearings and creates unbearable noise without proportional cooling gains. Fan speed above 80% shows diminishing returns—60-75% is the sweet spot for most users.
Mistake 2: Ignoring case airflow while buying expensive coolers
A deshroud mod or custom loop in a case with poor airflow delivers worse results than stock cooling in a well-ventilated case. Always address airflow first.
Mistake 3: Using degraded thermal paste on high-power GPUs
Traditional thermal paste suffers from “pump-out” effect on direct-die GPUs like RTX 4090/5090, where mounting pressure squeezes paste out over months. Use PTM7950 phase change material for long-term stability on these cards.
Mistake 4: Mixing thermal pad thicknesses
Using 2mm pads where 1mm pads should go creates uneven cooler pressure, potentially leaving the GPU die without proper contact. Always measure and match original pad thickness.
Mistake 5: Repasting without improving airflow
Fresh thermal paste in a poorly-ventilated case yields minimal improvement. The paste can only transfer heat to the cooler—if hot air surrounds the cooler, temperatures remain high regardless of paste quality.
Mistake 6: Extreme undervolts without stress testing
Pushing undervolts too aggressively causes crashes during gaming, corrupting save files or mid-match disconnects. Always stress test for 2-3 hours minimum before considering an undervolt stable.
Mistake 7: Deshrouding in cases with poor airflow
Deshrouding removes the shroud that directs airflow through the heatsink. In cases with weak intake airflow, deshrouded GPUs can run hotter than stock despite better fans. Verify case has strong front intake before deshrouding.
FAQ: GPU Cooling
What GPU temperature is too high?
Sustained temperatures above 85°C indicate cooling issues. Modern GPUs throttle at 87-92°C to protect components. While GPUs can technically survive up to 95-110°C, running at these temperatures degrades lifespan and reduces performance due to thermal throttling.
Does undervolting reduce GPU lifespan?
No, undervolting extends lifespan by reducing heat and electrical stress. It’s the opposite of overclocking—you’re running the GPU within safer parameters than manufacturer defaults. The only risk is instability if undervolted too aggressively.
How often should I replace GPU thermal paste?
Traditional paste: Every 2-3 years for optimal performance. PTM7950 phase change material: 3-5+ years with no degradation. For high-power GPUs (RTX 4090/5090), PTM7950 is essential—traditional paste degrades in 6-12 months due to pump-out effect.
Will better cooling improve FPS?
Yes, indirectly. GPUs boost clock speeds based on temperature headroom. A GPU at 70°C boosts higher than the same GPU at 85°C. Improved cooling can gain 3-8% FPS in games by allowing higher sustained boost clocks.
Can I use CPU thermal paste on GPU?
Yes, thermal paste is thermal paste—CPU and GPU pastes are identical. However, for RTX 4090/5090 and other high-power direct-die GPUs, use PTM7950 instead of traditional paste to avoid pump-out degradation.
Is vertical GPU mounting bad for temperatures?
It depends on case design. Vertical mounts in cases without proper ventilation choke GPU intake fans against glass panels, increasing temps by 8-15°C. Vertical mounts with proper spacing (3-4 inches from side panel) show minimal temperature difference.
Do GPU backplates help cooling?
Minimally. Backplates are primarily aesthetic and structural. Some premium backplates with thermal pads contacting backside components provide 1-3°C improvement, but most are decorative. Don’t expect meaningful cooling gains from backplates alone.
Should I set a frame rate limit to reduce GPU temperature?
Yes, capping FPS to your monitor’s refresh rate (144fps for 144Hz monitors, 60fps for 60Hz) prevents wasted GPU work rendering frames you can’t see. This reduces GPU load, temperatures, and power consumption by 10-30% depending on how much headroom your GPU has.
The Bottom Line: Layered Cooling Approach
GPU cooling isn’t a single solution—it’s a layered approach combining multiple strategies. Start with the easiest, highest-impact methods (case airflow, custom fan curves, undervolting) before considering hardware modifications. Most users achieve comfortable temperatures (70-75°C under load) through these free or low-cost methods without touching thermal paste or performing deshroud mods.
Repasting makes sense for GPUs 2+ years old showing degraded thermal performance, with PTM7950 phase change material now the gold standard replacing traditional pastes. The pump-out resistance is especially critical for RTX 4090/5090 owners where traditional paste fails within months. If your new GPU hits 85°C+ with good case airflow and aggressive fan curves, the issue is likely case ventilation—not thermal paste.
Undervolting deserves special emphasis as the single most effective cooling method that also reduces power consumption and noise. The 10-15°C temperature drops and 50-100W power reductions come with zero performance loss once properly tuned. Spend an hour learning undervolting before spending money on hardware modifications.
The deshroud mod represents the best DIY aftermarket cooling solution for 2026, replacing obsolete products like the Kraken G12 that don’t support modern GPUs. With $20-80 in quality 120mm fans, deshrouding delivers 10-15°C improvements and dramatic noise reductions, though it requires good case airflow and voids warranty.