You can connect both PS4 and PS5 controllers to your PC through three main methods: USB cable (plug and play), Bluetooth wireless connection, or using Steam’s built-in controller support. The USB method is the quickest, while Bluetooth offers wireless freedom, and each method takes less than 5 minutes to set up. However, depending on your gaming platform and specific needs, one method might work better than the others.
After testing dozens of controller setups over the years, I’ve found that choosing the right connection method can make or break your gaming experience on PC. Let’s dive into each method so you can pick what works best for your setup.
Why Use PlayStation Controllers on PC?
PlayStation controllers have become incredibly popular among PC gamers, and for good reason. The DualShock 4 and DualSense controllers offer excellent ergonomics, responsive buttons, and unique features like touchpads and gyroscopic controls that many PC games now support.
Modern games are increasingly optimized for PlayStation controllers on PC. Many titles display the correct PlayStation button prompts, and platforms like Steam have built-in support that recognizes these controllers instantly. The DualSense controller takes things even further with haptic feedback and adaptive triggers that work in compatible PC games.
I’ve personally switched between Xbox and PlayStation controllers for years, and while Xbox controllers have native Windows support, PlayStation controllers offer features that make them worth the extra setup step. The touchpad alone can function as a mouse, which is incredibly handy when navigating menus without reaching for your actual mouse.
Method 1: Connect PS4 Controller to PC via USB Cable
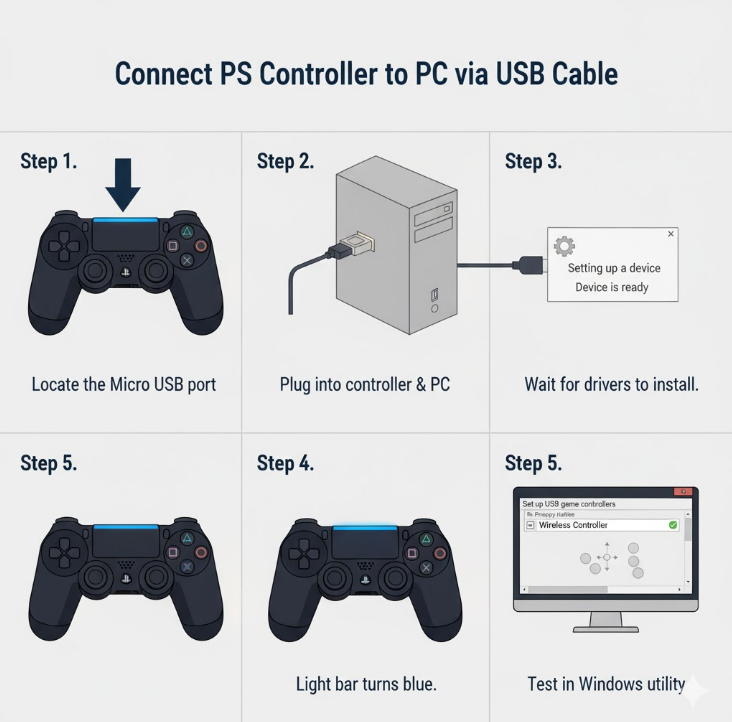
The USB connection method is the most straightforward way to connect your PS4 DualShock 4 controller to your PC. This wired connection provides zero latency and doesn’t require any additional software for basic functionality in most modern games.
What You’ll Need
Before starting, make sure you have a compatible USB cable. The PS4 controller uses a Micro USB port, so you’ll need a Micro USB to USB-A cable (or USB-C if your PC only has USB-C ports). Most smartphone charging cables will work perfectly for this.
Step-by-Step USB Connection Process
Step 1: Take your Micro USB cable and locate the charging port on the top of your PS4 controller, between the L2 and R2 buttons.
Step 2: Plug the Micro USB end into your controller and the USB-A end into any available USB port on your PC.
Step 3: Wait for Windows to automatically detect and install the necessary drivers. You’ll see a notification in the bottom-right corner when the controller is ready.
Step 4: The light bar on your controller will illuminate, indicating a successful connection.
Step 5: Test your controller by opening the “Set up USB game controllers” utility in Windows (search for it in the Start menu) and verify all buttons are responding correctly.
While testing controller connections, I’ve found that using the original Sony USB cable or a high-quality third-party cable makes a significant difference in connection stability. Cheap cables can cause intermittent disconnections during intense gaming sessions.
Method 2: Connect PS5 Controller to PC via USB Cable
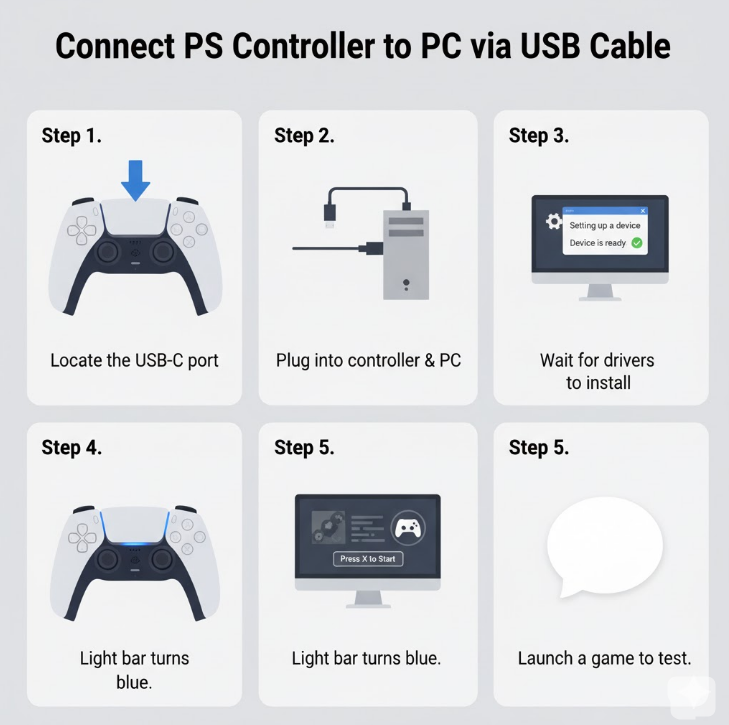
The PS5 DualSense controller uses a more modern USB-C port, making the wired connection even simpler than the PS4 controller. USB-C cables are becoming standard, so you might already have several lying around.
Required Equipment
You’ll need a USB-C to USB-A cable (or USB-C to USB-C if your PC has USB-C ports). The DualSense controller typically comes with a suitable cable, but any quality USB-C cable will work.
DualSense USB Connection Steps
Step 1: Locate the USB-C port at the top of your DualSense controller, centered between the L1 and R1 buttons.
Step 2: Connect the USB-C end to your controller and the other end to your PC’s USB port.
Step 3: Windows 10 and Windows 11 will automatically recognize the DualSense controller and install the appropriate drivers within seconds.
Step 4: The controller’s light bar will display a solid color, confirming the connection is active.
Step 5: Launch any game with controller support to verify everything works correctly.
The DualSense controller has excellent native support in Windows 10 and 11. Unlike older controllers that required third-party software, the DualSense works right out of the box for most applications.
Method 3: Connect PS4 Controller to PC via Bluetooth
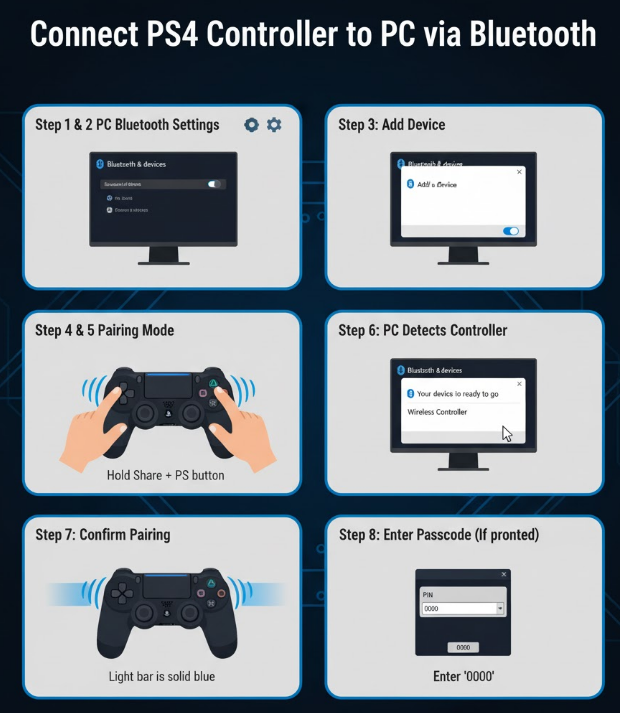
Wireless connectivity gives you freedom of movement and eliminates cable clutter on your desk. Connecting a PS4 controller via Bluetooth is slightly more involved than USB but still remarkably straightforward.
Bluetooth Requirements
Your PC needs a Bluetooth adapter to use this method. Most modern laptops have Bluetooth built-in, but desktop PCs might require a USB Bluetooth dongle. Make sure Bluetooth is enabled before attempting to pair your controller.
Wireless Pairing Process for PS4 Controller
Step 1: On your PC, click the Start button and go to Settings > Devices > Bluetooth & other devices.
Step 2: Toggle Bluetooth to “On” if it’s not already enabled.
Step 3: Click “Add Bluetooth or other device” and select “Bluetooth” from the options.
Step 4: On your PS4 controller, press and hold both the PlayStation button (center) and the Share button (to the left of the touchpad) simultaneously for about 3 seconds.
Step 5: The light bar on your controller will start flashing rapidly, indicating it’s in pairing mode.
Step 6: Your PC will detect “Wireless Controller” in the available devices list. Click on it to pair.
Step 7: Windows will confirm the pairing. The controller’s light bar will stop flashing and remain solid, indicating a successful connection.
Your PS4 controller is now wirelessly connected. The controller will automatically reconnect when you press the PlayStation button, as long as Bluetooth is enabled on your PC. Note that Windows 10 and 11 typically pair PlayStation controllers automatically without requiring a PIN code.
Your PS4 controller is now wirelessly connected. The controller will automatically reconnect when you press the PlayStation button, as long as Bluetooth is enabled on your PC.
For additional connection guidance, you can check PlayStation’s official support page.
Method 4: Connect PS5 Controller to PC via Bluetooth
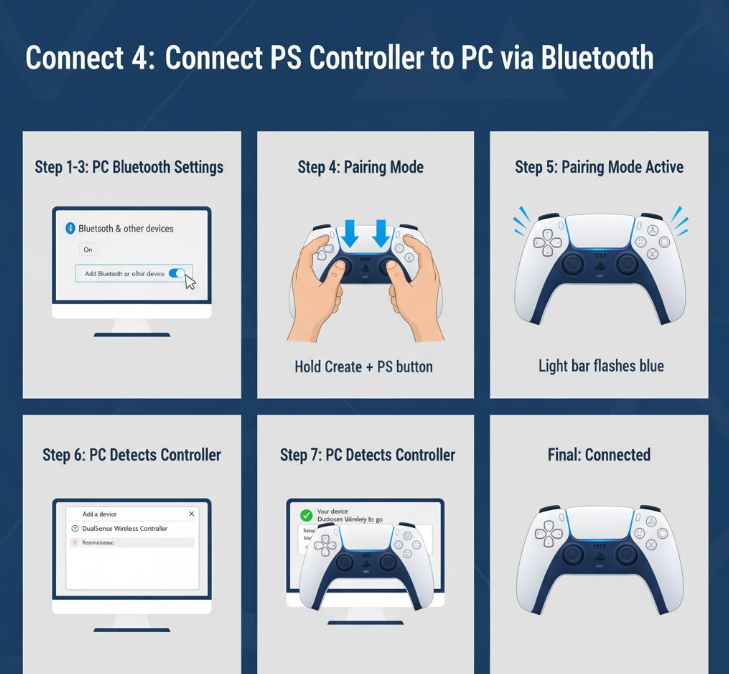
The DualSense controller’s Bluetooth pairing process is nearly identical to the PS4 controller, with only minor differences in button combinations.
Preparing for Wireless Connection
Ensure your PC’s Bluetooth is turned on and functioning properly. The DualSense has excellent wireless range, but keeping your PC within 10-15 feet ensures the best connection stability.
DualSense Bluetooth Pairing Steps
Step 1: Navigate to Settings > Devices > Bluetooth & other devices on your Windows PC.
Step 2: Verify Bluetooth is enabled, then select “Add Bluetooth or other device.”
Step 3: Choose “Bluetooth” from the device type options.
Step 4: On your DualSense controller, simultaneously press and hold the PlayStation button (center) and the Create button (to the left of the touchpad, previously called Share) for approximately 3 seconds.
Step 5: Watch for the light bar around the touchpad to flash blue rapidly, confirming pairing mode is active.
Step 6: Select “DualSense Wireless Controller” when it appears in your PC’s device list.
Step 7: Windows will pair the controller and confirm the connection. The flashing will stop, and the light bar will display a solid color.
The DualSense maintains its Bluetooth connection even after your PC goes to sleep. Simply press the PlayStation button to wake the controller and resume your gaming session.
Using DS4Windows for Enhanced Compatibility
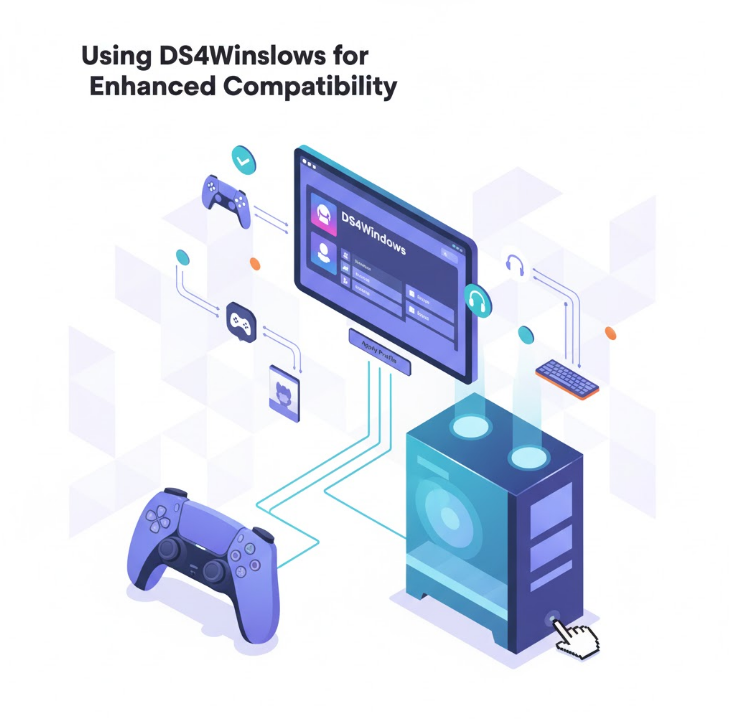
While modern Windows versions support PlayStation controllers natively, some older games only recognize Xbox controllers. DS4Windows is free software that tricks your PC into thinking your PlayStation controller is an Xbox 360 controller, ensuring compatibility with virtually every PC game.
Why You Might Need DS4Windows
Certain games, especially older titles released before 2020, were designed exclusively with Xbox controllers in mind. These games won’t recognize PlayStation controllers without additional software. DS4Windows bridges this compatibility gap and adds powerful customization options.
Installing and Setting Up DS4Windows
Step 1: Download the Microsoft .NET 8.0 Desktop Runtime from Microsoft’s official website if you don’t already have it installed.
Step 2: Visit the official DS4Windows GitHub page and download the latest x64 package (either the .zip or .7z file).
Step 3: Extract the downloaded file to an easily accessible location like your Desktop or Documents folder. Avoid extracting to Program Files, as this can cause permission issues.
Step 4: Run the DS4Windows.exe file. On first launch, you’ll choose where to save settings (AppData folder is recommended).
Step 5: When prompted, select which controllers you want DS4Windows to support (check DualShock 4 and/or DualSense).
Step 6: Click “Install ViGEmBus Driver” and follow the installation wizard. This driver allows DS4Windows to create a virtual Xbox controller.
Step 7: Click “Install HidHide Driver” and complete that installation. This optional but recommended driver prevents the “double controller” issue where games detect both your real PlayStation controller and the virtual Xbox controller.
Step 8: Connect your PlayStation controller using either USB or Bluetooth (follow the methods described earlier).
Step 9: Your controller should appear in the Controllers tab within DS4Windows. Wait for Windows to confirm it has connected a new Xbox 360 controller.
DS4Windows offers extensive customization options. You can remap buttons, adjust analog stick sensitivity, program the touchpad, change the light bar color, and create different profiles for different games.
In my experience testing various controller software, DS4Windows remains the gold standard for PlayStation controller compatibility on PC. It’s actively maintained, completely free, and offers more features than any alternative I’ve tried.
Configuring PlayStation Controllers in Steam
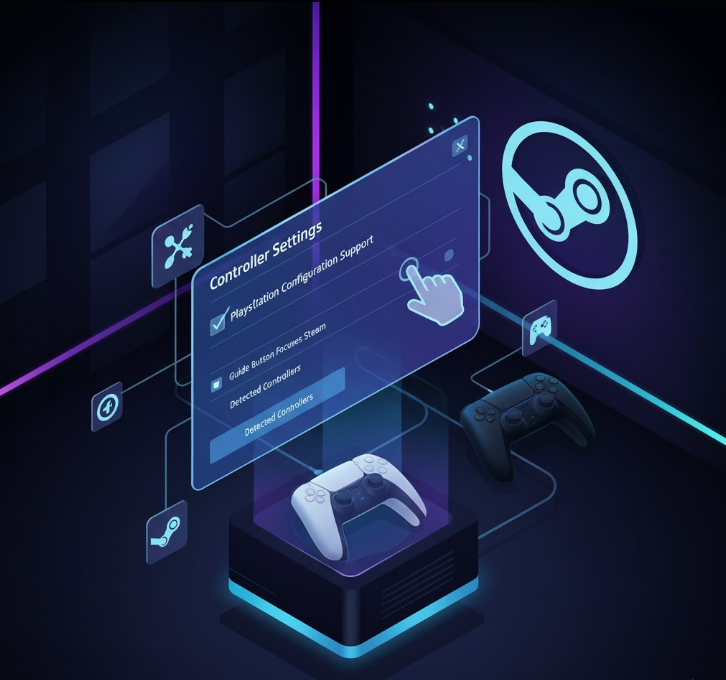
Steam has built-in support for PlayStation controllers, making it the easiest platform for using your DualShock 4 or DualSense without additional software. Steam’s controller configuration is incredibly powerful and works with thousands of games.
Enabling PlayStation Controller Support in Steam
Step 1: Open the Steam application on your PC.
Step 2: Click “Steam” in the top-left corner, then select “Settings” from the dropdown menu.
Step 3: In the Settings window, select “Controller” from the left sidebar.
Step 4: Click “General Controller Settings” to access the controller configuration menu.
Step 5: Connect your PlayStation controller using either USB or Bluetooth.
Step 6: Check the box next to “PlayStation Configuration Support” to enable full functionality.
Step 7: (Optional) Also check “Generic Gamepad Configuration Support” for broader compatibility.
Your PlayStation controller is now fully configured for Steam. The platform will display correct PlayStation button prompts in supported games, and you can access Steam’s powerful remapping features.
This video provides a visual demonstration of the Steam controller setup process
Customizing Your Controller in Steam
Steam’s controller customization deserves special attention because it’s far more advanced than most gamers realize. Navigate back to the Controller menu and select either “Big Picture Configuration” or “Desktop Configuration” to access these features.
You can remap every button and adjust thumbstick sensitivity curves. The touchpad can function as a mouse, virtual menu, or additional buttons. The gyroscope can control camera movement, offering motion controls similar to the Nintendo Switch. Steam even lets you adjust the light bar color and vibration intensity.
These settings apply globally or per-game, giving you unprecedented control over your gaming experience. I recommend experimenting with gyro aiming in first-person shooters if you haven’t tried it before – it’s surprisingly precise once you get used to it.
Troubleshooting Common Connection Issues
Even with straightforward setup processes, you might occasionally encounter problems when connecting PlayStation controllers to your PC. Here are solutions to the most common issues.
Controller Not Detected
If your PC doesn’t recognize your controller, first verify you’re using a data-capable USB cable. Some cables are charge-only and won’t transmit data. Try a different cable or USB port to rule out hardware issues.
For Bluetooth connections, make sure your controller is actually in pairing mode (the light bar should flash rapidly). If it’s not flashing, the controller might be paired with another device. Reset the connection by using a small pin to press the reset button located in a small hole on the back of the controller near the L2 trigger.
Update your Bluetooth drivers through Device Manager if wireless connections fail repeatedly. Outdated Bluetooth drivers are a common culprit for pairing problems.
Games Not Recognizing Controller Input
When your controller connects successfully but games don’t respond to inputs, the issue usually involves driver conflicts or game-specific settings. If you’re using DS4Windows, make sure the HidHide driver is installed and configured correctly to prevent the double controller problem.
Some games require you to enable controller support in their settings menus. Check the game’s options under “Controls” or “Input” settings. For Steam games, verify that PlayStation Configuration Support is enabled in Steam’s controller settings.
Older games might need DS4Windows to function properly, even if newer games work fine with native Windows controller support.
Intermittent Disconnections
If your controller disconnects randomly during gameplay, several factors could be responsible. For wired connections, inspect your USB cable for damage and try a different USB port, preferably one directly on your motherboard rather than a front panel or hub.
Wireless disconnections often stem from interference or distance. Bluetooth signals can be disrupted by WiFi routers, wireless mice, and other Bluetooth devices. Try moving closer to your PC or relocating other wireless devices. Using the 5GHz WiFi band instead of 2.4GHz can reduce interference, as Bluetooth operates on 2.4GHz.
Your controller’s battery might also be critically low. Charge it fully and test again. The DualSense controller, in particular, can disconnect unexpectedly when battery levels drop below 10%.
Light Bar Not Working
If your controller’s light bar doesn’t illuminate or behaves strangely, this typically indicates a power delivery issue. When connected via USB, ensure you’re using a USB port that provides sufficient power. USB 3.0 ports (the blue ones) generally work better than USB 2.0.
In DS4Windows, you can manually control the light bar color and brightness. If the light bar won’t change colors, check DS4Windows settings to ensure you haven’t disabled this feature. For Bluetooth connections, some light bar functionality might be limited compared to USB connections.
Comparing Connection Methods
Each connection method has distinct advantages and drawbacks. Choosing the right one depends on your specific gaming setup and preferences.
| Connection Method | Latency | Setup Difficulty | Compatibility | Mobility | Battery Usage |
|---|---|---|---|---|---|
| USB (PS4/PS5) | None | Very Easy | Excellent | Limited | Charges while playing |
| Bluetooth (PS4) | 5-15ms | Easy | Very Good | Excellent | Drains battery |
| Bluetooth (PS5) | 5-15ms | Easy | Very Good | Excellent | Drains battery |
| Steam Support | None/Minimal | Easy | Good (Steam games only) | Depends on connection | Depends on connection |
| DS4Windows | None/Minimal | Moderate | Excellent | Depends on connection | Depends on connection |
USB connections offer the absolute best performance with zero input lag and no battery concerns since the controller charges while you play. The obvious downside is limited movement range due to the cable.
Bluetooth provides fantastic mobility and keeps your gaming space tidy without cables. Input lag typically ranges from 5-15 milliseconds on modern Bluetooth adapters, which is imperceptible for most gaming but can be noticeable in competitive play. Battery life becomes a consideration – the DualSense typically lasts 6-8 hours with haptic features enabled, or up to 10-12 hours with advanced features disabled.
Steam’s built-in support is ideal if you exclusively play Steam games. It requires no additional software and offers powerful customization. However, non-Steam games won’t benefit from this integration.
DS4Windows provides maximum compatibility and works with virtually any PC game. The initial setup takes a few extra minutes, but the customization options are unmatched.
Advanced Tips for Optimal Performance
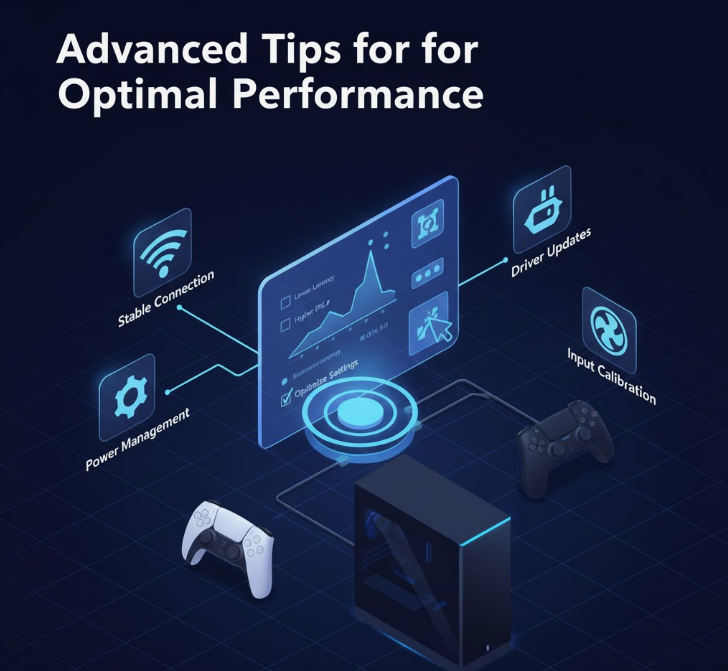
After you’ve successfully connected your controller, several tweaks can enhance your gaming experience even further.
Adjusting Deadzone Settings
Analog stick deadzones determine how much you need to move the stick before the game registers input. Over time, controllers develop slightly loose sticks that cause stick drift. Increasing the deadzone compensates for this wear and tear.
In DS4Windows, access the profile editor and select your controller. The deadzone settings appear in the analog stick configuration section. Start with small increases (5-10%) and test until stick drift disappears without making the controls feel unresponsive.
Steam offers similar deadzone adjustments in the controller configuration menu. The visual representation makes it easy to see how your changes affect stick behavior.
Optimizing Battery Life for Wireless Play
The DualSense controller’s impressive feature set comes at the cost of battery life. Reducing the light bar brightness significantly extends playtime. In DS4Windows, set the light bar to a dim, single color instead of vibrant or rainbow effects.
Disabling haptic feedback and adaptive triggers in games that overuse these features can add 2-3 hours of battery life. While these features are impressive, not every game implements them well, and constant vibration drains the battery quickly.
Consider keeping a long USB cable nearby for extended gaming sessions. You can switch to wired mode when the battery gets low without interrupting your gameplay.
Creating Game-Specific Profiles
Different games benefit from different controller configurations. Fast-paced shooters might need high stick sensitivity, while precision platformers work better with lower sensitivity.
Both DS4Windows and Steam allow you to create custom profiles that automatically activate when you launch specific games. Set up a profile for each of your favorite games with optimized button mappings and sensitivity curves.
For example, I have a racing game profile with reduced deadzone for precise steering, a fighting game profile with remapped buttons to match arcade layouts, and an FPS profile with gyro aiming enabled.
Final Thoughts on PlayStation Controllers and PC Gaming
Connecting PlayStation controllers to your PC opens up a world of comfortable, feature-rich gaming experiences. Whether you prefer the reliable DualShock 4 or the cutting-edge DualSense, both controllers work excellently with modern PCs.
The USB method remains my recommendation for most gamers who prioritize performance and don’t mind a cable. It’s instant, reliable, and keeps your controller charged. Bluetooth is perfect for couch gaming or when you need to sit farther from your PC.
Take the time to explore DS4Windows and Steam’s controller customization features. The ability to remap buttons, adjust sensitivity curves, and create game-specific profiles transforms your controller into a precisely tuned gaming tool. I’ve spent hours perfecting my controller profiles, and it’s made a noticeable difference in my gaming performance and comfort.
Remember that controller technology continues to evolve. Keep your Windows system updated, check for DS4Windows updates occasionally, and stay informed about new features as game developers add better PlayStation controller support to their titles.

