Skip to content
Pressure marks on a laptop screen are caused by physical force applied to the LCD or OLED panel, which temporarily or permanently displaces the liquid crystal layer. In some cases, you can reduce or remove them using gentle heat and soft circular massage with a microfiber cloth. However, whether they’re fixable depends entirely on the severity of the damage — and there are some important things you need to understand before you try anything, or you risk making the situation significantly worse.
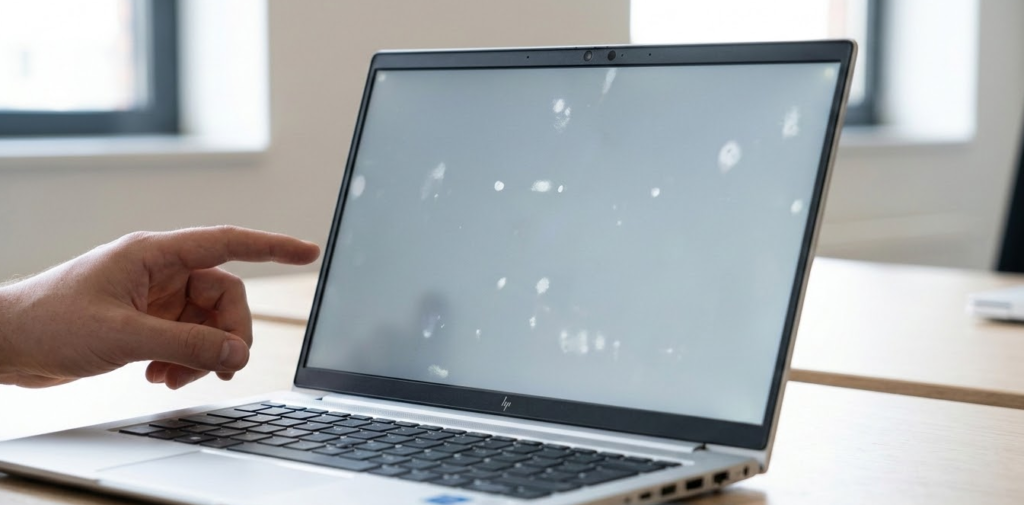
We’ve all been there. You open your laptop and notice a blotchy, discolored patch on the screen — maybe a faint white cloud, a dark bruise-like spot, or an unsettling rainbow shimmer sitting right in the middle of your display. It looks alarming, and the first instinct is usually to start poking at it, which is almost always the wrong move.
Pressure marks are one of the more frustrating laptop screen issues because they exist in a grey zone — sometimes they fade on their own, sometimes they respond to careful intervention, and sometimes they’re there for good. After years of testing and reviewing laptops and examining dozens of screen-related issues up close, I can tell you that the outcome really depends on what type of pressure mark you’re dealing with and how quickly you act.
This guide will walk you through everything: what pressure marks actually are, how to safely attempt to remove them, when to stop trying, and when it’s time to call in a professional or replace the screen entirely.
What Are Pressure Marks on a Laptop Screen?
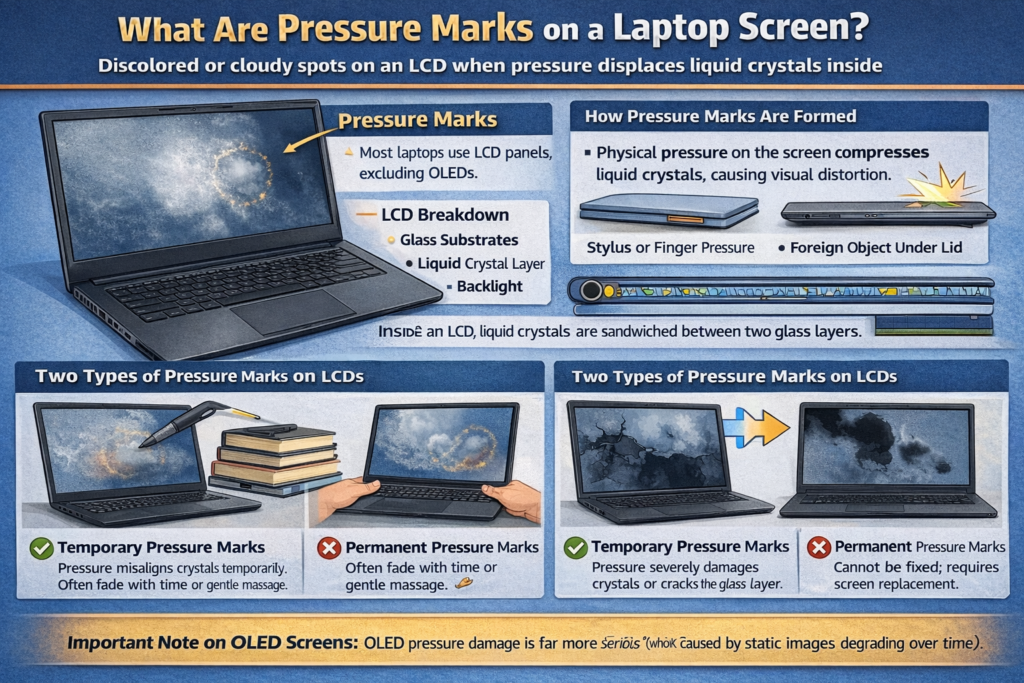
Pressure marks on a laptop screen are areas of visual distortion caused by physical force applied to the display panel, which compresses or displaces the liquid crystal layer inside an LCD screen, resulting in discolored, cloudy, or blotchy patches.
To understand why this happens, you need a quick look at how laptop screens work. Most laptop displays — excluding OLED panels — are LCD (Liquid Crystal Display) screens. Inside, there’s a very thin layer of liquid crystals sandwiched between two glass substrates. These crystals align and shift in response to electrical signals to produce the image you see.
When pressure is applied to the screen — from a stylus, a foreign object trapped under the lid, excessive squeezing, or even stacking heavy books on a closed laptop — the liquid crystals in that area get displaced or compressed. This disrupts their normal alignment and causes light to pass through incorrectly, which is what you see as a pressure mark.
There are two main types of pressure marks on LCD screens:
Temporary pressure marks occur when the crystals are pushed out of alignment but not permanently damaged. The crystals can sometimes migrate back to their correct position over time or with gentle encouragement. These are the ones you have the best chance of fixing.
Permanent pressure marks occur when the pressure was severe enough to crack the glass substrates, damage the backlight layer, or permanently destroy the liquid crystal alignment in that area. These cannot be repaired without replacing the screen panel itself.
A critical note on OLED screens: OLED laptop screens are a completely different situation, and the damage mechanism is far more serious. When physical pressure is applied to an OLED panel, it can break the microscopic vacuum encapsulation layer that protects the organic materials inside. Once oxygen and moisture breach that layer and come into contact with the organic LED elements, the affected pixels immediately begin to die. This appears as a pitch-black spot — often described by technicians as looking like spilled ink — that rapidly spreads across the screen over a period of days. This is sometimes referred to as “black bleed” or the “black bleed of death,” and it is not recoverable. If you see a spreading black ink-like patch on an OLED laptop screen, the panel is effectively dead and will only continue to worsen. There is no DIY fix. Skip directly to the professional repair or replacement section below.
This is also an important distinction to make clear: OLED pressure damage has nothing to do with “burn-in.” Burn-in is a completely separate phenomenon caused by static images being displayed for thousands of hours, slowly degrading the organic pixels over time. Pressure damage is an immediate, physical, structural failure of the encapsulation layer — not a gradual image retention issue. Confusing the two leads people to attempt the wrong interventions with damaging results.
How to Tell If Your Pressure Mark Is Temporary or Permanent
Before you attempt any fix, it’s worth doing a quick assessment. Jumping into a repair attempt without understanding what you’re dealing with is how minor damage becomes major damage.
Signs the pressure mark may be temporary:
- The mark appeared recently, within the last 24 to 48 hours
- The affected area looks like a faint, slightly blurry cloud or white patch
- There’s no visible crack or fracture in the glass
- The discoloration shifts slightly when you very gently flex the display area around it
- The screen otherwise functions normally — no dead pixels, no total blackout
Signs the pressure mark is likely permanent:
- You can see a visible crack or spiderweb fracture in the glass
- The mark has dark, black, or deep purple areas indicating backlight or substrate damage
- On an OLED screen, there is any black ink-like spot, no matter how small — this will spread
- The mark covers a large portion of the screen
- Part of the screen has gone completely black or shows no image
- The damage has been there for weeks or months without any change
If you see any signs of cracking, black spreading areas, or any ink-like dark patch on an OLED display, stop immediately. No DIY method will fix that, and attempting to apply heat or pressure to an already cracked or OLED-damaged screen will accelerate the damage. Professional replacement is the only path forward.
💡 Pro Tip: Take a photo of the pressure mark immediately after you notice it. Then take another photo 24 hours later without touching it. Sometimes pressure marks from minor incidents — like a pen cap trapped under the lid overnight — will reduce on their own within a day or two. Documenting it helps you track whether it’s improving or worsening, and it’s also useful evidence if the damage occurred under warranty conditions or if you need to make a case to the manufacturer about a design flaw. More on that below.
What You’ll Need Before You Start
If the mark shows signs of being temporary and there’s no cracking or OLED-specific dark spreading, here’s what to gather before attempting any fix:
- A clean, lint-free microfiber cloth (never paper towels or rough fabrics)
- A small, clean suction cup (the kind used for phone screen removals or car mounts)
- A hairdryer with a low-heat setting, or a warm laptop-safe heat source
- Isopropyl alcohol (90% or higher) — only for cleaning the exterior surface, never internally
- A well-lit workspace where you can clearly see the screen
- Patience — the process should always be slow and deliberate
How to Remove Pressure Marks From a Laptop Screen: Step-by-Step
Step 1: Power Off and Unplug the Laptop
Never attempt any screen intervention while the laptop is powered on. Shut it down completely and unplug it from power. If possible, let it sit for 15 to 20 minutes to cool down to room temperature before you start.
Step 2: Clean the Screen Surface
Using a dry microfiber cloth, gently wipe the screen to remove any dust, fingerprints, or debris from the surface. Don’t apply any pressure yet — this is just a surface clean. Make sure the screen exterior is clean and clear so you can see the damage accurately.
Step 3: Assess the Damage in Good Lighting
Open the laptop, turn on a solid white or light grey background on the screen (or hold it up to a well-lit window), and examine the pressure mark carefully. Confirm there’s no cracking. Note the exact size, shape, and location of the mark. If you have an OLED display, check carefully for any dark spreading patches — if present, stop here and proceed to the professional repair section.
Step 4: Apply Gentle Warmth
This is where many guides skip important nuance, so pay attention. Gentle, controlled warmth can help liquid crystals become slightly more mobile and return to their correct alignment. The key word is gentle.
Set a hairdryer to its lowest heat setting. Hold it at least 20 to 25 centimeters (8 to 10 inches) away from the screen. Move it slowly in a circular motion around — not directly on — the pressure mark for no more than 20 to 30 seconds at a time. Let the screen cool for a minute between passes.
Do not use high heat. Do not hold the hairdryer close to the screen. Excessive heat will damage the screen’s anti-reflective coating, the polarizer layer, or the LCD substrate. You’re applying barely-warm air, not blasting it.
Step 5: Use the Suction Cup Method (Recommended) or Gentle Circular Pressure
Once the screen is very slightly warm, you have two options. The first — and the one that hardware technicians increasingly recommend in 2026 — is the suction cup method. Take a small, clean suction cup (the type used for phone disassembly kits or basic car mounts works perfectly) and attach it gently to the center of the pressure mark. Then apply a very light outward pull — you’re not trying to yank the panel apart, just creating gentle decompression that relieves the inward compression trapping the displaced liquid crystals. This is safer than pressing inward because it works with the damage rather than adding more directional force to an already stressed area.
The second option, if you don’t have a suction cup available, is the traditional microfiber cloth method. Fold your microfiber cloth into a small, firm square. Using one or two fingers through the cloth, apply very gentle circular pressure around the outer edge of the pressure mark — not directly on the center. Work from the outside in, as if you’re coaxing the displaced crystals back toward the center.
In both cases, the pressure or pulling force should be extremely light. This is not a forceful intervention. Pressing too hard is exactly what caused the mark in the first place.
Apply either technique for 30 to 60 seconds, then stop and check the screen. Repeat the warm air and technique cycle two or three times maximum per session.
Step 6: Let It Rest
After your intervention, let the laptop sit open in a room-temperature environment for at least an hour before evaluating the results. Sometimes improvement is gradual rather than immediate.
Step 7: Evaluate and Decide
Power the laptop back on and check the screen against a solid white background. Has the mark reduced in size or intensity? If yes, that’s a good sign. You can repeat the process over the following days — but don’t overdo it. If you see no improvement after two or three sessions, continued attempts are unlikely to help and may cause additional stress to the panel.
What NOT to Do (Common Mistakes That Make It Worse)
This section might be the most important part of this article, because the internet is full of bad advice on this topic.
Do not press directly on the center of the mark with force. More pressure is not the solution to a pressure problem. Pressing harder will expand the damaged area and can crack the substrate.
Do not apply rubbing alcohol or any liquid to the surface hoping it will “fix” the pixels. Liquids applied to the screen exterior do nothing for internal LCD damage. If they seep into the bezel or under the screen, they cause additional damage.
Do not use a heating pad, heat gun, or high-heat setting on a hairdryer. These exceed safe temperature thresholds for laptop screens almost instantly. LCD screens are rated for specific temperature ranges and exceeding them causes irreversible damage.
Do not use sharp objects. Some forums suggest using a stylus or pen to “massage” the crystals back. This is terrible advice. Sharp objects on an LCD under any pressure scenario will create new damage.
Do not ignore a spreading black patch on an OLED screen. If you have an OLED laptop and notice a small dark ink-like spot, every hour you wait without addressing it is another hour of encapsulation failure spreading further. Get it assessed immediately — there is no home remedy for this.
Do not try to open the screen panel yourself unless you have professional experience. Laptop screens are sealed assemblies. Attempting to open the panel to access the LCD layer will almost certainly destroy the screen if you don’t have the right tools and training.
iFixit’s professional screen repair guides are the gold standard for DIY laptop screen work, and even they are clear that internal LCD layer access requires full panel replacement rather than internal adjustment.
Comparison Table: Types of Pressure Marks and What to Do
| Mark Type | Appearance | Screen Type | Fixable at Home? | Recommended Action |
|---|---|---|---|---|
| Fresh temporary cloud | White/grey haze, soft edges, recent | LCD | Possibly yes | Gentle heat + suction cup or soft pressure technique |
| Colour distortion blotch | Rainbow or colour-shifted patch | LCD | Sometimes | Gentle heat technique, monitor progress |
| Dark spreading bruise | Dark purple or black spreading area | LCD | No | Professional repair or replacement |
| Cracked substrate | Visible cracks, spiderweb pattern | LCD/OLED | No | Screen replacement only |
| Dead zone (no image) | Fully black section of screen | LCD | No | Screen replacement only |
| Black ink spreading spot | Dark spot that grows over days | OLED | No — panel is dying | Immediate professional assessment, replacement |
| Backlight bleed (not pressure) | Glow around edges on dark content | LCD | Not applicable | Different issue entirely |
When to See a Professional
There’s a clear point where DIY attempts should stop and professional help should begin. If any of the following apply, take it to a repair shop or contact the manufacturer:
- The pressure mark hasn’t improved after three rounds of the technique
- The mark is growing in size rather than shrinking
- You can see a crack anywhere on the display
- The screen has developed dead pixels around the mark
- Any part of the screen has gone dark or is showing no image
- You have an OLED laptop with any dark ink-like spot — don’t wait, it will spread
- The laptop is still under warranty (attempting DIY repairs may void it)
Warranty Considerations
Pressure damage is generally considered physical damage and is not covered under standard manufacturer warranties. However, if the damage occurred due to a manufacturing defect, the situation is worth pursuing with the manufacturer — and in 2026, this is more relevant than ever.
Laptops have become so thin in recent generations that a real and documented design problem has emerged: the keyboard keys physically press against the screen glass when the laptop is closed and placed in a backpack under any compression. If you examine your pressure mark closely and see that it corresponds to the imprint pattern of your keyboard keys — particularly the most raised keys like the spacebar, function row, or number keys — that is strong evidence of a design flaw rather than user abuse.
Before contacting the manufacturer, photograph the pressure mark carefully, then photograph your keyboard while holding the lid closed at an angle to show how the keys align with the damage. This “keyboard imprint” evidence is specifically what support teams and warranty reviewers look for when distinguishing design-flaw damage from user-caused damage. Some manufacturers, particularly Apple, Dell, and Lenovo, have been known to cover screen issues on a case-by-case basis for premium models that are still within the warranty window when this kind of evidence is presented clearly.
How Much Does Professional Laptop Screen Replacement Cost?
If the pressure mark is permanent and the screen needs replacing, here’s a general breakdown of what to expect cost-wise as of 2026.
| Laptop Type | DIY Replacement Part Cost | Professional Repair Cost | Difficulty Level |
|---|---|---|---|
| Budget laptop (under $500) | $40 – $90 | $100 – $180 | Moderate |
| Mid-range laptop ($500 – $1,000) | $80 – $150 | $150 – $250 | Moderate to High |
| Premium ultrabook | $120 – $250 | $200 – $400 | High |
| Gaming laptop | $100 – $200 | $180 – $350 | Moderate to High |
| MacBook (Apple Silicon) | $200 – $450 | $400 – $800+ | Very High |
| OLED premium laptop | $200 – $450 | $300 – $600 | Very High |
Costs vary significantly by region, repair shop, and availability of genuine parts. Always get two or three quotes before committing.
A specific note on MacBooks: if you own a 14-inch or 16-inch MacBook Pro with a Liquid Retina XDR display and you’re out of warranty, Apple’s official out-of-warranty screen replacement pricing for these models regularly hits the $700 to $900 range or higher as of 2026. AppleCare+ significantly reduces this, but without it, MacBook screen replacement is genuinely one of the most expensive repairs in the consumer laptop space. Factor that into your decision-making before committing to a repair versus replacement.
For laptops where the screen replacement cost exceeds 50% of the laptop’s current market value, it’s generally more economical to replace the laptop entirely rather than repair it. That’s a rough rule of thumb I’ve applied consistently over the years and it rarely steers people wrong.
Preventing Pressure Marks in the Future
Once you’ve dealt with a pressure mark — whether you fixed it or replaced the screen — the last thing you want is to go through it again. Prevention is straightforward but requires building some new habits.
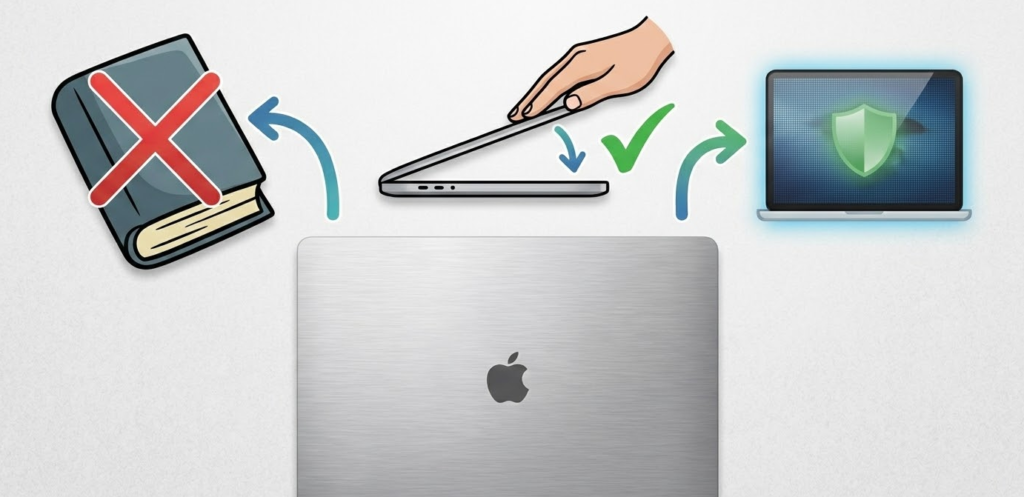
Never place objects on a closed laptop. Books, tablets, other laptops — they all add weight that the screen wasn’t designed to handle over extended periods.
Use a proper laptop bag with a padded, dedicated laptop compartment. A laptop thrown loosely into a backpack with books, chargers, and water bottles is an accident waiting to happen.
Check the lid before closing. Pens, earbuds, USB drives, even thick keyboard dust — anything resting on the keyboard when you close the lid becomes a pressure point against the screen.
Use a keyboard cover if you’re in a high-risk environment. Ultra-thin silicone keyboard covers can help distribute pressure more evenly if the laptop is frequently transported in tight bags.
Be aware of keyboard-to-screen contact in thin laptops. In ultra-slim 2025 and 2026 laptops especially, the reduced clearance between the keyboard and screen when closed means even a normally packed bag can cause keyboard imprinting damage over time. A thin neoprene sleeve inside your backpack can make a meaningful difference.
Transport laptops flat or in a proper sleeve. Carrying a laptop vertically in a tight bag with other items pressing against it can apply sustained side pressure to the screen.
This video from Hardware Busters on YouTube covering real-world laptop screen damage and how to avoid it is a genuinely useful watch — it visually demonstrates how quickly and easily pressure marks can form, which is a good motivator for being more careful.
2026 Screen Technology Trends and How They Affect This Issue
It’s worth noting that the move toward newer screen technologies is changing this conversation in a few meaningful ways.
OLED Laptops Are Significantly More Vulnerable
As OLED panels become mainstream in mid-range laptops throughout 2025 and into 2026, pressure sensitivity becomes a far bigger concern than it was with traditional LCDs. When an OLED panel is damaged by pressure, it breaks the microscopic vacuum encapsulation layer. Oxygen and moisture immediately begin degrading the organic materials, causing pixels to die rapidly and spreading outward from the point of impact. Unlike an LCD pressure mark that might stabilize or partially recover, OLED pressure damage is progressive and irreversible — the screen will continue to deteriorate until it’s replaced. This makes an already expensive repair category even more high-stakes.
Thinner Glass Substrates
Modern laptops are using increasingly thin glass substrates to reduce weight and overall thickness. While this makes laptops lighter and sleeker, it also means the glass reaches its fracture threshold at lower pressure levels than older, thicker panels. This makes prevention more important than ever, and it directly contributes to the keyboard-to-screen contact issue described in the warranty section above.
Mini-LED Backlit Displays
Mini-LED LCDs, which are appearing in more premium laptops in 2026, behave similarly to traditional LCDs with respect to pressure marks, but their more complex backlight arrays can show localized dimming or brightness inconsistencies as secondary symptoms of pressure damage, even if the liquid crystal layer itself is not severely displaced. This can make the visual symptoms of a pressure mark appear worse than the underlying damage actually is.
Better Hinge and Lid Designs
On the positive side, manufacturers are increasingly engineering laptop lids with internal reinforcement specifically designed to distribute pressure more evenly and prevent the lid from flexing inward when weight is applied. Laptops from Dell’s XPS line, Lenovo’s ThinkPad series, and Apple’s MacBook range have all made notable improvements here in recent generations — though the thinner-is-better arms race continues to create tension with structural durability.
CNET’s laptop buying guide covers several 2025 and 2026 models with particular attention to build quality and display durability, which is worth consulting if you’re shopping for a laptop and want to prioritize screen resilience.
Laptop Pressure Mark FAQ
Can pressure marks on a laptop screen go away on their own?
Yes, sometimes. If the pressure was mild and temporary — like a pen cap trapped under the lid overnight — the pressure mark may fade on its own within 24 to 48 hours as the liquid crystals slowly return to their correct alignment. Always give it at least a day before attempting any intervention.
Does the heat method actually work for pressure marks?
It can work for mild, recent, temporary pressure marks on LCD screens. The gentle warmth slightly increases the mobility of the liquid crystals, which can help them realign. It does not work on cracked screens or OLED panels, and it must be applied very carefully to avoid causing additional damage.
What does OLED pressure damage look like?
OLED pressure damage appears as a dark, ink-like black spot that typically begins small at the point of impact and spreads outward over the following hours and days. Unlike LCD pressure marks which tend to appear as cloudy or discolored blotches, OLED pressure damage creates a distinctly dark, spreading patch. Once visible, it will not stop spreading on its own. The screen must be replaced.
Will a pressure mark get worse over time?
It depends on the type and screen technology. A fresh, temporary LCD mark may improve on its own. A cracked LCD substrate may gradually worsen as the damaged area expands. OLED pressure damage will almost certainly worsen — sometimes dramatically — within just a few days of the initial injury.
Is pressure mark damage covered by warranty?
Generally no. Most manufacturers classify pressure damage as accidental physical damage, which is excluded from standard warranties. However, if the pressure mark aligns with the pattern of the keyboard keys, that’s worth photographing and presenting to the manufacturer as evidence of a design flaw — keyboard-to-screen contact in ultra-thin laptops is a documented issue. Some extended warranty plans or accidental damage protection plans (like Dell Complete Care or AppleCare+) may cover pressure damage, so check your specific coverage before paying out of pocket.
How do I know if I have a pressure mark or backlight bleed?
Backlight bleed appears as a glow around the edges of the screen — especially in corners — when the screen displays dark content. It’s a manufacturing characteristic, not physical damage. Pressure marks appear as cloudy, blotchy, or discolored patches that can occur anywhere on the screen, and are typically most visible on white or light-colored content.
Can I fix a cracked laptop screen without replacing it?
No. A cracked screen cannot be repaired — only replaced. There is no safe or effective DIY method for repairing a cracked LCD or OLED panel. Any product marketed as a “screen crack repair kit” for laptops should be treated with extreme skepticism.
How long does the technique take to show results?
If it’s going to work, you may see some improvement within one to three sessions, with each session being no more than five minutes and spaced at least a few hours apart. If you see no improvement after three sessions over a couple of days, it’s unlikely to work and you should consult a professional.
Can I use a laptop with a pressure mark safely?
If the screen is not cracked and the mark is only visual with no signs of spreading, yes — it is generally safe to continue using the laptop. However, if you have an OLED laptop with any dark ink-like spot, minimize use and get it assessed promptly. The spreading damage process doesn’t pause while you’re using the device.
What’s the cheapest way to fix a permanent pressure mark?
If you’re technically confident, sourcing a compatible replacement screen and following a reputable step-by-step guide (like those on iFixit) is the most cost-effective route. For most people, a local third-party repair shop will offer fair pricing with significantly less risk than a DIY approach on an unfamiliar device.
Quick Summary: Your Action Plan
| Situation | What to Do |
|---|---|
| Mark appeared within last 48 hours, no crack, LCD screen | Wait 24 hours first, then try gentle heat and suction cup or soft pressure technique |
| Mark has been there for weeks, no crack, LCD screen | Try the technique once or twice, then consult a professional |
| Visible crack anywhere on the screen | Do not attempt DIY — go straight to professional repair or replacement |
| OLED laptop with any dark ink-like or spreading black spot | Do not wait — panel is dying. Professional replacement only |
| Pressure mark matches keyboard key pattern | Document with photos, contact manufacturer — may qualify as design flaw coverage |
| Laptop still under warranty | Contact manufacturer before attempting anything — DIY may void warranty |
| Mark not improving after multiple attempts | Professional assessment or screen replacement |
| MacBook with screen damage, no AppleCare+ | Budget $400 – $800+ for Apple official repair, or get third-party quotes |
Bottom Line
Pressure marks on a laptop screen are fixable in some cases and permanent in others. The gentle heat combined with the suction cup technique (or soft microfiber pressure as an alternative) gives you the best shot at improving a mild, recent mark on an LCD screen — but it requires patience, a very light touch, and realistic expectations.
The moment you see cracking, spreading darkness on an LCD, or any ink-like black spot on an OLED panel, the DIY window has firmly closed. OLED pressure damage in particular is not a wait-and-see situation — it’s an act-now situation. The spreading encapsulation failure will not stop on its own.
The most important takeaway? Don’t make it worse by pressing harder or applying excessive heat in a panic. Slow, careful, and deliberate is the only approach that gives you a fighting chance at recovery. And going forward, a decent padded laptop sleeve, a quick check for objects on your keyboard before closing the lid, and awareness of how thin modern laptop lids really are will save you from ever dealing with this again.