You can use Claude Code, Anthropic’s AI coding agent, to build and publish a mobile app on both the iOS App Store and Google Play Store, even with zero coding experience. The recommended path is to use Claude Code alongside the Expo and React Native framework, then publish using Expo’s EAS Build service and Fastlane for store submission. You will need an Apple Developer account ($99/year) and a Google Play Console account ($25 one-time fee).
But before you rush off to create your developer accounts, there are a few setup steps and key decisions that will make or break your first launch experience, and I want to walk you through every single one of them.
What Is Claude Code, and Can It Really Build an App?
Claude Code is Anthropic’s AI-powered coding agent that writes, edits, and runs code directly in your terminal. Unlike a regular chatbot where you paste code back and forth, Claude Code operates inside your project folder, creates files, runs commands, and iterates on the app in real time. It is, in every practical sense, like having a senior developer sitting next to you.
Since its wider availability in early 2026, Claude Code has become one of the most popular tools in what the developer community calls “vibe coding,” a style of development where you describe what you want in plain English and the AI builds it. PCMag noted in early 2026 that Claude Code has fundamentally changed how indie developers are approaching the App Store, with coding agents now being credited for a surge in new app launches.
The honest truth, based on what the developer community has been reporting, is that Claude Code is genuinely capable of building production-ready mobile apps from scratch. The key is knowing how to direct it properly, and that is exactly what this guide covers.
What You Need Before You Start
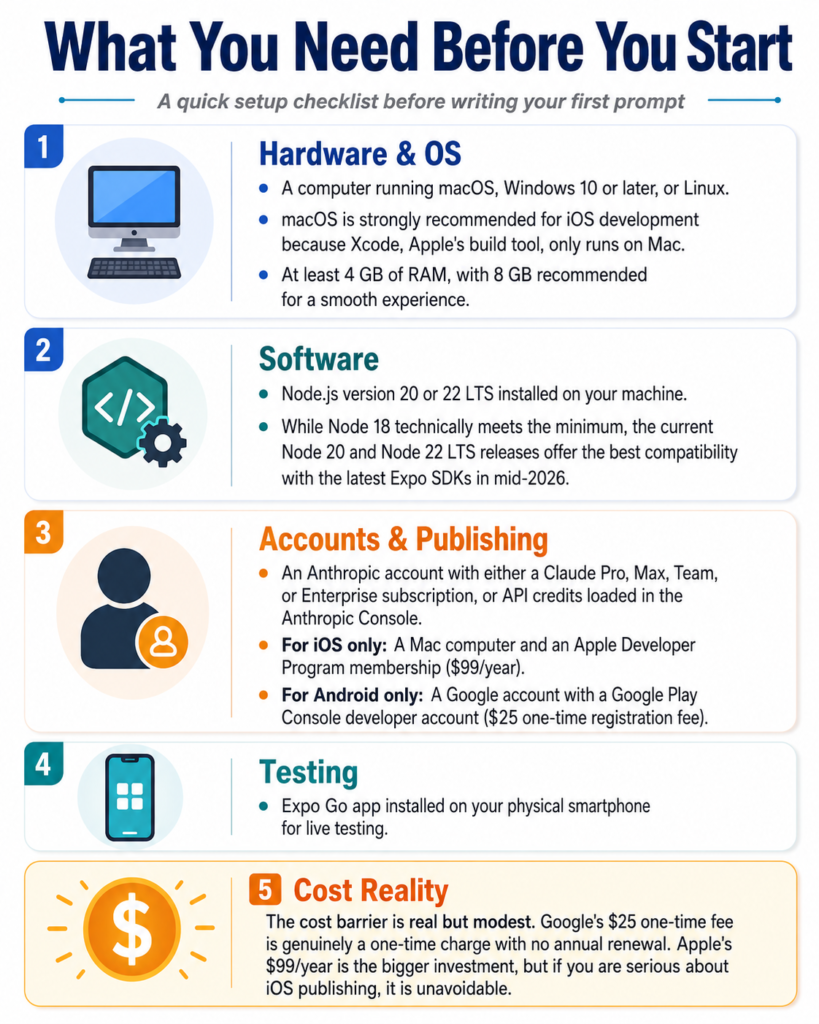
Getting everything in place before you write your first prompt will save you hours of frustration. Here is what you need:
-
A computer running macOS, Windows 10 or later, or Linux. macOS is strongly recommended for iOS development because Xcode, Apple’s build tool, only runs on Mac.
-
At least 4 GB of RAM, with 8 GB recommended for a smooth experience.
-
Node.js version 20 or 22 LTS installed on your machine. While Node 18 technically meets the minimum, the current Node 20 and Node 22 LTS releases offer the best compatibility with the latest Expo SDKs in mid-2026.
-
An Anthropic account with either a Claude Pro, Max, Team, or Enterprise subscription, or API credits loaded in the Anthropic Console.
-
For iOS only: A Mac computer and an Apple Developer Program membership ($99/year).
-
For Android only: A Google account with a Google Play Console developer account ($25 one-time registration fee).
-
Expo Go app installed on your physical smartphone for live testing.
The cost barrier is real but modest. Google’s $25 one-time fee is genuinely a one-time charge with no annual renewal. Apple’s $99/year is the bigger investment, but if you are serious about iOS publishing, it is unavoidable.
Understanding the Tech Stack You Will Use
You do not need to understand code deeply to use this stack, but knowing what each piece does will help you follow Claude’s instructions confidently.
React Native is a framework that lets you write one codebase and deploy it to both iOS and Android. Instead of learning Swift for iOS or Kotlin for Android separately, you work in JavaScript, and React Native translates your app into native mobile components.
Expo is a toolchain built on top of React Native that dramatically simplifies the setup, testing, and publishing process. Without Expo, getting a React Native app running on a physical device involves a complex configuration process. With Expo, you scan a QR code and your app appears on your phone instantly. Expo’s EAS (Expo Application Services) Build platform also handles the complex process of compiling your app into the binaries that the App Store and Play Store actually accept.
Fastlane is an open-source tool that automates the submission process to both Apple and Google. Claude Code integrates well with Fastlane, and once it is set up, you can submit builds with simple commands rather than manually navigating Apple’s App Store Connect or Google’s Play Console web interfaces.
Pro Tip: Tell Claude Code right at the start of your project: “Use Expo and React Native for this app, and set it up so we can use EAS Build for App Store and Play Store submission.” This single instruction will save you from a lot of unnecessary back and forth later.
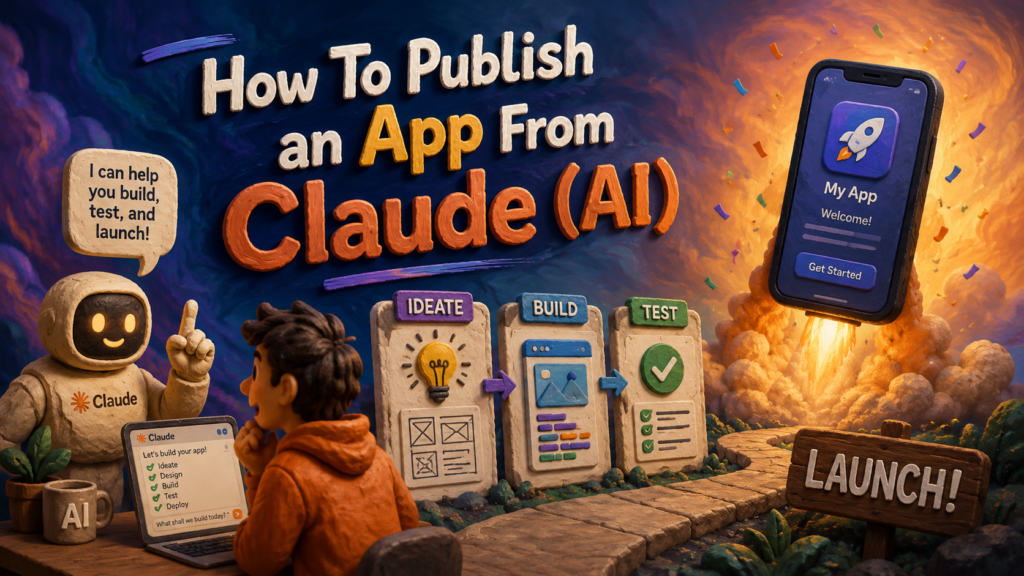
Step-by-Step: Installing and Setting Up Claude Code
Step 1: Install Node.js
Go to nodejs.org and download the LTS (Long Term Support) version for your operating system. In mid-2026, that means Node 20 or Node 22 LTS, both of which provide the best compatibility with current Expo SDKs. Run the installer and follow the prompts. Once installed, open your terminal (or Command Prompt on Windows) and type node --version to confirm it worked.
Step 2: Install Claude Code
Open your terminal and run the following command:
npm install -g @anthropic-ai/claude-code
Alternatively, on macOS and Linux, Anthropic provides a native installer at claude.ai/install.sh which is the recommended method as it handles automatic background updates. On Windows, you can use the PowerShell equivalent or install via winget.
Step 3: Authenticate Your Account
After installation, run claude in your terminal. It will open a browser window prompting you to sign in to your Anthropic account. Once you authorize, you are connected and ready to go.
Step 4: Install EAS CLI
EAS CLI is the command-line tool you will use to handle cloud builds and store submissions. The @expo/cli package ships locally inside your project and is invoked via npx expo, so the tool you need to install globally is EAS CLI specifically. Run this command in your terminal:
npm install -g eas-cli
Step 5: Create Your Project Folder
Navigate to wherever you want your project to live, create a new folder, and open Claude Code inside it:
mkdir my-first-app

cd my-first-app

claude
You are now ready to start building.
Step-by-Step: Building Your App With Claude Code
This is where the magic happens. You do not need to write a single line of code yourself.
Step 1: Give Claude a Clear Project Brief
The quality of your app starts with the quality of your instructions. Do not just say “make me an app.” Give Claude a brief like this:
“I want to build a mobile app using Expo and React Native. The app is a daily habit tracker. Users can add habits, check them off each day, and see a streak counter. The design should be clean and minimal with a dark theme. Set up the project from scratch and make sure it is ready for EAS Build submission to both the App Store and Play Store.”
Claude Code will then scaffold the entire project, install the necessary packages, and create all the files.
Step 2: Test on Your Phone Immediately
Once Claude Code sets up the project, it will give you a command to start the development server, typically npx expo start. Run this, and you will see a QR code in your terminal. Open the Expo Go app on your phone, scan the QR code, and your app will appear live on your device. Every change Claude Code makes will update in real time.
Step 3: Iterate With Natural Language
This is the part that beginner developers find most surprising. You just describe what you want to change:
-
“Make the buttons rounder and add a soft blue color.”
-
“Add a screen where users can view their habit history in a calendar view.”
-
“Fix the layout so it looks good on both small and large screen sizes.”
Claude Code will make the changes, and you will see them appear on your phone instantly.
Step 4: Test Thoroughly Before Publishing
Based on experience watching many first-time app launches go sideways, the single biggest mistake beginners make is rushing to publish before testing on multiple device sizes. Test your app on at least two different screen sizes using Expo Go before you move to the publishing stage. Ask Claude to help you fix any layout issues that appear.
Step-by-Step: Publishing to the iOS App Store
Publishing to the App Store is the more involved of the two platforms because Apple has stricter review requirements and a more complex build system. Here is the full process.
Step 1: Set Up Your Apple Developer Account
Go to developer.apple.com and enroll in the Apple Developer Program. The annual fee is $99 USD or local currency equivalent. You will need to verify your identity and, if registering as an organization, provide a D-U-N-S number.
Step 2: Install Xcode (macOS Only)
Open the App Store on your Mac and download Xcode. It is a large download, roughly 10 to 15 GB, so give it time. Once installed, open it once to accept the license agreement, then run:
sudo xcode-select --install
Step 3: Configure EAS Build for iOS
In your terminal, inside your project folder, run:
eas build:configure
EAS will guide you through linking your app to your Apple Developer account. This is also the point where you tell Claude Code to generate your App Store metadata, including your app description, keywords, and category.
Step 4: Build for the App Store
Run:
eas build --platform ios --profile production
This sends your code to Expo’s cloud build servers, compiles it into an IPA file (the iOS app binary), and returns a download link when it finishes. This process typically takes 10 to 30 minutes.
Step 5: Submit to App Store Connect
You can either submit manually through App Store Connect at appstoreconnect.apple.com, or you can use Fastlane, which Claude Code can configure for you. With Fastlane, the submission becomes a single terminal command. This complete tutorial on building and publishing with Claude Code walks through the Expo and EAS submission flow from start to finish if you want a visual walkthrough alongside this guide.
Step 6: Complete Your App Store Listing
In App Store Connect, you will need to fill in your app name, description, screenshots for multiple device sizes, an app icon at 1024×1024 pixels, your pricing, and your age rating. Claude Code can actually help you generate your app description, keywords, and even suggest categories based on your app content.
Step 7: Submit for Review
Once everything is filled in, click Submit for Review. Apple’s review process typically takes 24 to 48 hours for first-time submissions. You will receive an email when your app is approved or if changes are requested.
Step-by-Step: Publishing to the Google Play Store
The Play Store process is more straightforward than the App Store, but it does have its own set of requirements that have tripped up plenty of first-timers.
Step 1: Create Your Google Play Console Account
Go to play.google.com/console and sign in with your Google account. You will need to pay the one-time $25 USD registration fee. You will also need to verify your identity with a government-issued ID and provide a public support email address.
Step 2: Build Your Android App Bundle
Back in your project terminal, run:
eas build --platform android --profile production
This produces an AAB (Android App Bundle) file, which is the format Google Play requires.
Step 3: Generate Your Upload Key (Managed by EAS)
One of the most confusing steps for beginners historically was generating and managing the keystore file used to sign Android apps. EAS Build handles this for you automatically and stores the key securely. This is one of the biggest practical advantages of using Expo over a raw React Native setup.
Step 4: Create Your App in Play Console
In the Google Play Console, click Create App, fill in your app name, select whether it is a game or app, specify free or paid, and agree to the developer policies. Google requires new personal developer accounts to run a closed testing phase with at least 20 testers who must opt in and keep the app installed for 14 consecutive days before you can unlock production access. Plan this into your launch timeline because it is a hard requirement with no shortcut.
Step 5: Complete the Store Listing
You will need to provide a short description (up to 80 characters), a full description (up to 4,000 characters), screenshots for phone, tablet, and optionally for Chromebook, a feature graphic (1024×500 pixels), and your app icon (512×512 pixels). Ask Claude Code to help you write your Play Store description with relevant keywords naturally woven in.
Step 6: Upload and Publish
Upload your AAB file to the Production track, complete the content rating questionnaire, set your pricing, and click Review and Publish. Google’s review typically takes a few hours to a few days for first submissions.
Platform Comparison: iOS App Store vs. Google Play Store
Common Mistakes Beginners Make (And How to Avoid Them)
Skipping the testing phase. Every first-time publisher underestimates how different an app can look on a real device compared to a simulator. Always test on a physical phone with Expo Go before building for production.
Not reading Apple’s App Store Review Guidelines. Apple rejects apps for specific reasons that are all documented. Have Claude Code review your app against the guidelines before submission to catch obvious issues.
Using the wrong file formats. Apple wants IPA, Google wants AAB. EAS Build handles this automatically, but if you ever try to manually upload the wrong format, you will get rejected instantly.
Forgetting app screenshots. Both stores require screenshots at specific resolutions. For iOS, you need screenshots for at least the 6.9-inch display (iPhone 16 Pro Max). For Android, phone screenshots are mandatory; tablet screenshots are optional but recommended.
Underestimating the Google Play closed testing window. New personal developer accounts must recruit 20 testers who keep the app installed for 14 consecutive days before production access is unlocked. Starting this process early in your development cycle rather than at the end will save you significant time.
Not filling in all metadata. Incomplete store listings delay approval. Fill in every field, including privacy policy URL (required on both platforms), support URL, and contact email.
Claude Code and the 2026 Publishing Landscape
One of the most interesting developments in 2026 has been how much Claude Code has extended its reach into the actual publishing workflow, not just the coding phase. The community has built MCP (Model Context Protocol) servers that let Claude Code interact directly with App Store Connect and Google Play Console, managing metadata, uploading screenshots, and even initiating review submissions from within the terminal.
Tools like ClaudSkills’ App Store Publish and Play Store Publish skills drop specialized configuration files into Claude Code, giving it deep knowledge of the publishing pipeline. For developers who want full automation, This comprehensive guide on mobile app development with Claude Code covers Expo, React Native, Supabase integration, and the full publishing flow in detail.
MacStories highlighted in April 2026 that AI coding agents like Claude Code appear to be driving a measurable surge in App Store submissions, suggesting that the barrier to indie app publishing has never been lower. That is largely true, but the operational knowledge of how the stores work, what reviewers look for, and how to set up your build pipeline correctly still matters enormously, which is why this guide exists.
Frequently Asked Questions
Do I need to know how to code to publish an app with Claude Code?
No, you do not need prior coding experience. Claude Code handles the code writing entirely. What you do need is the ability to describe clearly what you want your app to do, test it on your phone through Expo Go, and follow the publishing steps in this guide. That said, a basic familiarity with using a terminal and following command-line instructions will make the process much smoother.
Can Claude Code publish to both iOS and Android at the same time?
Yes. If you use Expo and React Native as your framework, you maintain a single codebase that compiles for both platforms. EAS Build can produce iOS and Android builds from the same project, and Fastlane can submit to both stores. You still need the separate developer accounts for each platform.
How long does it take to build and publish a simple app with Claude Code?
For a simple, single-feature app, many developers in the community report going from zero to a published Play Store listing in a single weekend. Keep in mind that the Google Play closed testing requirement of 20 testers for 14 days means your Android public launch will take at least two weeks after you first upload. The iOS process typically has a shorter wait once the app is submitted, usually 24 to 48 hours for review.
What happens if Apple rejects my app?
Apple will provide specific reasons for rejection in App Store Connect. You can ask Claude Code to help you address the rejection reasons, make the necessary changes, rebuild using EAS Build, and resubmit. Most first-time rejections are for fixable issues like missing privacy policy links, incomplete metadata, or minor UI issues.
Is Claude Code free to use?
Claude Code requires a paid Anthropic subscription. As of mid-2026, access is included with Claude Pro, Max, Team, and Enterprise plans. You can also use the Anthropic API directly and pay based on token usage, which can be cost-effective for lighter usage patterns.
What is the difference between Expo Go and a production build?
Expo Go is a pre-built app on your phone that runs your code in development mode. It is fast for testing but cannot be submitted to the stores. A production build, generated through EAS Build, is a standalone compiled binary of your app that runs independently without Expo Go and is what you submit to Apple and Google.
Do I need a Mac to publish an Android app built with Claude Code?
No. Building and publishing for Android can be done entirely on Windows or Linux. The Mac requirement only applies to iOS development because Xcode, which is needed for iOS compilation, is macOS-exclusive. EAS Build’s cloud service can compile iOS apps on Apple’s infrastructure, but you still need a Mac to manage certain steps like TestFlight distribution in some configurations.
Bottom Line
Publishing an app from Claude Code is genuinely achievable for a complete beginner in 2026. The combination of Claude Code, Expo, React Native, and EAS Build has removed most of the technical barriers that used to make mobile app development exclusive to professional developers. The critical success factors are using the right framework from the start (Expo), testing thoroughly before you build for production, reading the platform guidelines before you submit, and giving Claude clear, specific prompts throughout the process. If you are targeting Android, start recruiting your 20 closed testers early so that requirement does not stall your launch at the finish line. Start with The beginner-friendly Claude Code tutorial to get comfortable with the tool before you begin your actual app, then follow this guide step by step for the publishing process.