There are four main ways to switch between a desktop and a laptop on the same monitor or monitors: manually switching the monitor’s input source, using a hardware KVM switch to swap both the display and peripherals in one click, using a KVM docking station for a single-cable laptop connection, or using free software like Microsoft PowerToys Mouse Without Borders or Synergy to share your keyboard and mouse across both machines without any extra hardware. The right method depends on how many monitors you have, whether you need to share peripherals, and how seamless you want the switching experience to be.
If you have both a desktop PC and a laptop at the same desk, you have almost certainly run into the same frustration: two computers, one desk, and the constant hassle of unplugging and replugging cables, keyboards, and mice every time you want to switch. The good news is that in 2026 there are more clean solutions to this problem than ever before, from free software that costs nothing to hardware KVM switches that swap your entire workspace, including both monitors and all peripherals, with a single button press or keyboard shortcut.
Understanding the Problem: What Exactly Are You Switching?
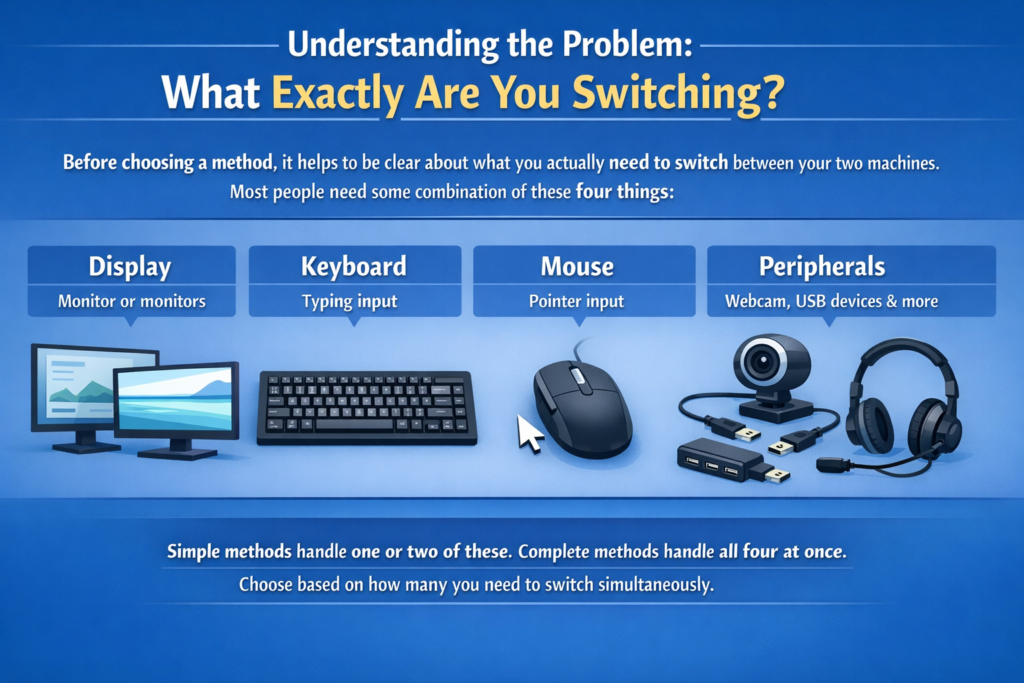
Before choosing a method, it helps to be clear about what you actually need to switch between your two machines. Most people need some combination of these four things:
- Display: The monitor or monitors showing the active computer’s output
- Keyboard: Typing input going to the active computer
- Mouse: Pointer input going to the active computer
- Peripherals: Webcam, headset, USB hub, external drives, and other connected devices
The simplest methods handle only one or two of these. The most complete methods handle all four simultaneously with a single action. Your choice of method should match how many of these you need to switch at once.
Method 1: Manual Input Switching on the Monitor (No Extra Hardware)
This is the zero-cost starting point and is far more practical than most people expect for basic setups. Every modern monitor with multiple input ports lets you switch which computer’s signal it displays using the monitor’s own on-screen menu.
How It Works:
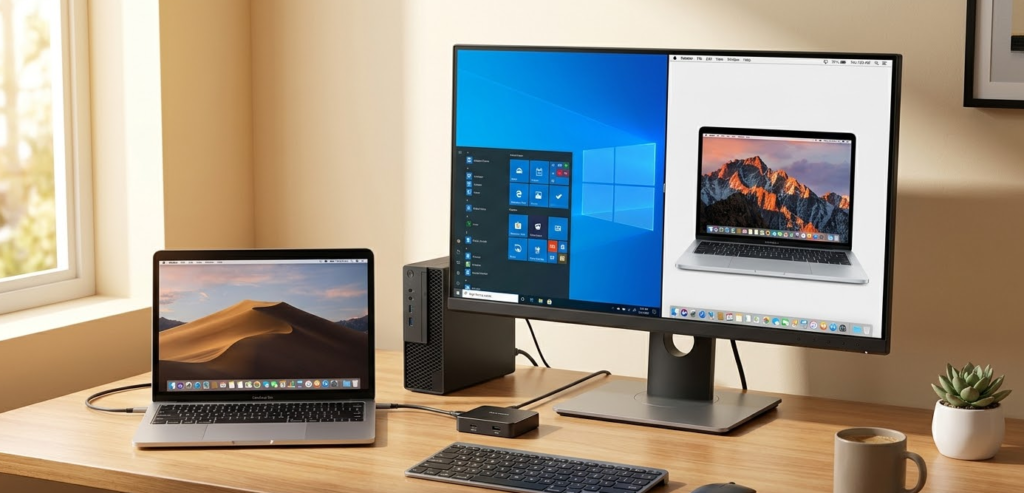
Connect your desktop to one input port on the monitor (for example, DisplayPort) and your laptop to a second input port (for example, HDMI). Both computers stay connected at all times. When you want to switch, you press the input selection button on your monitor and choose the other source. The monitor switches its display to the other computer in 2 to 4 seconds.
Step-by-Step:
Step 1: Connect Both Computers to the Monitor
Identify the available input ports on your monitor. Most monitors have at least two of the following: HDMI 1, HDMI 2, DisplayPort, USB-C, or VGA. Connect your desktop to one port and your laptop to another. If your laptop only has USB-C, use a USB-C to HDMI or USB-C to DisplayPort cable or adapter.
Step 2: Keep Both Computers Powered On and Connected
Both machines should remain connected to the monitor at all times. The monitor simply ignores the signal from the inactive source until you tell it to switch.
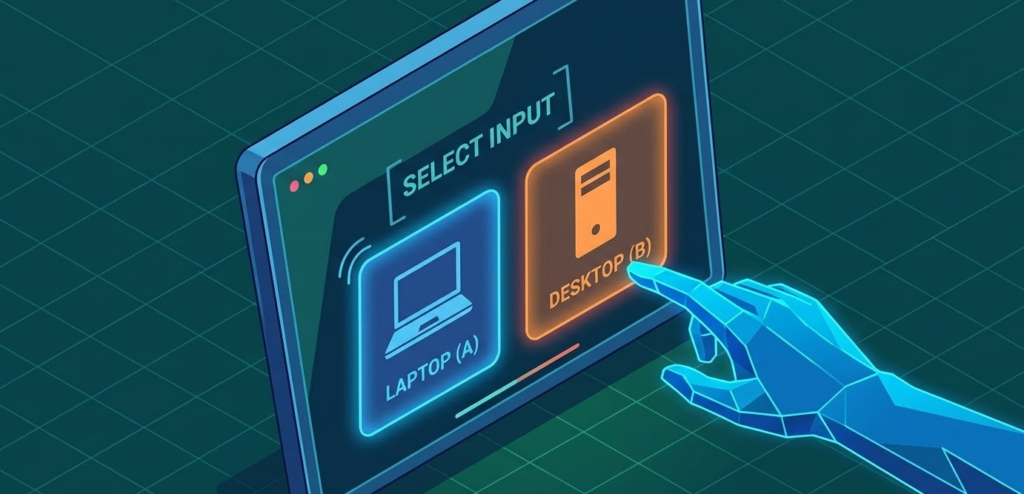
Step 3: Switch Using the Monitor’s Input Button
Locate the input selection button on your monitor. On most monitors it is on the bottom bezel, the right side, or accessible via a joystick button at the center back. Press it to open the input source menu and select the other computer. On many modern monitors, pressing the input button once cycles through active sources automatically without opening a full menu.
Step 4: Handle the Keyboard and Mouse Separately
Manual input switching only moves the display. Your keyboard and mouse still need to be physically moved or switched separately. The simplest solution is a basic USB switch box: a small device with a button that switches a set of USB ports between two computers. Plug your keyboard and mouse into the USB switch box, plug the switch box’s two USB outputs into each computer, and press the button to move the keyboard and mouse at the same time you change the monitor input.
Best For: Users with one monitor who only occasionally switch between machines and do not mind pressing two buttons (one for the monitor, one for the USB switch box).
Pros:
- Zero additional cost if you already have the right cables
- Works with any monitor that has multiple inputs
- No software to install, no configuration required
Cons:
- Switching the display and keyboard and mouse requires two separate actions
- No simultaneous peripheral switching without a USB switch box
- Slower and more manual than KVM solutions
Method 2: Hardware KVM Switch (One Button Switches Everything)
TESmart Dual Monitor KVM Switch
A KVM switch (Keyboard, Video, Mouse) is a hardware device that sits between your two computers and all your peripherals, and routes everything to whichever machine is currently active. Press the button or hit a keyboard shortcut, and the display, keyboard, mouse, and USB devices all switch simultaneously in under two seconds.
This is the right solution for anyone who switches between machines multiple times per day and wants the experience to feel seamless.
How a KVM Switch Works:
Both computers connect to the KVM switch via video cables (HDMI or DisplayPort). Your monitor connects to the KVM’s output. Your keyboard, mouse, and other USB devices connect once to the KVM. The KVM routes the active computer’s video signal to the monitor and the shared peripherals to the active computer. When you switch, everything follows in one action.
Step-by-Step: Setting Up a Single-Monitor KVM Switch
Step 1: Choose the Right KVM Switch for Your Setup
Before buying, match the KVM to your exact video standard and resolution. For a 1080p or 1440p monitor, a basic HDMI KVM at $30 to $60 works well. For 4K at 60Hz, look for HDMI 2.0 KVM switches. For high-refresh-rate gaming monitors at 120Hz or 144Hz at 1440p, you need a DisplayPort 1.4 KVM. Mismatching the video standard is the most common KVM buying mistake and results in resolution drops or refresh rate caps after switching.
Step 2: Connect Your Desktop to the KVM
Run a video cable (HDMI or DisplayPort) from your desktop’s graphics card output to one of the KVM’s computer input ports. Run a USB cable from your desktop to the KVM’s USB input for that computer.
Step 3: Connect Your Laptop to the KVM
Connect your laptop’s video output to the second computer input on the KVM. If your laptop only has USB-C, use a USB-C to HDMI or USB-C to DisplayPort cable. Run the laptop’s USB connection to the KVM’s USB input for that computer.
Step 4: Connect the Monitor to the KVM Output
Run a video cable from the KVM’s single output port to your monitor’s input.
Step 5: Connect Peripherals to the KVM
Plug your keyboard, mouse, and any other shared peripherals (webcam, headset, USB hub) into the KVM’s shared USB ports. These will be available to whichever computer is currently active.
Step 6: Switch Between Computers
Most KVM switches offer three switching methods simultaneously:
- A physical button on the KVM box itself
- A keyboard hotkey, typically double-tapping Scroll Lock followed by a number (varies by brand)
- A front panel button or included wired remote
An Important Note on EDID Emulation:
When you switch away from a computer using a basic KVM, the monitor briefly disconnects from that computer. Without EDID emulation, the inactive computer “forgets” the monitor’s resolution profile and rearranges all open windows to a default low resolution. When you switch back, all your windows are in the wrong place. KVM switches with built-in EDID emulation solve this by maintaining a persistent fake monitor connection to both computers at all times, so neither machine ever loses its display profile. This is a critical feature to look for and is the main difference between a quality KVM and a cheap one.
Best For: Users who need to switch the full setup quickly and repeatedly throughout the day, especially those who need to share peripherals like a webcam or headset between machines.
Method 3: Dual-Monitor KVM Switch (Two Screens, One Button)
Dual Monitor KVM Docking Station
If you work with two monitors and want both of them to switch simultaneously between your desktop and laptop, a dual-monitor KVM is the right tool.
How It Differs from Single-Monitor KVM:
A dual-monitor KVM has two video output ports instead of one, and both monitors switch at the same time when you press the button. Both computers connect to the KVM with two video cables each (one per monitor), and both monitors connect to the KVM’s outputs.
Step-by-Step: Setting Up a Dual-Monitor KVM
Step 1: Verify Your Computers Support Dual Display Output
Your desktop needs two video output ports on its graphics card. Your laptop needs to support two external monitors, either through its docking station, Thunderbolt port, or a USB-C port that supports DisplayPort multi-stream transport (MST). Many thin and light laptops only support one external display, so check your specifications before purchasing a dual-monitor KVM.
Step 2: Choose the Right Dual-Monitor KVM
For 4K at 60Hz on two monitors, look for a KVM with HDMI 2.0 and DisplayPort 1.4 outputs. For high-refresh gaming setups at 144Hz at 1440p or 4K, you will need a premium HDMI 2.1 or DisplayPort 2.1 model, which carries a significantly higher price tag in 2026. EDID emulation is even more important with dual-monitor setups because losing window positions across two screens is significantly more disruptive than across one.
Step 3: Wire Both Computers and Both Monitors
Connect computer 1 (desktop) to the KVM using two video cables, one for each monitor channel. Connect computer 2 (laptop) to the KVM using two video cables from its outputs. Connect Monitor 1 to KVM output 1 and Monitor 2 to KVM output 2. Connect all shared peripherals to the KVM’s USB ports.
Step 4: Switch
Press the button, use the keyboard hotkey, or use the included remote. Both monitors, the keyboard, the mouse, and all shared USB devices switch to the other computer simultaneously.
Recommended Dual-Monitor KVM Options for 2026:
| Model | Max Resolution | Video Ports | USB Ports | EDID Emulation | Approx. Price |
|---|---|---|---|---|---|
| TESmart HDK202-M24 (or equiv. HDMI 2.1 model) | 4K @ 144Hz | HDMI 2.1 + DP 2.1 | 4x USB 3.2 Gen 1 | Yes | $350 to $450 |
| TESmart HDK202 (Standard) | 4K @ 60Hz | HDMI 2.0 + DP 1.4 | 4x USB 3.0 | Yes | $120 to $160 |
| Monoprice 42643 | 4K @ 60Hz | 2x DisplayPort | 4x USB | Yes | $90 to $130 |
| UGREEN Dual Monitor KVM | 4K @ 60Hz | 2x HDMI 2.0 | 4x USB | Yes | $80 to $110 |
| Level1Techs DP 1.4 Dual KVM | 4K @ 144Hz | 2x DisplayPort 1.4 | 4x USB 3.0 | Yes (custom firmware) | $180 to $240 |
Budget Reality Check for 2026: The sub-$300 tier of dual-monitor KVMs is almost exclusively HDMI 2.0 and DisplayPort 1.4 hardware, which caps at 4K at 60Hz. If you need 4K at 120Hz or 144Hz for a high-refresh gaming monitor setup, budget $350 to $450 for a quality HDMI 2.1 or DisplayPort 2.1 model with full EDID emulation and USB 3.2 Gen 1 hub support. Trying to use a cheaper KVM at higher refresh rates will result in silent resolution or refresh rate caps that are easy to miss but genuinely impact the experience.
Method 4: KVM Docking Station (Best for Laptop-Primary Users)
A KVM docking station combines a laptop docking station with KVM switching functionality. Instead of running two separate video cables from the laptop to the KVM, the laptop connects to the docking station with a single USB-C or Thunderbolt cable. The docking station handles the video output to the monitors and also acts as the KVM switching point between the laptop and the desktop.
This is the cleanest physical setup for anyone whose laptop is their primary work machine and whose desktop is secondary.
How It Works:
The laptop connects to the docking station with one cable. The desktop connects to the docking station via HDMI and DisplayPort. The monitors connect to the docking station’s outputs. Peripherals connect once to the docking station. Press the button to switch all of it between laptop and desktop.
According to AV Access’s setup guide, the laptop simply uses USB-C with DisplayPort Alt Mode into the dock, and the front button on the dock switches both monitors and all peripherals between the two machines instantly.
Step-by-Step:
Step 1: Connect your laptop to the docking station using a single USB-C or Thunderbolt cable. Confirm your laptop supports DisplayPort Alt Mode over USB-C.
Step 2: Connect your desktop to the docking station using its HDMI and DisplayPort outputs.
Step 3: Connect both monitors to the docking station’s display outputs.
Step 4: Connect your keyboard, mouse, webcam, headset, and any other peripherals to the docking station’s USB ports.
Step 5: Switch between the laptop and desktop with the front button on the docking station, a keyboard shortcut, or an included remote.
Best For: Users whose laptop is their main work computer and whose desktop is secondary. The one-cable laptop connection means disconnecting from the desk is as simple as pulling a single USB-C cable.
KVM Docking Station vs. KVM Switch vs. Docking Station:
| Feature | Plain Docking Station | KVM Switch | KVM Docking Station |
|---|---|---|---|
| Connects laptop via 1 cable | Yes | No | Yes |
| Switches between 2 computers | No | Yes | Yes |
| Shares peripherals between 2 machines | No | Yes | Yes |
| Charges laptop while docked | Usually | No | Yes |
| Best for | Laptop-only setups | Desktop-primary setups | Mixed desktop + laptop setups |
| Typical price range | $50 to $200 | $40 to $280 | $100 to $300 |
Method 5: Software KVM (Free, No Hardware Required)
If you only need to share a keyboard and mouse between your desktop and laptop without switching the monitor, a software KVM is the most elegant and completely free solution. You use each computer on its own screen, and the keyboard and mouse flow seamlessly between them as you move the cursor to the edge of one screen and it appears on the other.
⚠️ Important Warning for Work Laptop Users: If your work laptop requires a strict corporate VPN, software KVMs like Mouse Without Borders and Synergy will almost certainly not work. Corporate VPNs tunnel the laptop’s network traffic away from your local network entirely, making it invisible to other devices on your home network including your personal desktop. The software KVM connection will drop immediately when the VPN connects. If you use a corporate VPN regularly, skip this method and use a hardware KVM instead, as it works at the physical hardware level and is completely unaffected by VPN configurations.
Option A: Microsoft PowerToys Mouse Without Borders (Free, Windows Only)
Mouse Without Borders is included in Microsoft’s free PowerToys utility and is one of the most widely recommended free software KVM tools for Windows users in 2026. As documented by Windows Forum, it allows one keyboard and mouse to control up to four Windows machines simultaneously, with the cursor moving naturally between screens as you push it to the screen edge. It also supports clipboard sharing and file drag and drop between machines. Both computers must be on the same local network and must not be isolated from each other by a VPN.
Step-by-Step: Setting Up Mouse Without Borders
Step 1: Download and install Microsoft PowerToys on both computers from the Microsoft Store or GitHub. Both machines must be on the same Wi-Fi or wired local network.
Step 2: Open PowerToys on your main computer (the one with the keyboard and mouse you want to share). Navigate to Mouse Without Borders in the left sidebar and enable it.
Step 3: On the same screen, click “New Connection” to generate a security code.
Step 4: Open PowerToys on your second computer, go to Mouse Without Borders, enable it, and enter the security code and the name of the first computer.
Step 5: The two machines will connect. Arrange the virtual screen positions by dragging the computer icons in the Mouse Without Borders layout to match your physical monitor arrangement on your desk.
Step 6: Move your mouse cursor to the far edge of the screen facing your other computer. The cursor will instantly appear on the second machine. Typing follows the cursor automatically.
Option B: Synergy (Paid, Cross-Platform)
Synergy by Symless works similarly to Mouse Without Borders but supports Windows, macOS, and Linux simultaneously, making it the right choice if your desktop runs Windows and your laptop runs macOS, or any other mixed-OS combination. It costs approximately $39 for a basic license. It supports clipboard sharing, hotkey switching, and drag-and-drop file transfer between machines. Switching is instant with no delay between machines. Like all software KVMs, it requires both machines to be visible on the same local network and will not function through a corporate VPN.
Option C: Barrier (Free, Open Source, Cross-Platform)
Barrier is a free, open-source fork of the older Synergy codebase that supports Windows, macOS, and Linux. It works identically to Synergy for basic keyboard and mouse sharing with no cost, though it lacks the polish and active development of the paid Synergy product. For users who need cross-platform sharing without spending money, Barrier is a solid option, with the same corporate VPN limitation applying here as with all software-based solutions.
Software KVM Comparison:
| Tool | Cost | Platform | Clipboard Sharing | File Transfer | Max Machines | Works with Corporate VPN |
|---|---|---|---|---|---|---|
| Mouse Without Borders (PowerToys) | Free | Windows only | Yes | Yes | 4 | No |
| Synergy | ~$39 | Windows, macOS, Linux | Yes | Yes | Unlimited | No |
| Barrier | Free | Windows, macOS, Linux | Yes | Limited | Unlimited | No |
| ShareMouse (Free Tier) | Free (limited) | Windows, macOS | Limited | No | 2 | No |
Important Limitation of All Software KVMs:
Software KVM tools share the keyboard and mouse only. They do not switch the monitor. Each computer keeps its own screen. This means software KVM is ideal when your laptop is open on your desk alongside your desktop monitor, but it does not work as a replacement for a hardware KVM if you want both machines to share the same monitor or monitors. Additionally, none of these tools function when a corporate VPN is active on either machine and that VPN isolates it from the local network.
Choosing the Right Method for Your Setup
Use this decision guide to find the best solution for your specific situation.
| Your Situation | Best Method |
|---|---|
| One monitor, switch occasionally, minimal cost | Manual input switching + USB switch box |
| One monitor, switch frequently, want one-button convenience | Single-monitor KVM switch |
| Two monitors, both need to switch together | Dual-monitor KVM switch |
| Laptop is primary machine, want one-cable desk connection | KVM docking station |
| Laptop and desktop each have their own screen, just want to share keyboard and mouse | Mouse Without Borders (free) |
| Mixed OS (Windows + macOS), share keyboard and mouse | Synergy or Barrier |
| Gaming desktop at 144Hz+, need zero quality loss | DisplayPort 1.4 or HDMI 2.1 KVM with EDID emulation |
| Work-from-home with company laptop + personal desktop, no corporate VPN | KVM docking station or software KVM |
| Work-from-home with company laptop + personal desktop, corporate VPN required | Hardware KVM switch (software KVM will not work) |
What to Look for When Buying a KVM Switch
If you decide to go the hardware KVM route, these are the specifications that matter most and that cheap KVM switches routinely get wrong.
1. Video Standard and Resolution
Match the KVM to your monitor’s maximum resolution and refresh rate. DisplayPort 1.4 supports 4K at 144Hz; HDMI 2.0 supports 4K at 60Hz; HDMI 2.1 supports 4K at 120Hz and 8K at 60Hz. A KVM that does not match your display’s bandwidth will silently cap your resolution or refresh rate.
2. EDID Emulation
This is non-negotiable for a smooth experience. Without EDID emulation, every time you switch away from a computer, that machine loses its monitor profile and rearranges your windows. With EDID emulation, both computers always see a persistent monitor connection and window positions are preserved. Always verify EDID emulation is listed in the specifications.
3. USB Standard
For sharing a keyboard, mouse, and basic webcam, USB 2.0 is sufficient. For sharing high-speed external drives or USB 3.0 webcams, look for KVMs with USB 3.0 or USB 3.2 Gen 1 ports on the shared hub.
4. Number of USB Ports
Count the peripherals you want to share: keyboard, mouse, webcam, headset USB dongle, USB hub. Budget KVMs often provide only two shared USB ports, which is frequently not enough. Look for at least four USB ports on the shared side.
5. Switching Methods
The best KVMs support at least three switching methods: a physical front panel button, a keyboard hotkey (so you can switch without reaching for the box), and ideally a wired or wireless remote for desk setups where the KVM is positioned out of reach.
6. Audio Passthrough
If your speakers or headset connect via 3.5mm audio rather than USB, check that the KVM includes a 3.5mm audio passthrough so your audio switches along with everything else. Many budget KVMs omit this.
Setting Up Windows Display Settings After Connecting to a Monitor
Regardless of which switching method you use, when you connect a laptop to an external monitor for the first time, you need to configure Windows to use it correctly.
Step 1: With your laptop connected to the monitor, press Windows key + P to open the Project panel on the right side of the screen.
Step 2: Choose your display mode:
- PC screen only: Uses only the laptop display, ignores external monitor
- Duplicate: Shows the same image on both screens (useful for presentations)
- Extend: Adds the external monitor as a separate workspace alongside the laptop display (most useful for productivity)
- Second screen only: Turns off the laptop display and uses only the external monitor (most useful when docked at a desk)
Step 3: For desk use, select Extend or Second screen only depending on whether you want your laptop display active alongside the external monitor.
Step 4: To fine-tune display arrangement, right-click the desktop and select Display Settings. Drag the monitor icons to match the physical positions of your screens so the cursor moves in the right direction when crossing between them.
Common Problems and How to Fix Them
Problem: Monitor goes black for several seconds every time I switch KVM inputs.
This is normal on KVM switches without EDID emulation. The monitor briefly loses its signal as it handshakes with the new computer. Upgrade to a KVM switch with EDID emulation to eliminate the blackout entirely.
Problem: My windows rearrange themselves every time I switch away from a computer.
This is the EDID problem described above. The inactive computer is losing its monitor profile when you switch, causing Windows to treat it as if the monitor has been disconnected. A KVM with EDID emulation fixes this permanently.
Problem: My laptop only shows one external monitor when connected to the KVM dock, but I have two.
Most thin and light laptops only support one external display natively over USB-C. Supporting two external monitors requires the laptop to support Thunderbolt or DisplayPort MST (Multi-Stream Transport) over its USB-C port. Check your laptop’s display output specifications. If MST is supported, enable it in your dock’s settings.
Problem: The KVM keyboard hotkey is not working.
Most KVMs use Scroll Lock as the hotkey trigger (double-tap Scroll Lock, then press 1 or 2). If your keyboard does not have a Scroll Lock key (common on laptop keyboards and compact keyboards), check your KVM’s manual for an alternate hotkey or use the front panel button instead.
Problem: Mouse Without Borders disconnects as soon as my work laptop connects to VPN.
This is expected behavior and not a configuration error. Corporate VPNs tunnel your laptop’s traffic off the local network, making it unreachable by other local devices including your desktop. Software KVMs require direct local network visibility between machines and cannot function through a strict corporate VPN. The only solution is to use a hardware KVM switch, which operates entirely at the physical cable level and is completely unaffected by VPN or network configuration.
Problem: Mouse Without Borders disconnects randomly without VPN.
This usually means one computer went to sleep and the network connection dropped. Go to Power Settings on both machines and disable the option that turns off the network adapter during sleep. Also ensure both machines are on the same network subnet.
Problem: My 4K monitor only shows 1080p after connecting through the KVM.
The KVM you are using does not support 4K at your connection type. Check that the KVM’s video standard matches both the output of your graphics card and the input of your monitor. HDMI 1.4 caps at 4K at 30Hz; HDMI 2.0 reaches 4K at 60Hz. If you are already at HDMI 2.0, check the cable, as low-quality cables are a common cause of bandwidth failures at 4K.
Pro Tip: If you are setting up a home office with one monitor shared between a work laptop and a personal desktop, the single most cost-effective upgrade you can make is adding a KVM switch with EDID emulation rather than using monitor input switching. The reason is window persistence. Every time you switch inputs manually, your desktop rearranges its windows because the monitor briefly disconnects. With EDID emulation, that never happens. Your desktop stays exactly how you left it every time you switch back. For a professional workflow, that alone is worth the $60 to $100 cost of a quality single-monitor KVM. And if your work laptop uses a corporate VPN, a hardware KVM is also the only software-KVM-proof option: it works entirely at the cable level and no VPN can interfere with it.
Recommended Setup Configurations by User Type
For the Remote Worker (Work Laptop + Personal Desktop, 1 Monitor, No Corporate VPN):
Use a single-monitor KVM switch with EDID emulation and four USB ports. Connect your keyboard, mouse, webcam, and headset dongle to the KVM. Switch between work and personal with a hotkey. Estimated cost: $60 to $100.
For the Remote Worker (Work Laptop + Personal Desktop, Corporate VPN Required):
A software KVM will not work here. Use a hardware KVM switch, which operates at the physical cable level and is completely immune to VPN isolation. Estimated cost: $60 to $100 for a single-monitor model.
For the Content Creator (Desktop + Laptop, 2 Monitors):
Use a dual-monitor KVM dock. Connect your laptop via USB-C, your desktop via HDMI and DisplayPort. Both monitors and all peripherals switch with one button. Estimated cost: $150 to $250 for HDMI 2.0 models; $350 to $450 for high-refresh HDMI 2.1 models.
For the Budget Home User (Occasional Switching, 1 Monitor):
Use the monitor’s built-in input switching for the display and a $20 USB switch box for the keyboard and mouse. Total additional cost: $20 to $30, or free if you already have the right cables.
For the Minimalist (Each Machine Has Its Own Screen, No Corporate VPN):
Install Microsoft PowerToys Mouse Without Borders on both Windows machines. Share one keyboard and mouse across both screens for free. The cursor flows naturally between screens as you move it. No hardware required.
For the Mixed macOS + Windows User (No Corporate VPN):
Use Synergy ($39) installed on both machines. The keyboard and mouse flow across screens regardless of OS, clipboard sharing works between platforms, and the setup takes under 10 minutes.
Frequently Asked Questions
What is a KVM switch and do I need one?
KVM stands for Keyboard, Video, Mouse. A KVM switch is a hardware device that lets you connect two or more computers to a single set of peripherals and switch all of them from one machine to another with a button press or hotkey. You need one if you want to share one monitor and one keyboard and mouse between a desktop and a laptop without plugging and unplugging cables every time you switch.
Can I switch between two computers on one monitor without a KVM switch?
Yes. Connect both computers to different input ports on the monitor (for example, desktop to DisplayPort and laptop to HDMI) and switch inputs using the monitor’s on-screen menu. For the keyboard and mouse, either move them physically or add a basic $15 to $25 USB switch box. This is the free approach with some extra button presses.
What is EDID emulation and why does it matter?
EDID (Extended Display Identification Data) is the information a monitor communicates to a computer about its resolution, refresh rate, and color capabilities. When a basic KVM switches inputs, the inactive computer briefly loses the EDID signal and thinks the monitor has been unplugged, causing it to reset window positions and resolution settings. KVM switches with EDID emulation maintain a fake persistent connection to both computers, preventing this problem entirely. It is the single most important feature to look for in a KVM switch.
Does a KVM switch reduce monitor quality or refresh rate?
A low-quality KVM switch absolutely can. Cheap HDMI KVM switches often cap output at 4K at 30Hz even if your monitor supports 4K at 60Hz. Always match the KVM’s video standard to your display’s maximum specifications. DisplayPort 1.4 KVM switches support up to 4K at 144Hz without quality loss. For 4K at 144Hz over HDMI, you need an HDMI 2.1 KVM, which in 2026 sits in the $350 to $450 price range for dual-monitor models.
Can I use a KVM switch with a MacBook and a Windows desktop?
Yes. KVM switches work at the hardware level and are OS-agnostic. Both macOS and Windows can share the same monitor and USB peripherals through a KVM switch. Note that some keyboard shortcuts differ between macOS and Windows, but the physical keyboard and mouse themselves switch cleanly.
What is the difference between a KVM switch and a docking station?
A docking station expands the connectivity of one laptop. A KVM switch routes peripherals and video between two computers. A KVM docking station does both: it connects the laptop with one cable and also acts as the switching point between the laptop and a desktop. If you only have a laptop, get a docking station. If you have two computers, get a KVM switch or a KVM docking station.
Is Mouse Without Borders free?
Yes. Mouse Without Borders is included in Microsoft’s PowerToys utility, which is completely free and available from the Microsoft Store or GitHub. It supports up to four Windows machines on the same local network and includes clipboard sharing and file drag and drop between machines. Note that it will not work if your work laptop is connected to a corporate VPN that isolates it from your local network.
Will a software KVM work if my laptop uses a corporate VPN?
No. Corporate VPNs tunnel the laptop’s network traffic away from your local network, making the laptop invisible to other devices on your home network. Software KVMs like Mouse Without Borders and Synergy require direct local network visibility between machines and will immediately lose their connection when a strict corporate VPN is active. Use a hardware KVM switch instead, as it works entirely at the physical cable level and is unaffected by any VPN or network configuration.
Can I share one monitor between a desktop and a laptop if my laptop only has HDMI out and my desktop has DisplayPort?
Yes. Connect the desktop to the monitor via DisplayPort and the laptop via HDMI. The monitor handles both signals simultaneously and you switch between them using the monitor’s input button. No adapter is needed as long as the monitor has both a DisplayPort and an HDMI input.
My laptop only has USB-C. Can it still connect to a KVM switch?
Yes, as long as your laptop’s USB-C port supports DisplayPort Alt Mode or Thunderbolt. Use a USB-C to HDMI or USB-C to DisplayPort cable to connect the laptop’s video output to the KVM’s input. For KVM docking stations designed for laptops, the USB-C cable handles both video and data in a single connection.
Does using a KVM switch add any input lag?
For keyboard and mouse input, no perceptible lag is added. For video, a quality KVM switch with proper EDID emulation and the correct video standard adds no lag. Cheap KVM switches can add minor lag at 4K resolutions due to insufficient bandwidth, which is another reason to match the KVM’s video specification to your display’s requirements.
Bottom Line
The right solution for switching between a desktop and a laptop depends on your specific setup and how often you switch. If you switch occasionally and want zero extra cost, monitor input switching combined with a basic USB switch box gets the job done. If you switch multiple times a day and want a seamless single-action experience, a hardware KVM switch with EDID emulation is the correct investment, and the $60 to $100 entry point for a quality single-monitor model is genuinely worth it. If your work laptop uses a corporate VPN, a hardware KVM is the only option that works reliably since software KVMs are blocked by VPN network isolation. And if you simply want to share a keyboard and mouse between two machines that each have their own screen on the same local network, Microsoft PowerToys Mouse Without Borders is completely free and takes ten minutes to set up.
This hands-on walkthrough for connecting one laptop and one desktop to two monitors with a KVM docking station is an excellent practical reference for the most common home office setup. Whichever method you choose, the right configuration eliminates the cable-swapping frustration entirely and makes working across two machines feel as natural as working on one.