
Yes, OpenClaw can absolutely run on a Raspberry Pi — and it runs surprisingly well when set up correctly. The key is understanding what role the Pi actually plays in the setup. It acts as a lightweight, always-on gateway that handles orchestration and task routing, while the heavy AI computation is handled by a cloud-based language model API. Once you grasp that architecture, the whole thing clicks into place.
That said, there are some important nuances, hardware requirements, and configuration steps you need to get right before diving in. This guide walks you through everything from scratch.
What Is OpenClaw, Exactly?
OpenClaw is a free, open-source autonomous AI agent framework that connects large language models (LLMs) to real software on your system. Unlike a regular chatbot that just answers questions, OpenClaw can actually execute tasks. It reads and writes files, runs shell commands, browses websites, sends emails, controls APIs, and automates workflows across applications.
It was originally launched by developer Peter Steinberger under the name Clawdbot, later briefly renamed Moltbot, before settling on the name OpenClaw. By early 2026, it had gone viral in the developer and home lab community, largely because it brings genuine autonomous agent behavior to personal hardware. KDNuggets describes OpenClaw as “a free, open-source agent that runs locally and connects large language models to real software,” noting that it supports over 100 prebuilt skills out of the box.
OpenClaw uses a plugin system called “skills” that lets the agent interact with tools like web browsers, messaging apps, file systems, productivity software, and automation platforms. Think of it as a personal AI operator that lives on your hardware and takes instructions through a chat interface.
Why Run OpenClaw on a Raspberry Pi?
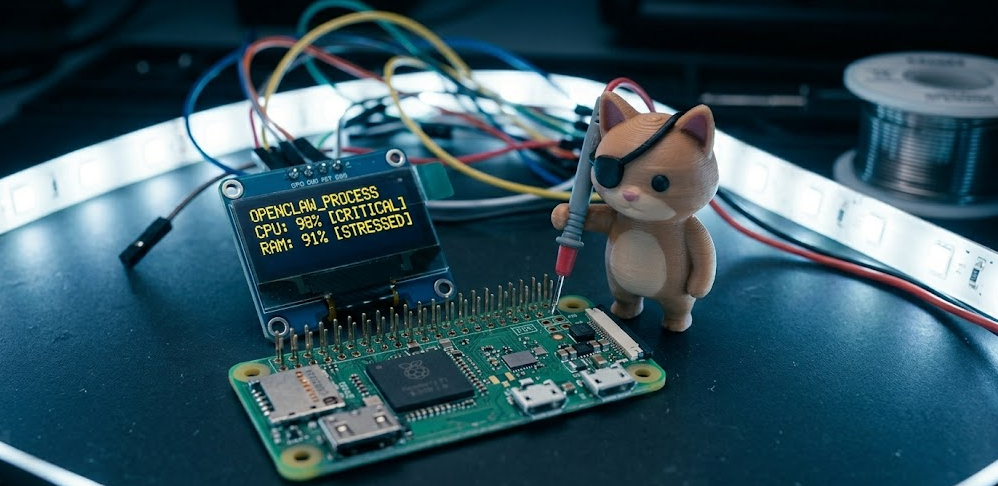
Running OpenClaw on a Raspberry Pi is one of the most cost-effective ways to get a 24/7 always-on AI agent without burning electricity or leaving your main computer running all day.
A Raspberry Pi typically consumes just 3 to 5 watts at idle. That is a fraction of what a desktop PC or even a Mac Mini draws. For long-running automation tasks like log summarization, scheduled reminders, API monitoring, or Telegram bot responses, the Pi is more than capable. It is small, silent, and reliable.
The Official OpenClaw documentation puts it plainly: “Since the Pi is just the gateway (models run in the cloud via API), even a modest Pi handles the workload well.” That single sentence captures the whole point. The Pi does not need to be powerful because it is not running the LLM itself. It is running the orchestration layer, and that is lightweight.
But Wait — Can It Run Local AI Models Too?
This is where things get more nuanced, and I think it is worth being upfront about it.
Running OpenClaw connected to a cloud API (like Claude, GPT-4o, or Gemini) on a Raspberry Pi works great. Running a full local LLM on the same Pi while also running OpenClaw is a different story.
A Raspberry Pi 4 with 4GB RAM can technically run a very small model like Phi-3 Mini or Qwen 2.5 0.5B using Ollama, but performance will be slow at roughly 4 to 5 tokens per second. Context window overloads are a real issue, and OpenClaw’s system prompts alone can push small models to their limits. The Raspberry Pi 5 with 8GB RAM performs better and is the recommended minimum if you want to experiment with local models. But for most practical purposes, the best setup is to use the Pi as the gateway and route model requests to a cloud API or to a more powerful machine on your network running Ollama.
Pro Tip: If you want a fully offline, privacy-first setup and you have a Raspberry Pi 5 with 8GB RAM, try connecting OpenClaw to a remote Ollama instance running on a more powerful PC on your local network. You get the best of both worlds: local data control with real performance.
Hardware Requirements at a Glance
Important: Do not use 32-bit Raspberry Pi OS. OpenClaw requires a 64-bit environment for proper ARM64 binary support and modern Node.js compatibility.
Step-by-Step Guide: How to Install OpenClaw on Raspberry Pi
This guide follows the official OpenClaw documentation and covers a clean installation on a headless Raspberry Pi running Raspberry Pi OS Lite (64-bit).
Step 1: Flash the Operating System
Start by downloading and installing the Raspberry Pi Imager on your main computer.
-
Open Raspberry Pi Imager
-
Under “Choose OS,” select Raspberry Pi OS Lite (64-bit)
-
Click the settings (gear icon) and configure:
-
Set a hostname (example:
gateway-host) -
Enable SSH
-
Set your own custom username and password (for example,
alexand a strong password of your choice) -
Configure your WiFi credentials (or plan to use Ethernet)
-
-
Flash to your SD card or USB SSD, insert it into the Pi, and power it on
Note on the username: Raspberry Pi OS no longer creates a default pi user. Whatever username you set here is the one you will use throughout this guide. Keep it in mind because you will need it in later steps.
Using a USB SSD instead of an SD card is strongly recommended. SD cards wear out faster and are noticeably slower, especially during Node.js operations and npm installs.
Step 2: Connect via SSH
Once the Pi boots up (give it about a minute), connect from your main computer:
ssh YOUR_USERNAME@gateway-hostReplace YOUR_USERNAME with the custom username you created in Step 1. If the hostname does not resolve, find the Pi’s IP address from your router’s admin panel and connect using the IP directly:
Step 3: Update the System and Install Dependencies
Run a full system update to make sure you have the latest packages and security patches:
sudo apt update && sudo apt upgrade -y

sudo apt install -y git curl build-essential
Set your timezone (this matters for cron jobs, reminders, and scheduled tasks):
sudo timedatectl set-timezone America/New_YorkReplace America/New_York with your actual timezone.
Step 4: Install Node.js 24
OpenClaw requires Node.js 22 or higher. As of April 2026, the recommended version is Node.js 24. Use the NodeSource repository for a clean install:
curl -fsSL https://deb.nodesource.com/setup_24.x | sudo -E bash -

sudo apt install -y nodejs

node --version
Confirm the version output shows v24.x or higher before continuing. If you see repository warnings on newer builds of Raspberry Pi OS, this is a cosmetic issue with the setup script on some Debian-based systems and does not affect the installation itself.
Step 5: Add Swap Space (Critical for 2GB Devices)
If your Pi has 2GB or less of RAM, you must add swap space to prevent out-of-memory crashes during installation and runtime:
sudo fallocate -l 2G /swapfile

sudo chmod 600 /swapfile

sudo mkswap /swapfile

sudo swapon /swapfile

echo '/swapfile none swap sw 0 0' | sudo tee -a /etc/fstab
Then reduce the swappiness value so the system does not over-rely on swap:
echo 'vm.swappiness=10' | sudo tee -a /etc/sysctl.conf

sudo sysctl -p
Even on a 4GB Pi, adding swap is a good precaution. It is a quick step that prevents headaches later.
Step 6: Install OpenClaw
This is the main event. Run the official one-line installer:
curl -fsSL https://openclaw.ai/install.sh | bashThe installer handles downloading the npm package, setting up the systemd service, and preparing the environment. It takes a few minutes. Let it complete without interrupting it.
Step 7: Run the Onboarding Wizard
Once installation is done, start the onboarding process:
openclaw onboard --install-daemonThe --install-daemon flag tells OpenClaw to automatically register itself as a user-level systemd service that starts on boot. The wizard walks you through several configuration steps:
-
Gateway setup: Accept the defaults for a standard Pi gateway configuration
-
Authentication: Use API key-based auth rather than OAuth — it works better on headless devices
-
AI model: Connect your preferred API (Claude, OpenAI, Gemini, or a local Ollama endpoint)
-
Channels: Set up how you want to interact with OpenClaw (Telegram is the easiest starting point)
-
Optional skills: You can skip these initially and add them later
For a full walkthrough of the onboarding process in video form, This OpenClaw Raspberry Pi 5 setup video on YouTube by a community creator is one of the clearest guides available, covering the one-command install, connecting cloud models, and setting up Telegram as the gateway channel.
Step 8: Verify the Installation
Run these commands to confirm everything is working correctly:
openclaw status

systemctl --user status openclaw-gateway.service

journalctl --user -u openclaw-gateway.service -f
You should see the gateway showing as active and running. The --user flag here is important — it checks the user-level service that was created by the --install-daemon flag in the previous step, not a system-wide service. If there are errors in the journal logs, check the troubleshooting section below.
Step 9: Access the Control UI
OpenClaw includes a browser-based dashboard. To access it from your laptop on the same network, first get the dashboard URL from the Pi:
ssh YOUR_USERNAME@gateway-host 'openclaw dashboard --no-open'Then create an SSH tunnel in a second terminal window:
ssh -N -L 18789:127.0.0.1:18789 YOUR_USERNAME@gateway-hostNow open your browser and navigate to:
http://localhost:18789/You should see the OpenClaw Control UI. From here you can configure skills, monitor task logs, and manage your agent settings without touching the terminal.
Step 10: Set Up a Messaging Channel (Optional but Highly Recommended)
One of the best features of running OpenClaw on a Pi is being able to interact with it from your phone via Telegram. To add Telegram as a channel:
openclaw channels add --channel telegram --token <YOUR_BOT_TOKEN>You can get a bot token by messaging @BotFather on Telegram. Once the channel is connected, any message you send to the bot gets routed through the OpenClaw gateway. You can send task instructions from anywhere in the world and get responses back in the same chat thread.
Discord is also supported:
openclaw channels add --channel discord --token <YOUR_DISCORD_BOT_TOKEN>How to Run OpenClaw as a 24/7 Service
Note: If you used --install-daemon during the onboarding step, OpenClaw is already configured as a user-level systemd service that starts automatically on boot. You can skip this entire section. Run systemctl --user status openclaw-gateway.service to confirm it is active.
If you skipped the daemon flag during onboarding, or if you prefer to manage OpenClaw as a root-level system service instead of a user service, here is how to set that up manually.
Create the service file:
sudo nano /etc/systemd/system/openclaw.servicePaste in this configuration, replacing YOUR_USERNAME with the username you created in Step 1:
[Unit]

Description=OpenClaw Gateway

After=network.targetType=simple
User=YOUR_USERNAME
WorkingDirectory=/home/YOUR_USERNAME
ExecStart=/usr/local/bin/openclaw gateway start
Restart=always
RestartSec=5
WantedBy=multi-user.target
For example, if you created the user alex in Step 1, replace YOUR_USERNAME with alex in both the User= and WorkingDirectory= lines. The service will fail to start if these values do not match your actual system username.
Enable and start the service:
sudo systemctl daemon-reload

sudo systemctl start openclaw

sudo systemctl enable openclaw

sudo systemctl status openclaw
The service will now start automatically every time the Pi boots, and it will restart automatically if it ever crashes.
Performance Optimization Tips
Getting OpenClaw running is step one. Getting it running smoothly is step two. Here are the most impactful optimizations from real-world testing:
Use a USB SSD instead of an SD card. This is the single biggest performance upgrade you can make. SD card I/O is a bottleneck for Node.js-based applications. A USB SSD dramatically reduces cold start times and improves overall responsiveness.
Enable Node.js compile cache. Add this to your .bashrc to speed up repeated CLI invocations:
export NODE_COMPILE_CACHE=/var/tmp/openclaw-compile-cache

mkdir -p /var/tmp/openclaw-compile-cache

export OPENCLAW_NO_RESPAWN=1
Reduce GPU memory allocation. On a headless Pi, the GPU does not need much memory. Free it up for OpenClaw:
echo 'gpu_mem=16' | sudo tee -a /boot/config.txtDisable unused services to free up RAM:
sudo systemctl disable bluetooth

sudo systemctl disable cups

sudo systemctl disable avahi-daemon
Fix WiFi dropouts if you are not using Ethernet:
sudo iwconfig wlan0 power offTroubleshooting Common Issues
2026 Trends: Why This Setup Is More Relevant Than Ever
The combination of OpenClaw and Raspberry Pi is becoming increasingly popular in 2026 for a few clear reasons. First, the rise of affordable, capable cloud API tiers from providers like Anthropic, OpenAI, and Google means you can get serious AI performance for very low monthly costs while keeping your local hardware requirements minimal. The Pi handles the orchestration; the cloud handles the thinking.
Second, privacy-conscious users are pushing back against always-on cloud-based AI assistants. Running OpenClaw on a local Pi means your task instructions and automation workflows never leave your home network unless you specifically route them to an external API. That is a meaningful distinction for people managing sensitive files, home automation systems, or business workflows.
Third, the Raspberry Pi Foundation’s own coverage of OpenClaw highlighted how connecting OpenClaw to locally hosted models via Ollama, llama.cpp, or LocalAI keeps “all reasoning and processing on your Raspberry Pi, keeping your data private, reducing latency, and eliminating API costs.” That is the long-term vision for edge AI agents, and the Pi is squarely in the middle of it.
FAQs
Can OpenClaw run on Raspberry Pi 4?
Yes, OpenClaw runs on Raspberry Pi 4 with 2GB RAM or more. For smooth performance, 4GB is recommended. The Pi 4 works well as a cloud-connected gateway. Running a local LLM alongside it on a Pi 4 is technically possible but will be very slow.
Do I need a monitor to set up OpenClaw on a Raspberry Pi?
No. The entire setup can be done headlessly over SSH. The guide above is written for a fully headless setup. You only need a monitor if you prefer a desktop environment, which is not required.
What AI models work with OpenClaw on Raspberry Pi?
Any API-based model works great, including Claude, GPT-4o, and Gemini. For local models, small ones like Phi-3 Mini (under 4GB RAM footprint) are the practical choice on a Pi. The recommended local model for Raspberry Pi is Phi-3 Mini according to community benchmarks.
Can I access OpenClaw on my Pi from outside my home network?
Yes. The easiest method is setting up Tailscale, a free VPN tool that gives your Pi a permanent address accessible from anywhere. The official OpenClaw docs recommend Tailscale for remote access.
Is OpenClaw free to use on Raspberry Pi?
OpenClaw itself is completely free and open-source. You will only pay for any LLM API usage (like OpenAI or Anthropic tokens) if you connect to cloud-based models. If you use a free-tier model or a fully local model, the entire setup costs nothing beyond the hardware.
How much electricity does running OpenClaw 24/7 on a Raspberry Pi use?
A Raspberry Pi 4 or 5 running as a gateway draws roughly 3 to 7 watts depending on load. Running 24/7 for a full month costs approximately $0.25 to $0.50 in electricity at average US rates. That is far cheaper than leaving a desktop or laptop running continuously.
What happens if OpenClaw crashes on the Pi?
If you configured the systemd service with Restart=always and RestartSec=5, OpenClaw will automatically restart within 5 seconds of any crash. You can monitor its logs at any time with journalctl --user -u openclaw-gateway.service -f for the user service, or journalctl -u openclaw.service -f for a manually created root service.
Why does my manually created systemd service fail to start?
The most common cause is a mismatch between the User= and WorkingDirectory= values in the service file and your actual system username. Raspberry Pi OS no longer creates a default pi user. Make sure both lines reflect the custom username you created in Step 1 of this guide.
Bottom Line
OpenClaw on Raspberry Pi is a genuinely excellent combination for anyone who wants an always-on, low-power AI agent without paying cloud subscription fees or leaving a full computer running around the clock. The setup takes about 30 minutes if you follow the steps above, and the result is a capable automation hub that you can message from Telegram, control from a browser dashboard, and extend with dozens of prebuilt skills. Use it as a cloud-connected gateway for the best performance, or push into local LLM territory on a Pi 5 if privacy is your top priority. Just remember: no default pi user, pick one service method and stick with it, and use a USB SSD if you want the experience to feel genuinely snappy.