The quickest way to see what GPU you have is to open Task Manager on Windows (Ctrl + Shift + Esc), click the Performance tab, and select GPU — your graphics card model will be displayed in the top-right corner. But depending on your operating system and how much detail you need, there are several other reliable methods worth knowing, and I’ll walk you through all of them.
Whether you’re trying to update your drivers, check game compatibility, troubleshoot a performance issue, or simply satisfy your curiosity, knowing your GPU is more important than most people realize. Let’s get into it.
Why You Need to Know What GPU You Have
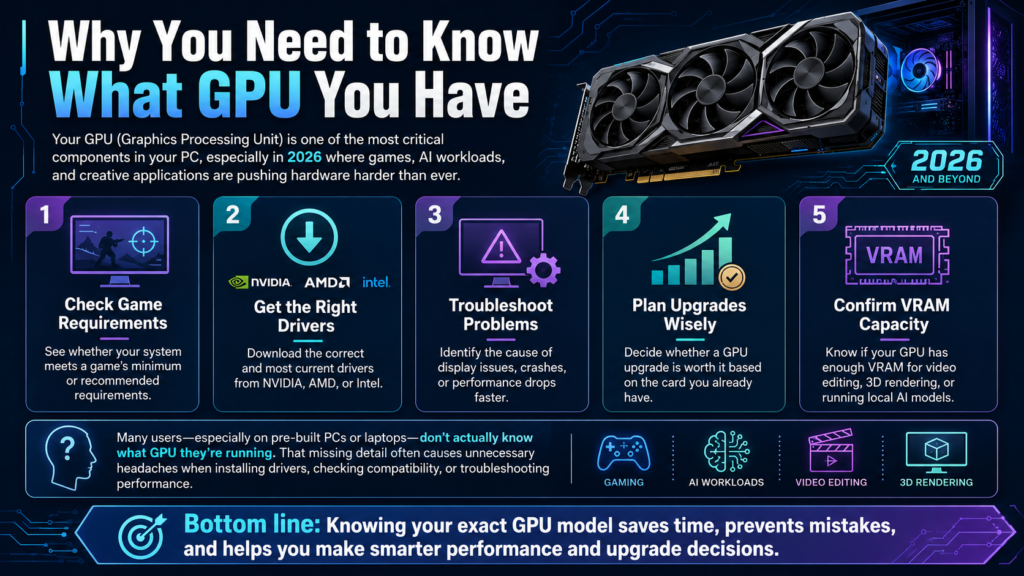
Your GPU (Graphics Processing Unit) is one of the most critical components in your PC, especially in 2026 where games, AI workloads, and creative applications are pushing hardware harder than ever. Knowing your exact GPU model helps you:
-
Check whether your system meets a game’s minimum or recommended requirements
-
Download the correct and most current drivers from NVIDIA, AMD, or Intel
-
Troubleshoot display issues, crashes, or performance drops
-
Determine if an upgrade is worth it based on your current card
-
Confirm VRAM capacity for GPU-intensive tasks like video editing, 3D rendering, or running local AI models
In my experience reviewing and testing systems over the years, a surprising number of users simply don’t know what GPU they’re running, especially on pre-built PCs or laptops. And that missing piece of information causes a lot of unnecessary headaches.
How to Check What GPU You Have on Windows
Windows gives you multiple built-in ways to identify your GPU. Each method reveals slightly different information, so it’s worth knowing more than one.
Method 1: Task Manager (Fastest Method)
This is the fastest and most practical method for everyday users on Windows 10 and Windows 11.
-
Press Ctrl + Shift + Esc to open Task Manager directly
-
Click the Performance tab
-
In the left sidebar, scroll to the bottom and click GPU
-
Your GPU’s full model name appears in the top-right corner of the window
You’ll also see real-time stats including GPU utilization, memory usage, temperature, and dedicated VRAM. This is particularly useful if you want to see how hard your card is working at any given moment. The ASUS ROG team actually recommends this as the go-to starting point for checking your GPU, and I’d have to agree.
Method 2: DirectX Diagnostic Tool (DxDiag)
The DxDiag tool has been around for decades but it remains one of the most thorough ways to pull GPU information on Windows.
-
Press Windows + R to open the Run dialog
-
Type dxdiag and press Enter
-
Click the Display tab at the top
-
Look at the Name field under “Device Information”
You’ll see your GPU name, manufacturer, VRAM (listed as “Approx. Total Memory”), driver version, and DirectX feature levels all in one place. This is the method I recommend when you need to share full graphics info for tech support purposes.
Method 3: Device Manager
Device Manager is a solid fallback method, especially if Task Manager’s GPU tab isn’t showing up for some reason.
-
Press Windows + X and click Device Manager
-
Scroll down and expand Display adapters
-
Your GPU(s) will be listed underneath
If you have both a dedicated GPU and an integrated Intel or AMD graphics chip, both will appear here. Right-clicking the GPU and selecting Properties gives you driver details and hardware IDs.
Method 4: System Information (msinfo32)
This method is best for users who need a complete overview of their hardware in one window.
-
Press Windows + R, type msinfo32, and hit Enter
-
In the left panel, expand Components and click Display
-
Your GPU name, driver version, and adapter RAM will appear on the right
Method 5: PowerShell or Command Prompt
If you’re comfortable with the command line, this method gives you quick results without opening any GUI tools.
Open PowerShell and type:
Get-CimInstance win32_VideoController | Select-Object Name
Or in Command Prompt, type:
wmic path win32_VideoController get name
Both commands will print your GPU model name instantly. It’s a handy trick if you’re managing multiple machines or need to script hardware checks.
Method 6: Windows Settings (Display Info)
For a more casual route without opening any diagnostic tools:
-
Press Windows + I to open Settings
-
Go to System and then Display
-
Scroll down and click Advanced display
-
Your GPU name appears under Display information
As Microsoft’s official Windows learning center explains, this path gives you a quick and clean view of your graphics hardware without needing to dig into performance or diagnostic tools.
How to Check Your GPU on Mac

Mac users have a slightly different experience depending on whether they’re running an Intel-based Mac or a newer Apple Silicon machine (M1, M2, M3, M4, M5).
Apple Silicon Macs
On Macs with Apple Silicon, the GPU is integrated into the same chip as the CPU, so you won’t see a separate discrete GPU listed.
-
Click the Apple menu in the top-left corner
-
Select About This Mac
-
Look for the chip name (e.g., Apple M5 Pro) which includes the integrated GPU
For more detail, click System Report, then navigate to Hardware > Graphics/Displays. You’ll see the full GPU core count and configuration there.
Intel-Based Macs
-
Click the Apple menu and select About This Mac
-
Your GPU will be listed next to Graphics in the overview panel
-
For full specs, click System Report and select Graphics/Displays in the sidebar
Some Intel Macs have both an integrated GPU and a discrete GPU. The System Report will show both, along with VRAM and Metal support details. Apple’s support documentation confirms that the currently active GPU is always shown next to “Graphics” in the About This Mac screen.
How to Check Your GPU on Linux
Linux gives you a few terminal-based methods depending on your distribution and desktop environment.
Using lspci (Most Universal)
First, update your PCI device database:
sudo update-pciids
Then run:
lspci | grep -i vga
This returns your GPU’s manufacturer and model pulled from the PCI database.
Using lshw
sudo lshw -C display
This gives a more verbose output including the GPU name, memory size, driver in use, and bus information.
Using nvidia-smi (NVIDIA GPUs Only)
If you have an NVIDIA card with drivers installed:
nvidia-smi
This gives you the full GPU name, driver version, VRAM, current temperature, and usage stats in a formatted table.
Using the GNOME Settings GUI
If you’re on a GNOME desktop (Ubuntu, Fedora, etc.):
-
Open Settings
-
Go to About
-
Look for the Graphics field
As How-To Geek’s Linux GPU guide notes, the lspci method works universally across all Linux distributions, making it the most reliable option regardless of which desktop environment you’re running.
Pro Tip: If you want the most comprehensive GPU information available on Windows, download GPU-Z by TechPowerUp. It’s completely free, lightweight, and shows you everything from your GPU’s shader count and memory type to real-time clock speeds, temperatures, and PCIe lane configuration. It’s the tool I keep installed on every test machine I work with, and it’s genuinely one of the best free utilities in the PC hardware space.
Best Third-Party Tools to Check GPU Info
While built-in methods work well, third-party tools go much deeper. Here are the best options available in 2026:
For a visual walkthrough of how to identify your GPU and what the numbers actually mean, this YouTube tutorial by Paul’s Hardware does an excellent job breaking down GPU specifications for both beginners and enthusiasts.
How to Check GPU on a Laptop vs. Desktop
Laptops add a layer of complexity because most modern gaming and creator laptops have two GPUs: an integrated GPU (Intel or AMD) for light tasks and a discrete GPU (NVIDIA or AMD) for demanding workloads. This is called a hybrid or switchable graphics setup.
When you check Task Manager on a laptop, you may see GPU 0 and GPU 1 listed. Typically:
-
GPU 0 is the integrated graphics (Intel Iris Xe, AMD Radeon Graphics, etc.)
-
GPU 1 is the dedicated discrete GPU (NVIDIA GeForce RTX, AMD Radeon RX, etc.)
In DxDiag, a laptop with dual GPUs will show a second Display tab. Make sure you’re reading the right one when checking specs for gaming purposes. The dedicated GPU is the one that matters for gaming and creative performance.
What Do GPU Specs Actually Mean?
Once you’ve found your GPU, you’ll likely see a bunch of numbers and specs. Here’s a quick breakdown of the most important ones:
How to Update GPU Drivers After Identifying Your Card

Once you know your GPU, keeping drivers updated is critical for performance and stability. Here’s where to go:
For NVIDIA GPUs:
Go to nvidia.com/drivers or use the NVIDIA App for automatic updates.
For AMD GPUs:
Go to amd.com/support or use AMD Software: Adrenalin Edition.
For Intel Arc GPUs:
Go to intel.com/arc or use Intel Arc Control.
For integrated Intel/AMD graphics on laptops:
Check your laptop manufacturer’s support page (Dell, HP, Lenovo, ASUS, etc.) since OEM-optimized drivers are often more stable than generic ones.
GPU Checking in 2026: New Trends to Know
The landscape around GPUs has shifted significantly heading into 2026. Here are a few things worth keeping in mind:
NVIDIA’s RTX 50 series cards (like the RTX 5090 and RTX 5080) launched in early 2025 and have become the new reference point for high-end gaming. If you’re checking your GPU and find you’re on a 30-series or older card, you now have two full generations of new hardware above you.
AMD’s RX 9000 series (RDNA 4 architecture) arrived in early 2025 and brought competitive rasterization performance, especially at the mid-range tier. Intel’s Arc B-series (Battlemage) is also now a legitimate mid-range option with solid driver maturity compared to the first-generation Arc cards.
Windows 11 24H2 added a dedicated NPU (Neural Processing Unit) monitoring tab to Task Manager’s Performance section. The NPU works alongside your GPU to handle local AI tasks, and being able to track its usage separately is a genuinely useful addition for anyone running AI workloads on compatible hardware.
AI workloads running locally (like local LLMs, Stable Diffusion, and AI-upscaling tools) are now a legitimate use case for consumer GPUs. VRAM capacity has become more important than ever. Cards with less than 8GB VRAM are starting to show real limitations with modern AI tasks and even some newer game titles at high settings.
Step-by-Step: Quickest Way to Check GPU (Any Windows PC)
If you’re in a hurry and just need the fastest possible answer, follow these steps:
-
Press Ctrl + Shift + Esc on your keyboard
-
Click the Performance tab
-
Scroll to the bottom of the left panel and click GPU
-
Read the GPU model name in the top-right corner of the window
-
Note your Dedicated GPU Memory value for VRAM
Done. The whole process takes under 15 seconds.
Frequently Asked Questions
How do I know if I have a dedicated GPU or integrated graphics?
In Task Manager’s Performance tab, if you see a GPU labeled with a brand name like “NVIDIA GeForce” or “AMD Radeon RX,” that’s a dedicated GPU. If it says “Intel Iris Xe,” “Intel UHD Graphics,” or “AMD Radeon Graphics” without a specific RX model number, that’s integrated graphics. Laptops often have both.
Can I check my GPU without opening my PC case?
Yes, absolutely. All the software methods covered in this article work without ever touching your hardware. Task Manager, DxDiag, Device Manager, and third-party tools like GPU-Z all read information directly from your system’s software.
Why does Task Manager show “GPU 0” and “GPU 1”?
This typically happens on laptops or systems with both an integrated GPU and a dedicated GPU. GPU 0 is usually the integrated graphics and GPU 1 is the discrete (dedicated) card. On desktops, seeing two GPU entries usually means you have two physical graphics cards installed.
How do I check my GPU on a Chromebook?
Go to chrome://system in your browser’s address bar. Search for “gpu” in the list. You’ll see basic GPU information including the model and driver version. For more detail, type chrome://gpu in the address bar for a full GPU feature and status report.
Is GPU-Z safe to download and use?
Yes. GPU-Z is developed by TechPowerUp and has been a trusted tool in the hardware community for well over a decade. Download it directly from techpowerup.com to ensure you’re getting the official version.
My GPU isn’t showing in Task Manager. What’s wrong?
This usually points to a driver issue. Try opening Device Manager, expanding Display adapters, right-clicking your GPU, and selecting “Update driver.” If the GPU shows a yellow warning icon, the driver may be corrupted or missing. A clean driver reinstall using DDU (Display Driver Uninstaller) in Safe Mode often resolves this.
Does knowing my GPU model help with gaming?
Absolutely. Knowing your exact GPU lets you cross-reference it against game system requirements, look up performance benchmarks at specific resolutions, and determine the right graphics settings to use. Sites like TechPowerUp’s GPU database let you look up detailed specs for virtually every GPU ever made.
How often should I update my GPU drivers?
For gamers, updating with each major game release or every few months is a good habit. NVIDIA and AMD both release driver updates frequently, often with performance improvements for specific titles. If your system is stable and performing well, there’s no urgent need to update every single release.
Bottom Line
Checking what GPU you have takes less than a minute on any platform. On Windows, Task Manager is your fastest route. On Mac, “About This Mac” gets the job done. On Linux, a quick lspci command in the terminal handles it. And if you want the full picture including VRAM, clock speeds, temperatures, and driver info, GPU-Z is the tool to grab. Knowing your GPU is the first step toward better performance, smarter upgrades, and fewer technical headaches down the road.